Circuit Bent Casio SK-1 Gets An Arduino Brain

The Casio SK-1 keyboard is fairly well-known in the “circuit bending” scene, where its simple internals lend themselves to modifications and tweaks to adjust the device’s output in all sorts of interesting ways. But creating music via circuit bending the SK-1 can be tedious, as it boils down to fiddling with the internals blindly until it sounds cool. [Nick Price] wanted to do something a bit more scientific, and decided to try replacing his SK-1’s ROM with an Arduino so he could take complete control it.

Replacing the ROM chip with header pins.

That’s the idea, anyway. Right now he’s gotten as far as dumping the ROM and getting the Arduino hooked up in place of it. Unfortunately the resulting sound conjures up mental images of a 56K modem being cooked in a microwave. Clearly [Nick] still has some work ahead of him.

For now though, the progress is fascinating enough. He was able to pull the original NEC 23C256 chip out of the keyboard and read its contents using an Arduino and some code he cooked up, and he’s even put the dump online for any other SK-1 hackers out there. He then wrote some new code for the Arduino to spit data from the ROM dump back to the keyboard when requested. In theory, it should sound the same as before, but with the added ability to “forge” the data going back to the keyboard to make new sounds.

The result is what you hear in the video linked after the break. Not exactly what [Nick] had in mind. After some snooping with the logic analyzer, he believes the issue is that the Arduino can’t respond as fast as the original NEC chip did. He’s now got an NVRAM chip on order to replace the original NEC chip; the idea is that he can still use the Arduino to reprogram the NVRAM chip when he wants to play around with the sound.

We’ve covered some pretty fancy circuit bent instruments here in the past, but if you’re looking for something a bit easier to get your feet wet we ran a start-to-finish guide back in the Ye Olden Days of 2011 which should be helpful.

Continue reading “Circuit Bent Casio SK-1 Gets An Arduino Brain”

Extracting A Vector Font From A Vintage Plotter

There is a huge variety of hardware out there with a font of some form or other baked into the ROM. If it’s got a display it needs a font, and invariably that font is stored as a raster. Finding these fonts is trivial – dump the ROM, render it as a bitmap, and voilà – there’s your font. However, what if you’re trying to dump the font from a vintage Apple 410 Color Plotter? It’s stored in a vector format, and your job just got a whole lot harder.

The problem with a vector font is that the letters aren’t stored as individual images, but as a series of instructions that, when parsed correctly, draw the character. This has many benefits for generating characters in all manner of different sizes, but makes the font itself much harder to find in a ROM dump. You’re looking for both the instructions that generate the characters, as well as the code used to draw them, if you want a full representation of the font.

The project begins by looking at what’s known about the plotter. The first part of any such job is always knowing where to look, of course. It’s quickly determined that the font is definitely stored in the main ROM, and that there is no other special vector drawing chip or ROMs on board. The article then steps through the search process, beginning with plaintext searches of the binary dump, before progressing to a full disassembly of the plotter firmware. After testing out various assumptions and working methodically, the vector data is found and eventually converted into a modern TrueType font.

In the end, the project is successful, and it’s a great guide on how to approach similar projects. The key is to lay out everything you know at the start, and use that to guide your search step by step, testing and discarding assumptions until you hit paydirt. We’ve seen similar works before, like this project to dump the voice from an ancient Chrysler Electronic Voice Alert.

The King Of All Game Genies In An Arduino

While Nintendo is making a killing on nostalgic old consoles, there is a small but dedicated group of hackers still working with the original equipment. Since the original NES was rolled out in the 80s, though, there are a few shortcomings with the technology. Now, though, we have Arduinos, cheap memory, and interesting toolchains. What can we do with this? Absolutely anything we want, like playing modern video games on this antiquated system. [uXe] added dual-port memory to his ancient NES console, opening up the door to using the NES as a sort of video terminal for an Arduino. Of course, this is now also the King of All Game Genies and an interesting weekend project to boot.

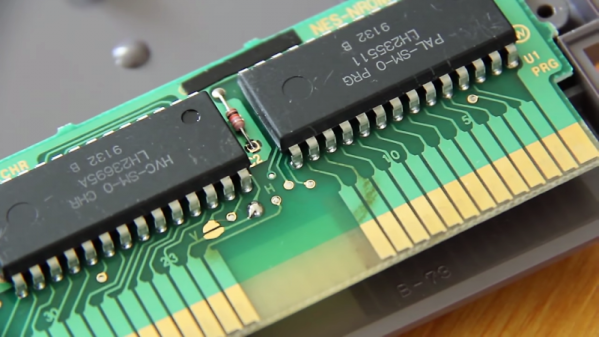
Most NES cartridges have two bits of memory, the PRG and CHR ROMs. [uXe] is breaking out the cartridge connector onto an exceptionally wide rainbow ribbon cable, and bringing it into a custom Arduino Mega shield loaded up with two 16K dual-port RAM chips. These RAM chips effectively replace the PRG and CHR ROMs Since these are dual-port RAM chips, they can be written to by the Arduino and read by the NES simultaneously.

The NES sees one port of the RAM and can read and write from it while the Arduino still has access to make changes to the other post while that’s happening. A trick like this opens up a whole world of possibilities, most obviously with tiling and other graphics tricks that can push beyond the console’s original capabilities. [uXe] is currently playing Arduboy games on the NES — a really neat trick to pull off. Well done [uXe]!

Be sure to check out the video below of the NES running some games from the Arduboy system. It seems to integrate seamlessly into the hardware, so if you’ve always had a burning desire to fix crappy graphics on some of your favorite games, or run some special piece of software on an NES, now might just be your time to shine.

Continue reading “The King Of All Game Genies In An Arduino”

We’re Using The Word Firmware Wrong

I had an interesting discussion the other day about code written for an embedded system. I was speaking with Voja Antonic about ‘firmware’. The conversation continued forward but I noticed that he was calling it ‘software’. We later discussed it and Voja told me he thought only the parts of the code directly interacting with the microcontroller were firmware; the rest falls under the more generic term of software. It really had me wondering where firmware stops being firmware and is merely software?

The topic has remained on my mind and I finally got around to doing some dictionary searches. I’m surprised that I’ve been using the word differently and I think most of the people I’ve heard use it are doing the same — at least as far as dictionary definitions are concerned. My go to sources are generally Merriam-Webster and Oxford English dictionaries and both indicate that firmware is a type of software that is indelible:

Permanent software programmed into a read-only memory.

computer programs contained permanently in a hardware device (such as a read-only memory)

According to this definition, I have never written a single bit of firmware. Everything I have written has been embedded software. But surely this is a term that must change with the times as technology progress so I kept digging.

Continue reading “We’re Using The Word Firmware Wrong”

Dumping Synth ROMs And Avoiding Bitrot

Bitrot is setting in, and our digital legacy is slowly turning to dust. Efforts preserve our history are currently being undertaken numerous people around the Internet, and [Jason Scott] just got an automated CD ripper, so everything is kinda okay.

However, there is one medium that’s being overlooked. ROMs, and I don’t mean video game cartridges. In the 80s, mask ROMs were everywhere, found in everything from talking cars to synthesizers.

[Ali] bought a Korg i5m workstation from eBay a few years ago, but this unit had a problem. Luckily, he had a similar synth with the same samples stored on board. There was only one way to find out if bitrot was the cause: desoldering the chips and dumping all the information.

After fiddling around with his broken synth, [Ali] still had a problem with the sound output. Deciding the ROM chips had to be the issue, [Ali] desoldered the chips and ordered a breadboard SOP44 adapter after deciding soldering wires to each lead of the chip was a bad idea. This adapter was connected to an Arduino Mega — still the best tool for weird tasks like this — and the contents of the ROM were dumped to a PC with the help of a helpful Arduino sketch.

Dumping the ROMs took about 15 minutes, and that’s if he was able to maintain a good connection between the chip and Arduino for that long. [Ali] wrote an improved ROM reader after much trial and error, and was eventually able to get the same data out of the same chip eventually.

While the broken synth hasn’t been repaired yet, at least [Ali] has the important bits off of this antique instrument. That’s good enough for now, but [Ali] intends to take this project to completion and get those vintage samples playing out of this great old synth.


FPGA Emulates NES Cart; Prototype So Cyberpunk

By now, most of us have had some experience getting ROMs from classic video games to run on new hardware. Whether that’s just on a personal computer with the keyboard as a controller, or if it’s a more refined RetrioPie in a custom-built cabinet, it has become relatively mainstream. What isn’t mainstream, however, is building custom hardware that can run classic video games on the original console (translated). The finished project looks amazing, but the prototype blows us away with it’s beauty and complexity.

[phanick]’s project is a cartridge that is able to run games on the Polish Famicon clone called the Pegasus. The games are stored on an SD card but rather than run in an emulator, an FPGA loads the ROMs and presents the data through the normal edge-connector in the cartridge slot of the console. The game is played from the retro hardware itself. It takes a few seconds to load in each ROM, but after that the Pegasus can’t tell any difference between this and an original cartridge.

The original prototype shown here was built back in 2012. Since then it’s been through a few iterations that have reduced the size. PCBs were designed and built in-house, and the latest revision also includes a 3D-printed case that is closer to the size of the original Famicon cartridges.

Even if you don’t have an interest in classic video games or emulation, the video below is worth checking out. (Be sure to turn on the subtitles if you don’t speak Polish.) [phanick] has put in a huge amount of time getting all of the details exactly right, and the level of polish shows in the final product. In fact, we’ve featured him before for building his own Famicom clone.

Continue reading “FPGA Emulates NES Cart; Prototype So Cyberpunk”

Pancake-ROM: Eat-only Memory?

You can store arbitrary data encoded in binary as a pattern of zeros and ones. What you do to get those zeros and ones is up to you. If you’re in a particularly strange mood, you could even store them as strips of chocolate on Swedish pancakes.

Oddly enough, the possibility of the pancake as digital storage medium was what originally prompted [Michael Kohn] to undertake his similar 2013 project where he encoded his name on a paper wheel. Perhaps wisely, he prototyped on a simpler medium. With that perfected, four years later, it was time to step up to Modified Swedish Pancake Technology (MSPT).

pancake_rom_bottomHighlights of the build include trying to optimize the brightness difference between chocolate and pancake. Reducing the amount of sugar in the recipe helps increase contrast by reducing caramelization, naturally. And cotton balls placed under the spinning cardboard platform can help stabilize the spinning breakfast / storage product.

Even so, [Michael] reports that it took multiple tries to get the sixteen bytes (bites?) of success in the video below. The data is stenciled onto the pancake and to our eye is quite distinct. Improvement seems to be more of an issue with better edge detection for the reflectance sensor.

Continue reading “Pancake-ROM: Eat-only Memory?”