If you’ve scrolled through the list of boot options offered on any PC’s BIOS, it reads like a history of storage technology. Up top we have the options to boot from disk, often a solid-state drive, then USB disk, optical drive, removable media, and down the bottom there’s usually an option to boot from the network. Practically no BIOS, however, has an option to boot a PC from a vinyl record — at least until now.
Clearly a project from the “Because why not?” school of hacking, [Jozef Bogin] came up with the twist to the normal booting process for an IBM-PC. As in the IBM-PC — a model 5150, with the putty-colored case, dual 5-1/4″ floppies, and one of those amazing monochrome displays with the green slow-decay phosphors. To pull off the trick, [Jozef] leverages the rarely used and little known cassette tape interface that PCs had back in the early days. This required building a new bootloader and burning it to ROM to make the PC listen to audio signals with its 8255 programmable peripheral interface chip.
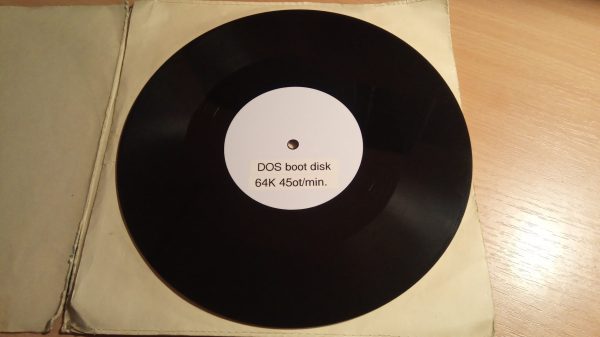
Once the PC had the right bootloader, a 64k FreeDOS bootable disk image was recorded on vinyl. [Jozef] provides infuriatingly little detail about the process other than to mention that the audio was sent directly to the vinyl lathe; we’d have loved to learn more about that. Nonetheless, the resulting 10″ record, played back at 45 RPM with some equalization tweaks to adapt for the RIAA equalization curve of the preamp, boots the PC into FreeDOS just fine, probably in no more time than it would have taken to boot from floppy.
It’s may not be the first time we’ve seen software on vinyl, but it’s still a pretty cool hack. Want to try it yourself but lack a record-cutting lathe? Maybe laser-cutting your boot disc will work.
Continue reading “Booting A PC From Vinyl For A Warmer, Richer OS”