This Artist Drags His Feet Across Sand And Snow

You may have seen Simon Beck’s work a few years back. The snow artist, known for creating large-scale works of art with nothing but snowshoes, has been creating geometrically inspired fractals and mathematical forms for years. An orienteer and map-maker by day, he typically plans out his works in advance and chooses sites based on their flat terrain. The lack of slopes prevents skiers from traversing the area beforehand and helps with measuring the lines needed to create the drawing.

He starts off by measuring the distance he has to be from the center by using a compass and walking in a straight line towards a point in the distance, making curves based on relative position to other lines. Once the primary lines are made, he measures points along the way using pace counting and joins secondary lines by connecting the points. The lines are generally walked three times to solidify them before filling in the shaded areas. The results are mesmerizing.

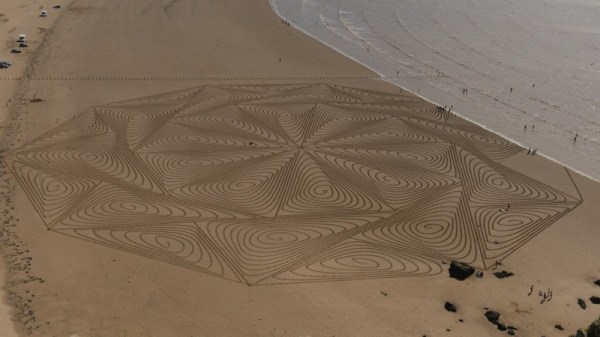
He has since expanded to sand art, using the same techniques that gained him fame in ski resorts and national parks on the sandy shores. Unfortunately, tidal patterns, seaweed, and beach debris make it slightly harder to achieve pristine conditions, but he has managed to create some impressive works of art nonetheless.

Continue reading “This Artist Drags His Feet Across Sand And Snow”

Project Egress: Casting The Hatch Handle

Every door needs a handle, even – especially – the door of a spaceship. And [Paul] from “Paul’s Garage” got the nod to fabricate the handle for the Apollo 11 Command Module hatch being built as part of Project Egress.

For those not familiar with Project Egress, it’s a celebration of the 50th anniversary of the first Moon landing that aims to recreate an important artifact from the mission: the Unified Crew Hatch, or UCH, from the Apollo 11 Command Module Columbia. Forty-four makers from various disciplines have been tasked with making the various pieces of the UCH, and each one is free to use whatever materials and methods he or she wants. [Paul] chose what will probably turn out to be the consensus material – aluminum – and decided to play to his strengths by casting the part.

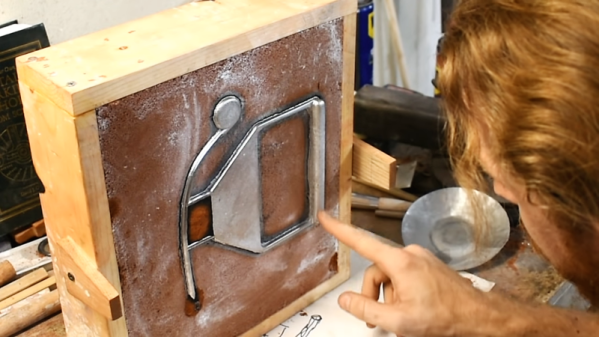
The handle itself is a chunky affair, as one would expect from something designed to be handled by an astronaut. [Paul] started with a 3D-printed version of the handle and created a two-piece mold in casting sand. The original part was probably machined, which meant that it didn’t have the draft angle that cast parts are supposed to have to make removal from the molding medium easier. [Paul] lucked out and got a perfect mold, and a perfect pour from silicon aluminum to boot. All the casting needed was a little cleanup and some holes to bolt it to the door.

[Paul]’s handle will get shipped to the Smithsonian along with the other parts, like [Fran Blanche]’s latch assembly, so that [Adam] can assemble the hatch live during the 50th-anniversary celebration later this month. Stay tuned for more Project Egress coverage as the parts keep rolling in.

Continue reading “Project Egress: Casting The Hatch Handle”

Solder SMDs With A Pan O’ Sand

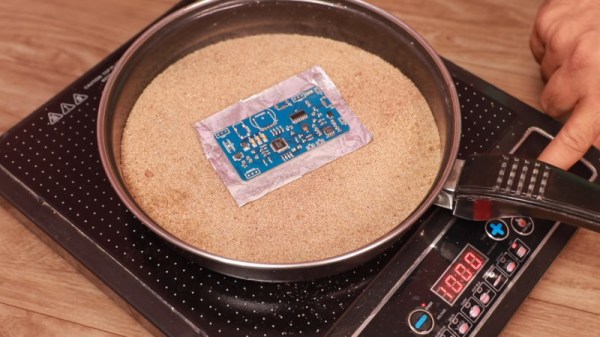
For those that grew up working with through-hole components, surface mount parts can be challenging to deal with. However, there are plenty of techniques out there that are more than accessible to the DIY set. With the right gear, soldering SMD boards is a snap – just get yourself a hot pan of sand (Youtube link, embedded below)!

The process starts with a professionally manufactured PCB, and accompanying stencil. All major PCB CAD packages are capable of generating stencil files these days, and many manufacturers will throw in a laser cut stencil for minimal extra cost with a PCB order. The board is first mounted on a stable surface, and has solder paste applied, before components are placed with tweezers. Perfect placement isn’t necessary, as the surface tension of the molten solder pulls components into their correct orientations. The populated board is then placed on a bed of sand in a frying pan, which is placed on an induction cooktop. The board is then heated until the solder melts, and all the components are neatly reflowed. Once allowed to cool, the board is done!

The trick is that the sand helps evenly heat the circuit board, while keeping it a safe distance away from the heat source. Results are good, and the process is far quicker than hand soldering. It’s easy to keep an eye on the process too. Of course, the traditional method is still to use the humble toaster oven, but new techniques are always useful. We’ve seen it done with a Bunsen burner, too. Video after the break.

Continue reading “Solder SMDs With A Pan O’ Sand”

Achieving Zen The Arduino Way

The purpose of a Zen garden, those stylized landscapes created by painstakingly placing rocks and raking gravel into perfect patterns, is the doing of the thing. Making sure every line is perfectly formed is no mean feat, and the concentration required to master it is the point of the whole thing. But who has time for that? Why not just build a robot to create the perfect Zen garden in miniature?

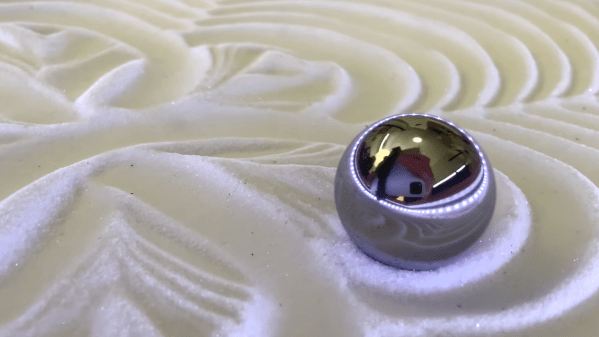
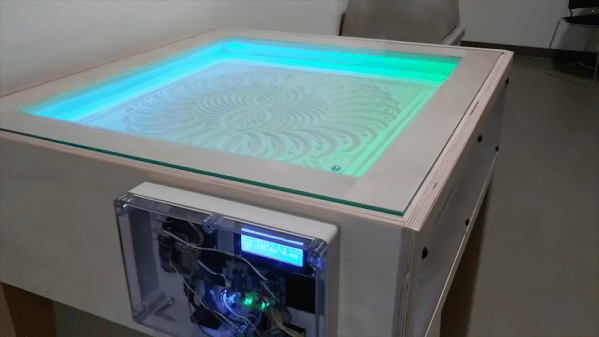
That was what [Tim Callinan] and his classmates did for a semester project, and the “ZenXY” sand plotter was the result. There isn’t a build log for the device per se, although the video below makes it plain how they went about this. The sand table itself is a plywood box whose bottom is layered with fine white sand and contains a single steel ball. Below the table is an X-Y gantry carrying a powerful magnet. A gShield riding on top of an Uno turns G code into slow, stately movement of the ball through the sand. The patterns are remarkably intricate, and while it might not be the same as mastering the body control needed to rake gravel with precision, watching the ball push the sand around is pretty Zen all by itself

This isn’t the first time we’ve seen someone try to automate a traditional Japanese practice. This tea ceremony robot comes to mind, and this nicely crafted sand table is very similar to the ZenXY.

Continue reading “Achieving Zen The Arduino Way”

SandBot Happily And Tirelessly Rolls Patterns In Sand

The patience and precision involved with drawing geometric patterns in sand is right up a robot’s alley, and demonstrating this is [rob dobson]’s SandBot, a robot that draws patterns thanks to an arm with a magnetically coupled ball.

SandBot, SCARA version. The device sits underneath a sand bed, and a magnet (seen at the very top at the end of the folded “arm”) moves a ball bearing through sand.

SandBot is not a cartesian XY design. An XY frame would need to be at least as big as the sand table itself, but a SCARA arm can be much more compact. Sandbot also makes heavy use of 3D printing and laser-cut acrylic pieces, with no need of an external frame.

[rob]’s writeup is chock full of excellent detail and illustrations, and makes an excellent read. His previous SandBot design is also worth checking out, as it contains all kinds of practical details like what size of ball bearing is best for drawing in fine sand (between 15 and 20 mm diameter, it turns out. Too small and motion is jerky as the ball catches on sand grains, and too large and there is noticeable lag in movement.) Design files for the SCARA SandBot are on GitHub but [rob] has handy links to everything in his writeup for easy reference.

Sand and robots (or any moving parts) aren’t exactly a natural combination, but that hasn’t stopped anyone. We’ve seen Clearwalker stride along the beach, and the Sand Drawing Robot lowers an appendage to carve out messages in the sand while rolling along.

Drawing Lines In The Sand: Taking Beach Graffiti To The Next Level

When strolling down the beach, there’s always an urge to draw in the sand – it seems compulsory to make your mark by inscribing something. But there’s a dilemma: how do you go about physically drawing it? You could opt to remain standing and attempt to deploy a toe, but that requires a level of dexterity few possess. The only other option is to bend down and physically use your hands. Ultimately, there’s no way to draw anything in the sand without losing your dignity.

The solution? A robot, of course – the brainchild of [Ivan Miranda]. The idea is simple and elegantly executed: make a large linear actuator, place it on wheels, and attach a servo which can position an etching tool to be either in the sand or above it. The whole contraption moves forward one column at a time, making a vertical pass with the marker being engaged or disengaged as required. The columns are quite thin, giving relatively high-resolution text, though this does mean it take a while. Adding another servo and marking two adjacent columns at the same time would be an easy way to instantly double the speed.

The wheels are big and chunky, to ensure the horizontal distance travelled does not change between the top and the bottom. Of course, when making big parts like these it always helps if you’ve already built a giant custom 3D printer. If you want to read more of [Ivan]’s large scale 3D printing antics, checkout his tank with suspension, or plus-sized seven-segment clock.

Continue reading “Drawing Lines In The Sand: Taking Beach Graffiti To The Next Level”

Fill Your Hot Tub With Sand. For Science!

Here at Hackaday, we can understand if you don’t like sand. It’s coarse, rough and irritating, and it gets everywhere. With that said, [Mark Rober] discovered a great way to have fun with sand right in your own back garden.

We’ll preface this by stating that this isn’t the easiest hack to pull off on a lazy Saturday afternoon. You need a spare hot tub, plenty of pipe, and a seriously big air supply. But if you can pull it all together, the payoff is fantastic.

What [Mark] has achieved is turning a regular hot tub into a fluidized bed. In simple terms, this is where a solid particulate material (like sand) is made to act more like a fluid by passing pressurized fluid through the material. Through a carefully built series of drilled copper pipes, [Mark] manages to turn the hot tub into a fluidized bed, much to the enjoyment of his young nephews.

While it’s not the easiest hack to copy at home, [Mark] drives home the science of both the fluidized bed and why certain objects float or sink in the sand. It’s something that can also be easily tackled at a smaller scale, if you’re looking for something more achievable for the average maker.

For more sand science, how about using it to hold up your car?

[Thanks to Keith for the tip!]