Clever Mechanism Makes A Linear Control From A Rotary Hall Sensor

Every once in a while we stumble across something so simple yet so clever that we just have to call it out. This custom linear Hall effect sensor is a perfect example of this.

By way of backstory, [Nixieguy], aka [The Electronic Mercenary], offers up a relatable tale — in the market for suitable hardware to make the game Star Citizen more enjoyable, and finding the current commercial joystick offerings somewhat wanting, he decided to roll his own controllers. This resulted in the need for a linear sensor 100 mm in length, the specs for which — absolute sensing, no brushes or encoders, easily sourced parts — precluded most of the available commercial options, like linear pots. What to do?

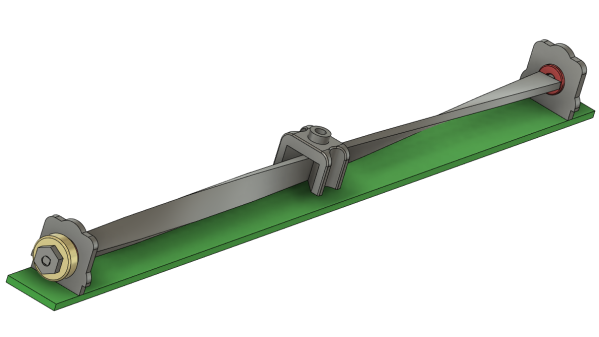
The solution [Nixieguy] settled on was to use a Hall effect sensor and a diametrally magnetized neodymium ring magnet. The magnet is rotated through 180 degrees by a twisted aluminum bar, which is supported in a frame by bearings. A low-friction slider with a slot captures the bar; moving the slider along the length of the control rotates the bar, which rotates the magnet, which allows the Hall sensor to measure the angle of the magnetic field. Genius!

The parts for the prototype sensor are all made from 0.8-mm aluminum sheet stock and bent to shape. The video below shows the action better than words can describe it, and judging by the oscilloscope trace, the output of the sensor is pretty smooth. There’s clearly a long way to go to tighten things up, but the basic mechanism looks like a clear win to us.

Hats off to [Nixieguy] for this one, which we’ll surely be following for more developments. In the meantime, if you need to brush up on the Hall effect, [Al Williams] did a nice piece on that a while back.

Continue reading “Clever Mechanism Makes A Linear Control From A Rotary Hall Sensor”

Replace Your Automatic Transmission With A Bunch Of Relays

A “Check Engine” light on your dashboard could mean anything from a loose gas cap to a wallet-destroying repair in the offing. For [Dean Segovis], his CEL was indicating a fairly serious condition: a missing transmission. So naturally, he built this electronic transmission emulator to solve the problem.

Some explanation may be necessary here. [Dean]’s missing transmission was the result of neither theft nor accident. Rather, he replaced the failed automatic transmission on his 2003 Volkswagen EuroVan with a manual transmission. Trouble is, that left the car’s computer convinced that the many solenoids and sensors on the original transmission weren’t working, leaving him with a perfectly serviceable vehicle but an inspection-failing light on the dash.

To convince the transmission control module that a working automatic was still installed and clear the fourteen-odd diagnostic codes, [Dean] put together a block of eight common automotive relays. The relay coils approximate the resistance of the original transmission’s actuators, which convinces the TCU that everything is hunky dory. There were also a couple of speed sensors in the transmission, which he spoofed with some resistors, as well as the multi-function switch, which detects the shift lever position. All told, the emulator convinces the TCU that there’s an automatic transmission installed, which is enough for it to give the all-clear and turn off the Check Engine light on the dash.

We love hacks like this, and hats off to [Dean] for sharing it with the VW community. Apparently the issue with the EuroVan automatic transmissions is common enough that a cottage industry has developed to replace them with manuals. It’s not the only questionable aspect of VW engineering, of course, but this could help quite a few people out of a sticky situation.

Continue reading “Replace Your Automatic Transmission With A Bunch Of Relays”

Better Air Quality Sensing With CO2

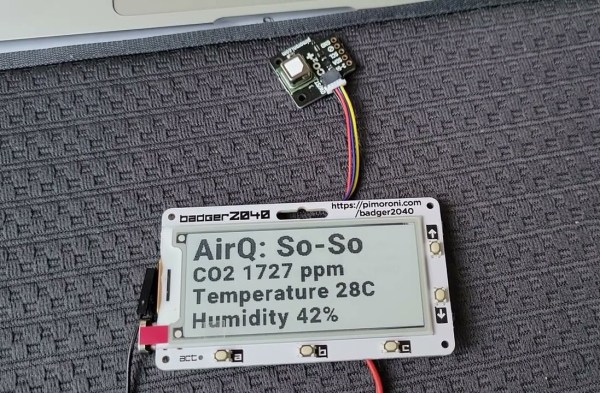
Measuring air quality, as anyone who has tried to tackle this problem can attest, is not as straightforward as it might seem. Even once the nebulous term “quality” is defined, most sensors use something as a proxy for overall air health. One common method is to use volatile organic compounds (VOCs) as this proxy but as [Larry Bank] found out, using these inside a home with a functional kitchen leads to a lot of inaccurate readings. In the search for a more reliable sensor, he built this project which uses CO2 to help gauge air quality.

Most of the reason that CO2 sensors aren’t used as air quality sensors is cost. They are much more expensive than VOC sensors, but [Larry] recently found one that was more affordable and decided to build this project around it. The prototype used an Arduino communicating over I2C to the sensor and an OLED screen, which he eventually put in a 3D printed case to carry around to sample CO2 concentration in various real-world locations. The final project uses a clever way of interfacing with the e-paper display that we featured earlier.

While CO2 concentration doesn’t tell the full story of air quality in a specific place, it does play a major role. [Larry] found concentrations as high as 3000 ppm in his home, which can cause a drop in cognitive function. He’s made some lifestyle changes as a result which he reports has had a beneficial impact. For human-occupied indoor spaces, CO2 can easily be the main contributor to poor air quality, and we’ve seen at least one other project to address this concern directly.

Ceiling Fan Adds CO2 Sensor

Ceiling fans seem to be an oft-misunderstood or overlooked household appliance. As such, they seem to have missed a lot of the IoT wave. Sure, you can get smart controllers for them to plug into your home automation system of choice, but these mostly rely on temperature sensors, simple timers, or voice commands. There’s a lot more to a ceiling fan than maintaining a comfortable temperature, as [EJ] demonstrates with this smarter ceiling fan build.

A big part of the job of a ceiling fan is to improve air circulation, which can help a room from feeling “stuffy”. This feeling is usually caused by excess CO2 as a result of respiration in an area where the air is not moving enough to exhaust this gas. Not only does [EJ]’s controller make use of a temperature monitor for controlling the fan automatically, but there is also a CO2 sensor integrated to improve this aspect of air quality when needed.

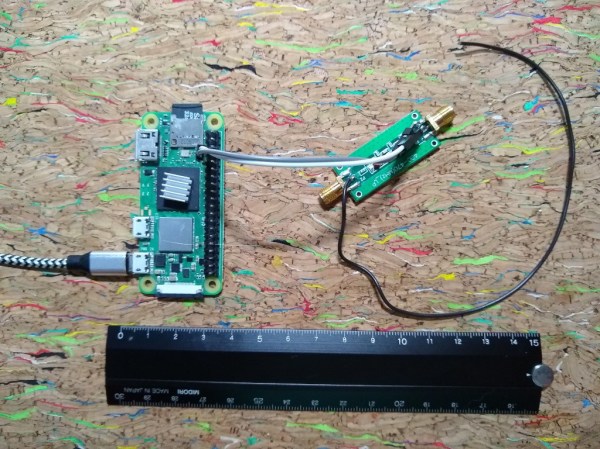
The entire build is based on a Raspberry Pi Zero, and nothing needed to be changed about the ceiling fan itself for this added functionality because it already included a radio-based remote control. With some monitoring of the signals produced by the remote, the Raspberry Pi was programmed to mimic these commands when the surrounding sensors captured a condition where [EJ] would want the fan on. There’s also a manual control button as well, so the fan control is not entirely in the hands of the computer.

For a little more detailed information about this build, there’s a separate project page which details a lot of the information about the RF waveform capturing and recreation. And, if you want to take your fan to the next level, take a look at this one which focuses on building a smartphone app to control the fan instead.

Trombone Controls Virtual Trombone

Guitar Hero was a cultural phenomenon a little over a decade ago, and showed that there was a real fun time to be had playing a virtual instrument on a controller. There are several other similar games available now for different instruments, including one called Trombone Champ that [Hung Truong] is a fan of which replaces the traditional guitar with a trombone. The sliding action of a trombone is significantly different than the frets of a guitar, making it a unique challenge in a video game. But an extra challenge is building a controller for the game that works by playing a real trombone.

Unlike a guitar which can easily map finger positions to buttons, mapping a more analog instrument like a trombone with its continuous slide to a digital space is a little harder. The approach here was to use an ESP32 and program it to send mouse inputs to a computer. First, an air pressure sensor was added to the bell of the trombone, so that when air is passing through it a mouse click is registered, which tells the computer that a note is currently being played. Second, a mouse position is generated by the position of the slide by using a time-of-flight sensor, also mounted to the bell. The ESP32 sends these mouse signals to the computer which are then used as inputs for the game.

While [Hung Truong] found that his sensors were not of the highest quality, he did find the latency of the control interface, and the control interface itself, to be relatively successful. With some tuning of the sensors he figures that this could be a much more effective device than the current prototype. If you’re wondering if the guitar hero equivalent exists or not, take a look at this classic hack from ’09.

Continue reading “Trombone Controls Virtual Trombone”

A Simple Web Configured BLE To GPIO Bridge

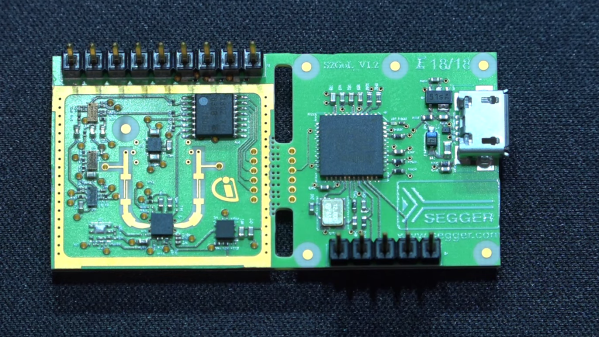
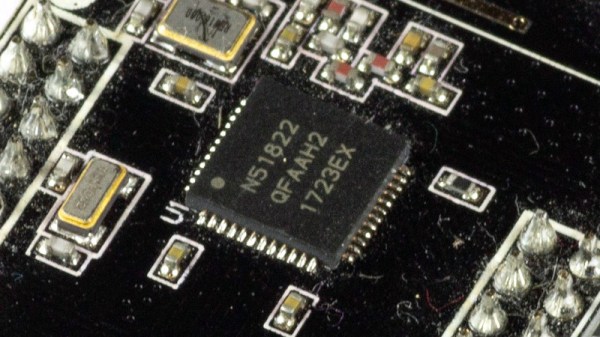
[Daniel Dakhno] kept ending up in a situation where the ability to read the status of, or control a few digital IO pins with minimal effort, would be terribly useful. Not wanting to keep compiling code, for such simple needs, they instead used a nRF51-based module as a physical interface and produced a general purpose firmware that could be configured with a simple web interface. The NRF51-IO-module was born, whose job is to pair with whatever device you have in front of you, provided it supports BLE, and give direct access to those IO pins.

Rather than acting as a rather slow logic analyser, the firmware is intended for mostly static configurations. The web application sends a configuration packet over to the nRF51 board, which then programs it into FLASH and restarts, reading the updated configuration and applying it to the IO pins. These outputs then persist as long as there is power. The read-side of the equation can also be performed via the web page, but we didn’t have a chance to verify that. The code implements the Bluetooth automation IO service as well as the binary sensor service so if you have access to applications that talk these services, then you should be able to fire it up and go with it, although we’ve not personally tested this due to lack of an nRF51 board. We noticed that the Home Assistant automation platform supports the BT binary sensor, which might be a big help for some people with a need for some wireless control and sensing.

If you need a practical example of a use for remote sensing, here’s a physical mailbox status monitor, using the nRF51. Whilst we’re thinking of Bluetooth and sensors, here’s a custom firmware for some super cheap environment sensors that frees them from vendor lock-in.

Header image: Ubahnverleih, CC0.

2022 Hackaday Prize: Plant Monitoring System Grows To Include LoRa

Change on industrial scales is slow, but if you’re operating your own small farm or simply working in a home garden there are some excellent ways to use water more effectively. The latest tool from [YJ] makes it possible to use much less water while still keeping plant yields high.

This is an improvement on a previous project which automates watering and lighting of a small area or single pot. This latest creation, called FLORA, includes a LoRa module for communication up to 3 kilometers, and the ESP32 on board also handles monitoring of soil moisture, humidity and other sensors. It also includes a pump driver for managing irrigation systems so that smart decisions can be made about when to water. Using this device, the water usage when testing was reduced by around 30% compared to a typical timed irrigation system.

Using a smart system like this is effective for basically any supply of water, but for those who get water from something like an off-grid rainwater system or an expensive water utility, the gains are immediate. If you aren’t already growing your own food to take advantage of tools like this, take a look at this primer to get you started.