LMN-3: Putting The ‘OP’ In Open Source Synthesizers

Some projects you come across simply leave you in awe when you look at the thought and the resulting amount of work that went into it, not only for the actual implementation, but everything around it. Even more so when it’s a single-developer open source project. [Stone Preston]’s synth / sampler / sequencer / DAW-in-a-box LMN-3 absolutely fits the description here, and it seems like he has set his heart on making sure everyone can built one for themselves, by providing all the design files from case down to the keycaps.

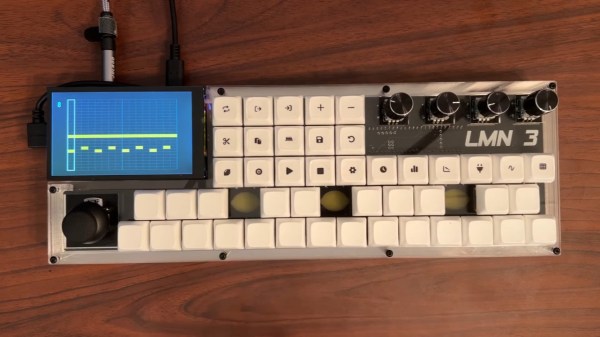
The LMN-3 (LMN as in “lemon”, not “comes before the OP“) is intended as a standalone, portable digital audio workstation, and is built around a Raspberry Pi 4 with a HyperPixel display for the user interface. The UI itself, and with it the core part of the software, was created using the Tracktion Engine, which itself uses the JUCE framework and combines your typical synthesizer, sequencer, and sampler features with the DAW part to handle recording, editing, and mixing. The remaining hardware is a custom-designed PCB with a set of function and keyboard buttons, along with a pitch bend joystick and four rotary encoders with push buttons that serve as main input handlers. Oh yes, and a Teensy board.

The UI is actually entirely controlled via MIDI commands, and custom firmware on the Teensy is translating the input events from buttons, encoders, and joystick accordingly. This essentially decouples the hardware from the software, and using a cross-platform framework underneath, you can also run the UI standalone on your computer and use any 3rd-party MIDI controller you like. Or then, as [Stone] thought really about everything, use a hardware emulator he created in addition. You could even leave out the Raspberry Pi and software altogether and turn this into a pure MIDI controller. If that sounds tempting, but you’re looking for something with more knobs and sliders instead of buttons, check out the Traktorino. And if you actually prefer a mouse as input device, there’s always something running in a browser.

Continue reading “LMN-3: Putting The ‘OP’ In Open Source Synthesizers”

Jukebox Electromechanical Automation Explained

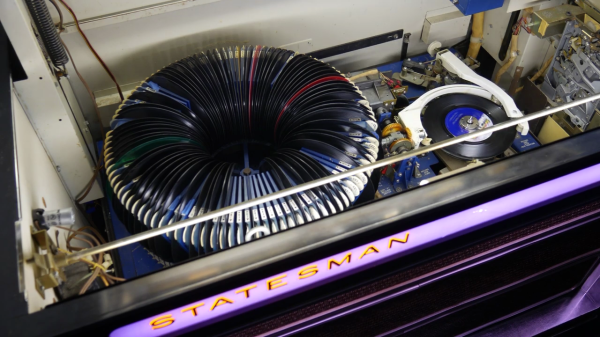
If you ever been curious how old-school jukeboxes work, it’s all electromechanical and no computers. In a pair of videos, [Technology Connections] takes us through a detailed dive into the operation of a 1970 Wurlitzer Statesman model 3400 that he bought with his allowance when he was in middle school. This box can play records at either 33-1/3 or 45 RPM from a carousel of 100 discs, therefore having a selection of 200 songs. This would have been one of the later models, as Wurlitzer’s jukebox business was in decline and they sold the business in 1973.

This may be the ugliest jukebox ever produced.

This jukebox is actually what turned me into the weirdo that I am today.

External appearances aside, it’s the innards of this mechanical wonder that steal the show. The mechanism is known as the Wurlamatic, invented by Frank B. Lumney and Ronald P. Eberhardt in 1967. Check out the patent US3690680A document for some wonderful diagrams and schematics that are artwork unto themselves. Continue reading “Jukebox Electromechanical Automation Explained”

Customisable Micro-Coded Controller Helps With In-Circuit Debugging

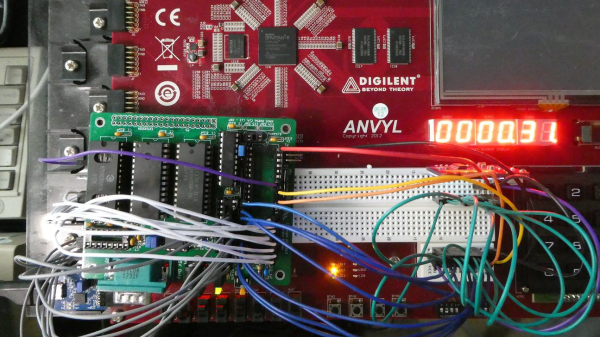
Over on Hackaday.io, [Zoltan Pekic] has been busy building a stack of tools for assisting with verifying and debugging retro computing applications. He presents his take on using Intel hex files for customised in-circuit testing, which is based upon simple microcoded sequencers, which are generated automatically from a high level description.

The idea is that it is very useful to be able to use an FPGA development board to emulate the memory bus component of the CPU, allowing direct memory access for design validation purposes. This approach will also allow the production of a test rig to perform board level verification. The microcode compiler (MCC) generates all the VHDL, and support files needed to target a Xilinx FPGA based dev board, but is generic enough to enable targeting other platforms with a little adaptation.

Another interesting use case enables in-circuit tracing of buggy memory accesses, with the microcode sequencer decoding the accesses and dumping the relevant information out to either a serial port, or even direct to an embedded VGA controller, hardware allowing.

This automated approach to generating customisable microcoded hardware is a very nice trick to have in your bag, and even if it only helps in certain circumstances, [Zoltan] notes that it at least serves as an interesting example of the architecture of computers from history, if not much else.

Source for the example 8085 project can be found on the project GitHub, and the toolchain source can found here also.

For an interesting practical use of microding to implement emulations of historical hardware, checkout this neat switchable reproduction calculator project.

Homebrew Relay Computer Looks Like It Could Be A Commercial Product

You may not have noticed, but we here at Hackaday really love our clicky stuff. Clicky mechanical keyboards, unnecessarily noisy flip-dot displays, and pretty much anything made with a lot of relays — they all grab our attention, in more ways than one. So it’s with no small surprise that we appear to have entirely missed perhaps the clickiest build of all: a fully operational 8-bit computer using nothing but relays.

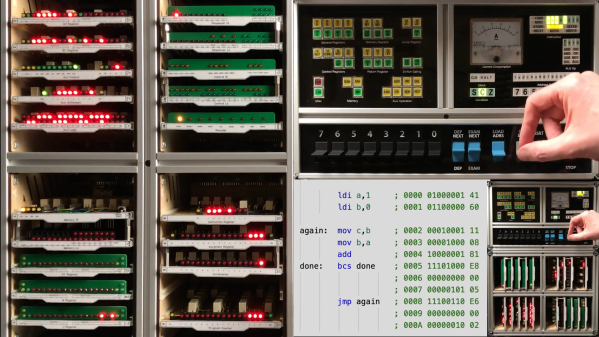
What’s even more amazing about our failure to find and feature [Paul Law]’s excellent work is that he has been at it for the better part of a decade now. The first post on his very detailed and very well-crafted blog describing the build dates from 2013, when he was just testing LEDs in the arithmetic-logic unit (ALU). Since then, [Paul] has made incredible progress, building module after module, each containing a small portion of the computer’s functionality. The modules plug into card cages with backplanes to connect them, and the whole thing lives in an enclosure made from aluminum extrusion and glossy black panels for a truly sleek look. The computer is incredibly compact for something that uses 400+ DPDT relays to do its thinking.

In addition to the blog, [Paul] has a criminally undersubscribed YouTube channel with a quite recent series going over the computer in depth. We included the overall tour below, but you should really check out the rest of the videos to appreciate how much work went into this build. We’ve seen relay computers ranging in size from single-board to just plain ludicrous, but this one really takes the prize for fit and finish as well as functionality.

Continue reading “Homebrew Relay Computer Looks Like It Could Be A Commercial Product”

Hardware Vs Software: Fight!

It’s one of the great cliches in the hacker world: the hardware type and the software type. You can tell which of these two you are quite easily. When a project is actually 20% done, but you think it’s 90% done, and you say to yourself “And the rest is a simple matter of software”, you’re a hardware type. Ask anyone who has read my code, and they’ll tell you, I’m a hardware type.

Along with my blindness to the difficulties of getting the code right, I’ve also admittedly got an underappreciation of what powers lie in the dark typing arts. But I am not too proud to tip my hat when I see an awesome application of the soft stuff. Case in point: this Go board sequencer that we ran last week. An overhead webcam parses players’ moves as they put black and white stones down while playing the game of Go, and turns this into music.

The pure software type will be saying “but there’s a webcam and a Go board”. And indeed, that’s true. There are physical elements to this project that anchor it in the shared reality of the two people playing. But a hardware project this isn’t; it’s OpenCV and Max/MSP that make it work.

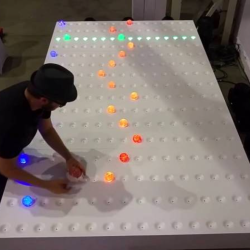
For comparison, look at the complexity of this similar physical sequencer. It’s got a 16 x 16 array of LEDs and switches and a CNC milled, primed, and painted surface that’s the size of a twin bed. Sawdust and hand-soldering: that’s a hardware project.

What I love about the Go sequencer is that it uses software just right. The piece is still physical. It could have just as easily been a VR world, where the two people would interact with each other only inside their goggles. But somehow that’s not quite as human as putting stones on a wooden board, sitting across from, and maybe even looking at, your opponent. The players aren’t forced to think about the software. They don’t feel like they’re playing a video game.

But at the same time, the software side of things makes all of the horrible hardware problems go away. Nobody is soldering a rat’s nest of 169 switches. There’s a webcam plugged into the USB port of a laptop. There’s a deep simplicity there.

Should you always trade out arcade buttons for OpenCV? Absolutely not! But is it worth considering the soft side when doing it in hardware is just too, well, hard? I’m open.

Mini Marble-Powered Synth Pays Homage To Its Bigger Cousins

If imitation is the sincerest form of flattery, what then are we to make of something that shares only a few of the original’s design elements, operates in a completely different way, and has been scaled down to a fifth its size? Still seems like flattery to us.

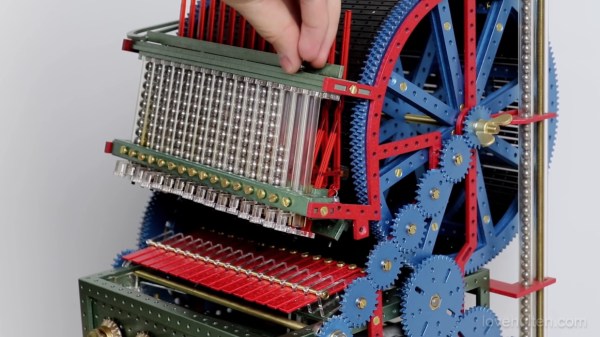
Despite the changes, it’s clear where [Love Hultén] took inspiration for his miniature Marble Machine XS. Readers will no doubt see in it elements from [Martin Molin]’s original Marble Machine, the fantastic plywood and Lego musical contraption, along with his new Marble Machine X, the construction of which never seems to end. Like the originals, [Love]’s miniature version uses a lot of steel balls, albeit considerably scaled down, and it still uses a programming drum to determine where and when to drop them. But rather than strike real traditional instruments, the falling balls strike synthesizer keys, triggering a range of sounds through its built-in speaker. The whole thing is powered by a small electric motor rather than being hand-cranked and is small enough to sit on a desktop, a decided advantage over the mammoth machines to which it pays homage.

We have to say that as much as we love the hacksmanship of the original Marble Machine and the craftsmanship of its successor, the look and feel of [Love]’s machine just blows us away. We’re not sure what materials he used, but the whole hammertone paint scheme and Meccano look is a feast for nostalgic eyes.

Continue reading “Mini Marble-Powered Synth Pays Homage To Its Bigger Cousins”

Sequence Your Beats With The Magic Of Magnets

Typically, when we think of a music sequencer, we envisage LEDs and boards covered in buttons. Of course, there are naturally other ways to build such a device. MesoTune takes a different tack entirely, relying on magnets and rotating mechanisms to get the job done.

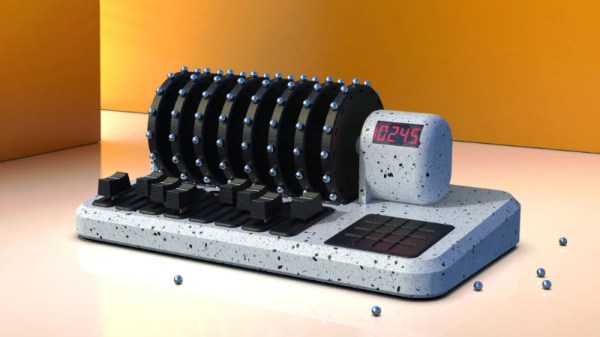
MesoTune acts as a MIDI controller, and is designed to be hooked up to a computer or other MIDI synthesizer device. The heart of MesoTune is a set of eight magnet wheels, rotating together on a common shaft. The rotational speed of the shaft, dictated by the requested tempo in beats per minute, is controlled by an Arduino. Each magnet wheel has 16 slots into which the user can place a spherical magnet. Every time a magnet on the wheel passes a hall sensor, it sends a MIDI message to the attached computer which is then responsible for using this to synthesize the relevant sound.

There are other useful features, too. Each of the eight magnet wheels, or channels, gets its own fader, which can be used to control volume or other parameters. There’s also a handy tempo display, and a 16-button touchpad for triggering other events. These additions make it more practical to use in a compositional context, where it’s nice to have extra controls to make changes on the fly.

Made out of 3D printed parts and readily available off the shelf components, it’s a fun alternative sequencer design that we’re sure many makers could whip up in just a weekend. We’d love to see other remixes of the design – if you’ve got one, hit us up at the tipline. We’ve seen other great sequencer builds before, too. Video after the break.