AVR Minecraft Server Lets You Toggle Pins From The Virtual World

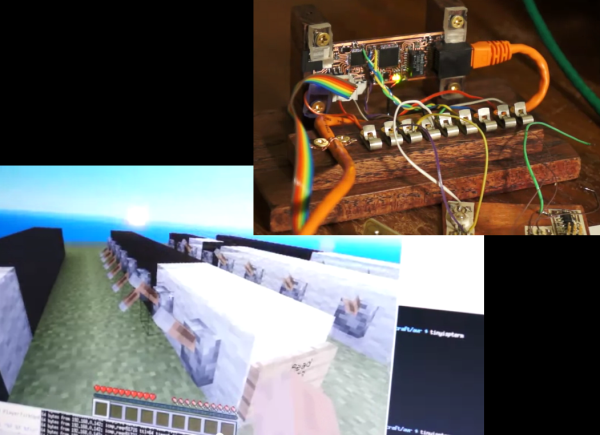
Wanting to test his skills by building a webserver [Cnlohr] decided to also code a Minecraft server which allows him to toggle pins from inside the game. The rows of switches seen above give him direct access to the direction register and I/O pins of one port of the ATmega328.

The server hardware is shown in the image above. It’s hard to tell just from that image, but it’s actually a glass substrate which is [Cnlohr’s] specialty. He uses an ENC424J600 to handle the networking side of things. This chip costs almost twice as much as the microcontroller next to it. But even in single quantities the BOM came in at under $20 for the entire build.

In the video after the break [Cnlohr] and a friend demonstrate the ability for multiple users to log into the Minecraft world. The simulation is fairly bare-bones, but the ability to affect hardware from the game world is more exciting than just pushing 1s and 0s through some twisted pairs.

Continue reading “AVR Minecraft Server Lets You Toggle Pins From The Virtual World”

Laptop Motherboard Reborn As A Low-wattage Server

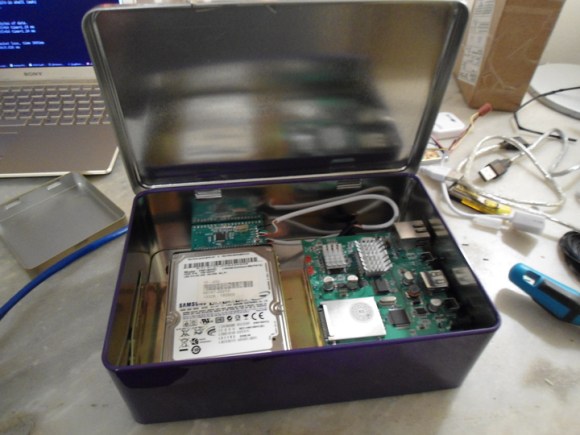
[Darknezz] sent us a set of photos and some details about his damaged laptop motherboard turned into a server. A client brought him a Dell 1525 on which nothing was showing up on the LCD screen. The HDMI and VGA still worked, and he traced the problem to no signal coming out of the motherboard. He swapped the board out to get the laptop working again, but he client said he could keep the damaged one.

It has a dual-core CPU which meets his needs and since it’s meant to run off of a battery it’s as energy-efficient as possible. [Darknezz] dug through his parts bin and found a PSU that could supply the needed 19.5V at 3.5A. The connector didn’t match but it didn’t take him too long to patch into it using a spare Molex connector. He also needed a power button and ended up soldering a momentary push switch to a couple of pads which he traced out form the original connector. The only thing he actually ended up purchasing were the memory modules. Check out the photos he took of the alterations in the gallery after the break.

Continue reading “Laptop Motherboard Reborn As A Low-wattage Server”

Repurposing Server PSU For Your Charging Needs

That grey box at the top of the photo is a modular power supply unit for a rack-mounted server system. [Sebastian] decided to repurpose it as a charging source for his RC batteries. He chose this HP DPS-600PB because of its power rating, efficiency, and you can get them at a reasonable price.

This is an active power factor corrected (APFC) PSU, which he says draws 40% less current than the non-APFC variety. Since he sometimes charges batteries in the field from a generator this is a big plus. But a bit of modification is necessary before it can be used as a source.

Since this is a rack device it has a set of connectors on the back. For power there are spade connectors which mate with a fin on the rack. He soldered positive and negative leads between the spades to interface with the battery chargers. The PSU won’t fire up if it’s not in the rack, so some jumper wires also need to be added connecting three of the interface pins.

With his modding all worked out he went on to use two PSUs for a 24V source, housing them to a nice carrying case while at it.

Pedal-powered 32-core ARM Linux Server

Sure, it’s probably a gimmick to [Jon Masters], but we absolutely love the pedal-powered server he built using a group of ARM chips. [Jon] is an engineer at Red Hat and put together  the project in order to show off the potential of the low-power ARM offerings.

The platform is a quad-core Calxeda EnergyCore ARM SoC. Each chip draws only 5 Watts at full load, with eight chips weighing in at just 40 Watts. The circuit to power the server started as a solar charger, which was easy to convert just by transitioning from panels to a generator that works just like a bicycle trainer (the rear wheel presses against a spin wheel which drives the generator shaft).

So, the bicycle generator powers the solar charger, which is connected to an inverter that feeds a UPS. After reading the article and watching the video after the break we’re a bit confused on the actual setup. We would think that the inverter would feed the charger but that doesn’t seem to be the case here. If you can provide some clarity on how the system is connected please feel free to do so in the comments.

Continue reading “Pedal-powered 32-core ARM Linux Server”

Automating The Shutdown Of APC UPS Devices

ups-shutdown-device

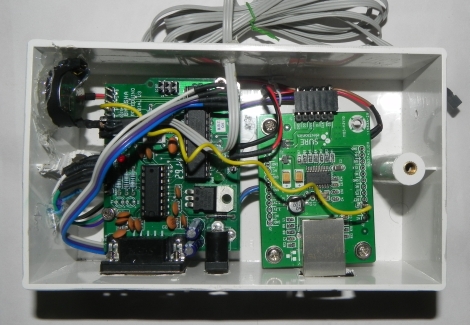
[Ishan Karve] works in some bizarro world where the building management demands that all servers and Uninterruptible Power Supplies be shut down at the end of each evening. While inconceivable to most systems admins, he has no recourse but to comply. This means that his employees need to turn things off before they leave for the day, and since they often work up to 15 hours a day, waiting for Windows server to shut down seems like an eternity.

Being the good manager he is, [Ishan] decided to build a device that handles the clean shutdown of their servers and UPS for them. An Arduino board serves as the brains of the device, communicating with and issuing shutdown commands to the UPS over a serial port. The Arduino is also connected to the office network, enabling it to send ARP requests to the servers in order to determine when they have completely shut down for the day. In order to protect against an accidental shutdown due to network connectivity issues, [Ishan] added an RTC module to the mix so that the Arduino does not issue shutdown commands until at least 8 pm.

Instead of waiting around for Windows to do its thing, [Ishan’s] employees can take off once they start the server shutdown process, knowing that they are totally compliant with their landlord’s crazy requests.

Hacking Old Server Hardware For New Home Use

[Arnuschky] was looking for a network storage solution that included redundancy. He could have gone with a new NAS box, but didn’t want to shell out full price. Instead, he picked up a Dell PowerEdge 2800 and hacked it for SATA drives and quiet operation.

It’s not surprising that this hardware can be had second-hand at a low price. The backplane for it requires SCSI drives, and it’s cheaper to upgrade to new server hardware than it is to keep replacing those drives. This didn’t help out [Arnuschky’s] any, so he started out by removing the SCSI connectors. While he was at it, he soldered wires to the HDD activity light pads on the PCB. These will be connected to the RAID controller for status indication. The image above shows the server with eight SATA drives installed (but no backplane); note that all of the power connectors in each column are chained together for a total of two drive power connectors. He then applied glue to each of these connectors, then screwed the backplane in place until the glue dried. Now the device has swappable SATA drives!

His server conversion spans several posts. The link at the top is a round-up so make sure you click through to see how he did the fan speed hack in addition to the SATA conversion.

If your tolerances don’t allow you to glue the connectors like this, check out this other hack that uses shims for spacing.

Rebuilding A Mac SE As A Server Again

Around this time last year, [Sprite_TM] took a 1980’s-era Macintosh SE and rebuilt it as a home file server. He used a Seagate Dockstar as the new motherboard, but over the past year he’s been annoyed with the fact that the Dockstar doesn’t have real SATA ports. Using USB to SATA converters on a server is a slow way of doing things, so [Sprite_TM] rebuilt his SE using an HP thin client. To do this, he had to break out the onboard SATA and PCIE; not an easy task, but that’s why [Sprite_TM] is around.

The first order of business was installing a pair of SATA ports. The stock thin client had two NAND-flash chips serving as the drive, both connected to a SATA controller. All [Sprite_tm] had to do was desolder the flash chips and wire up the new SATA connections. Easy enough.

Because the HP thin client only had 100Mbps Ethernet, [Sprite_tm] wasn’t looking forward to the order of magnitude difference between his expected rsync speeds and what he would get with a 1Gbps connection. The only problem is the thin client didn’t have a spare PCIE connection for an Ethernet card. That’s really no problem for [Sprite_tm], though: just desolder the GPU and run a few wires.

Just like last year’s work on his SE, [Sprite_tm] ended up with a functional and very cool home server. The old-school System 7 is still there, and of course he can still play Beyond Dark Castle. Awesome work, in our humble opinion.