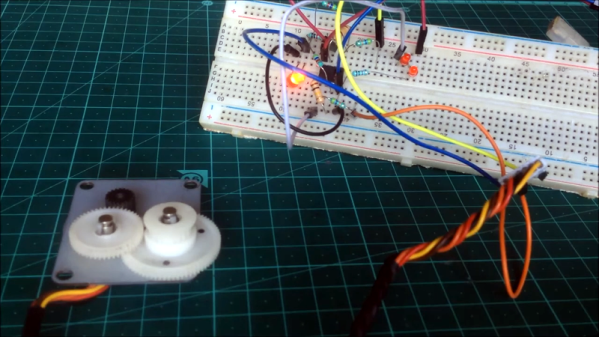
It isn’t hard to imagine a scenario where you are stuck at home all day with nothing to do and certain items are in short supply. Sure, bathroom tissue gets all the press, but try buying some flour or a freezer and see how far you get. Plus online shopping has given up on next day delivery for the duration. Not hard to imagine at all. Now suppose your latest self-quarantine project needs a rotary shaft encoder. Not having one, what do you do? If you are [Tech Build] you go all MacGyver on an old printer and pull out a stepper motor.
How does a stepper motor turn into an encoder? Well, that’s the MacGyver part. We are not big fans of the physical circuit diagrams, but it looks like [Tech Build] borrowed (with credit) from an earlier post and that one has a proper schematic.
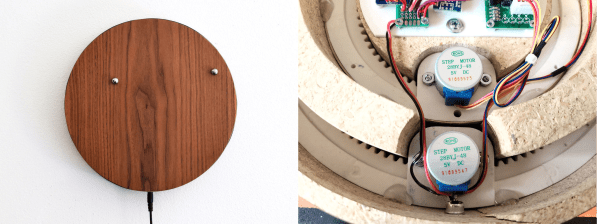
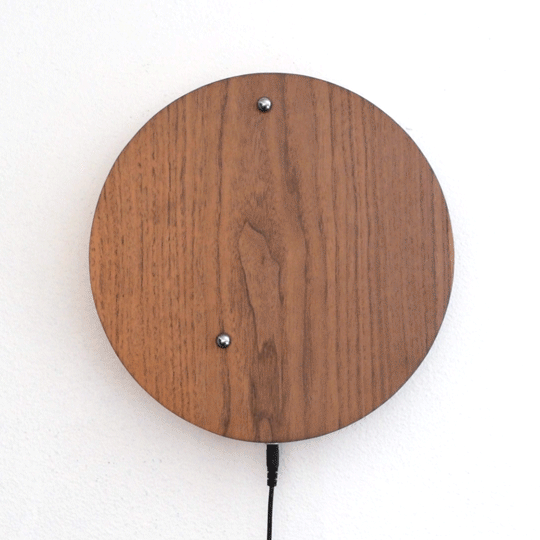
Timepieces are cool no matter how simplistic or granular they are. Sometimes its nice not to know exactly what time it is down to the second, and most of the really beautiful clocks are simple as can be. If you didn’t know this was a clock, it would still be fascinating to watch the bearings race around the face.
This clock takes design cues from the Story clock, a visual revolution in counting down time which uses magnetic levitation to move a single bearing around the face exactly once over a duration of any length as set by the user. As a clock, it’s not very useful, so there’s a digital readout that still doesn’t justify the $800 price tag.
[tomatoskins] designed a DIY version that’s far more elegant. It has two ball bearings that move around the surface against hidden magnets — an hour ball and a minute ball. Inside there’s a pair of 3D-printed ring gears that are each driven by a stepper motor and controlled with an Arduino Nano and a real-time clock module. The body is made of plywood reclaimed from a bed frame, and [tomatoskins] added a walnut veneer for timeless class.
In addition to the code, STLs, and CAD files that birthed the STLs, [tomatoskins] has a juicy 3D-printing tip to offer. The gears had to be printed in interlocked pieces, but these seams can be sealed with a solution of acetone and plastic from supports and failed prints.
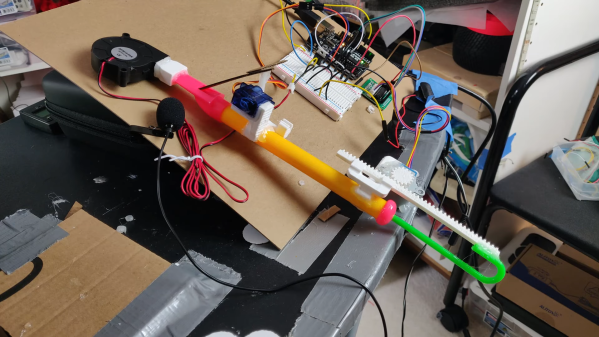
Thanks to some clever Arduino-driven automation, [Gurpreet] can maintain a safe distance from his slide whistle while interacting with it. Slide whistles need two things — air coming in from the top, and actuation at the business end. The blowing force now comes from a focused fan like the ones that cool your printed plastic as soon as the hot end extrudes it. A stepper motor moves the slide up and down using a printed rack and pinion.
Here’s a smooth touch — [Gurpreet] added a micro servo to block and unblock the sound hole with a cardboard flap to make the notes more distinct. Check out the build video after the break, which includes a music video for “My Heart Will Go On”, aka the theme from Titanic. It’s almost like the ship herself is playing it on the steam whistles from the great beyond.
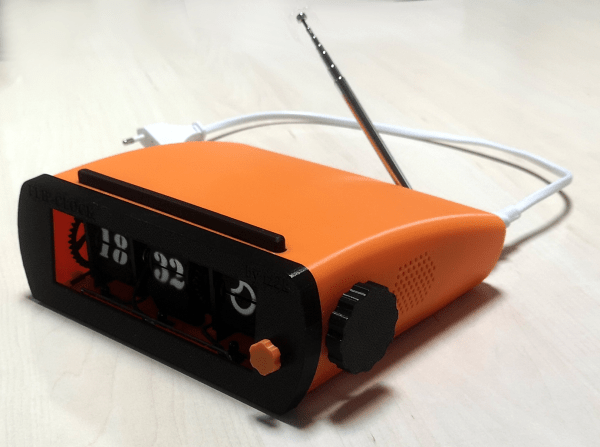
There’s a Raspberry Pi to fetch the time, the weather, and the Spotify. Old flip clocks invariably tuned in FM radio, so [iz2k] used an RTL-SDR dongle and a software decoder for the deed. This clock even has a big snooze bar, which functions like a night light when there is no alarm actively going off. The three groups of painstakingly-printed flaps are controlled with stepper motors and an IR transmitter/receiver pair to do the counting.
For the interface, [iz2k] kept things nice and simple. The big-knobbed rotary encoder handles volume up/down/mute, and the little one on the front switches between FM radio, Spotify, and silence. Moving either knob generates feedback by flashing LEDs that sit underneath the display. Take a few seconds to flip past the break and check out the short demo.
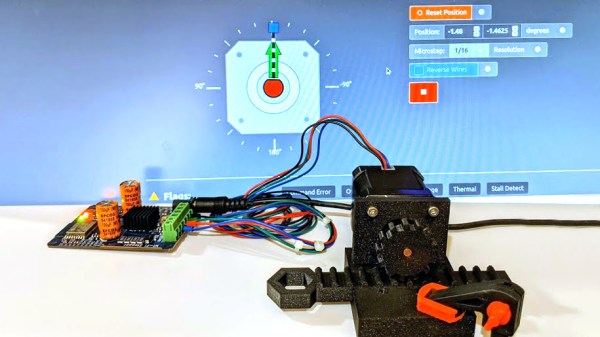
Like most of us, I sometimes indulge in buying a part for its potential or anticipated utility rather than for a specific project or purpose. That’s exactly how I ended up with the WSX100 Wi-Fi Stepper, a single board device intended to be one of the fastest and easiest ways to get a stepper motor integrated into a project. Mine came from their Crowd Supply campaign, which raised money for production and continues to accept orders.
What’s It For?
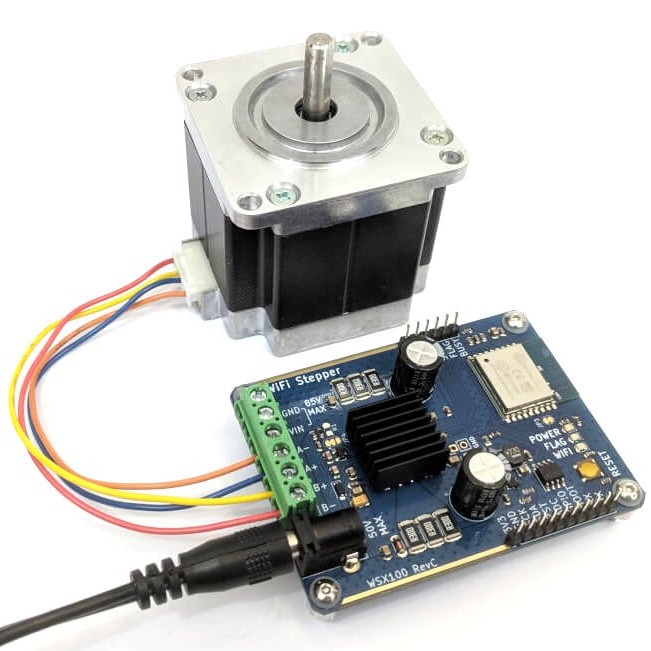
The WSX100 Wi-Fi Stepper Driver (with motor), by Good Robotics
The main reason the Wi-Fi Stepper exists is to make getting a stepper motor up and running fast and simple, in a way that doesn’t paint a design into a corner. The device can certainly be used outside of prototyping, but I think one of its best features is the ability to help quickly turn an idea into something physical. When prototyping, it’s always better to spend less time on basic bits like driving motors.
In a way, stepper motors are a bit like RGB LEDs or LCD displays were before integrated drivers and easy interfaces became common for them. Steppers require work (and suitable power supplies) to get up and running, and that effort can be a barrier to getting an idea off the ground. With the Wi-Fi Stepper, a motor can be fired up and given positional commands (or set to a speed and direction) in no time at all. By sending commands over WiFi, there isn’t even the need to wire up any control logic.
At a recent swap meet, [digitalrice] found what appeared to be a like-new QIDI X-Plus 3D printer. It wasn’t clear what was wrong with it, but considering it retails for $900 USD, he figured the asking price of $150 was worth the gamble. As you might expect, the printer ended up being broken. But armed with experience and a supply of spare parts, he was able to get this orphaned machine back up and running.
The first and most obvious problem was that the printer’s Z axis didn’t work properly. When the printer tried to home the axis, one of the motors made a terrible noise and the coupler appeared to be spinning backwards. From his experience with other printers, [digitalrice] knew that the coupler can slip on the shaft, but that didn’t appear to be the case here. Removing the stepper motor and testing it in isolation from the rest of the machine, he was able to determine it needed replacing.
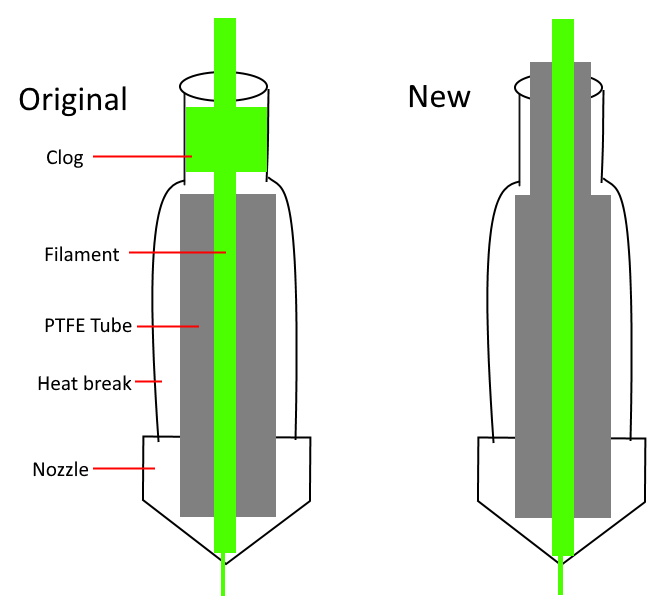
Improving the printer’s filament path.
Unfortunately, the spare steppers he had weren’t actually the right size. Rather than waiting around for the proper one to come in the mail, he took an angle grinder to the stepper’s shaft and cut off the 5 mm needed to make it fit, followed by a few passes with a file to smooth out any burrs. We’re not sure we’d recommend this method of adjustment under normal circumstances, but we can’t argue with the results.
The replaced Z motor got the printer moving, but [digitalrice] wasn’t out of the woods yet. At this point, he noticed that the hotend was hopelessly clogged. Again relying on his previous experience, he was able to disassemble the extruder assembly and free the blob of misshapen PLA, leading to test prints which looked very good.
But success was short lived. After swapping to a different filament, he found it had clogged again. While clearing this second jam, he realized that the printer’s hotend seemed to have a design flaw. The PTFE tube, which is used to guide the filament down into the hotend, didn’t extend far enough out. Right where the tube ended, the filament was getting soft and jamming up the works. With a spare piece of PTFE tube and some manual reshaping, he was able to fashion a new lining which would prevent the filament from softening in this key area; resulting in a more reliable hotend than the printer had originally.
It’s great to see this printer repaired to working condition, especially since it looks like [digitalrice] was able to fix a core design flaw. But a broken 3D printer can also serve as the base for a number of other interesting projects, should you find yourself in a similar situation. For example, replacing the extruder assembly with a digital microscope can yield some very impressive results.
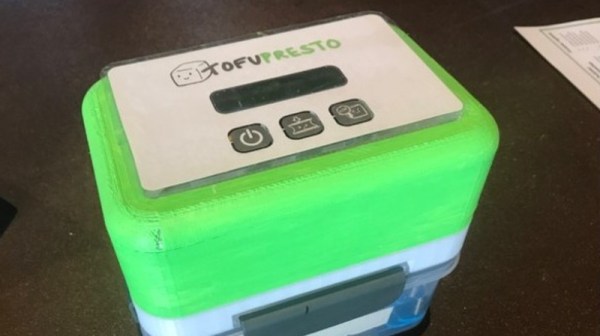
Tofu is a fairly common food in East and Southeast Asian cuisines, but it has also been making its way around vegetarian circles as a meat substitute. While it may be a more environmentally friendly source of protein than meat, it does have the unfortunate side effect of being fairly tedious to cook. To reach the right consistency, tofu requires hours of pressing to drain excess water, which tends to be tedious for most amateur cooks.
A team of students at HackMIT developed a contraption that incrementally presses tofu for you, using signals sent over WiFi to initialize the device. Several 3D-printed components extend an existing food container, along with a stepper motor, motor shield, Adafruit Feather HUZZAH, and a screen.
The motor steps at a rate of 30rpm once a signal is sent from a mobile application, causing four connected threaded rods to begin rotating. The tofu tray travels upwards to press against its lid, draining out excess water. A central gear box containers complementary cutouts that allow the tofu platform to travel vertically when shafts are rotated, pushed by nuts below the platform. The students also included a screen indicating time remaining, as well as a notification sent to the user once the tofu is finished being pressed.
It’s certainly a useful solution that will hopefully increase the popularity of tofu-based recipes!