Digital Kitchen Spoon Makes Weighing Your Ingredients A Snap

There seem to be two camps when it comes to recipes: those based on volume-based measurements, and those based on the weight of ingredients. Gravimetric measurements have the advantage of better accuracy, but at the price of not being able to quickly scoop out a bit of this and a dash of that. It would be nice to get the convenience of volumetric measurements with the accuracy of weighing your ingredients, wouldn’t it?

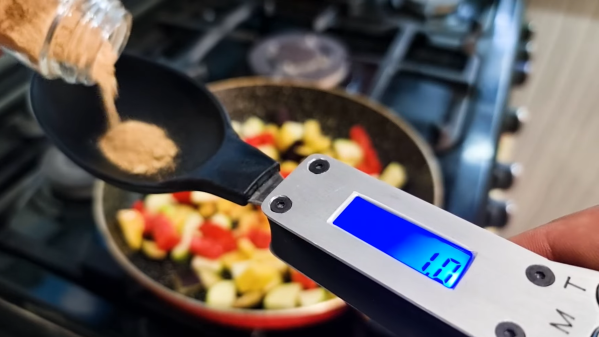
It would, and that’s just what [Penguin DIY] did with this digital kitchen spoon scale. The build started with, perhaps not surprisingly, a large mixing spoon and a very small kitchen scale. The bowl of the spoon got lopped off the handle and attached to the strain gauge, which was removed from the scale along with its LCD display and circuit board. To hold everything, a somewhat stocky handle was fabricated from epoxy resin sandwiched between aluminum bolsters. Compartments for the original electronics parts, as well as a LiPo battery and USB charger module, were carved out of the resin block, and the electronics were mounted so that the display and controls are easily accessible. The video below shows the build as well as the spoon-scale in action in the kitchen.

We think this is not only a great idea but a fantastic execution. The black epoxy and aluminum look amazing together on the handle, almost like a commercial product. And sure, it would have been easy enough to build a scale from scratch — heck, you might even be able to do away with the strain gauge — but tearing apart an existing scale seems like the right move here.

Continue reading “Digital Kitchen Spoon Makes Weighing Your Ingredients A Snap”

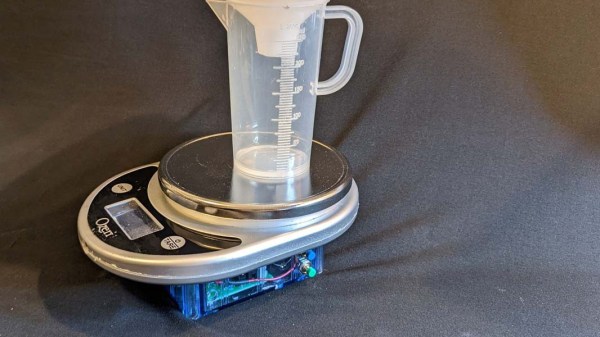
picture showing the re-built scale with an extra blue box with electronics on the bottom of it. on the scale, there's a transparent food-grade plastic glass with measurement marks on the side.

Urine Flow Measurement Made Accessible With UroFlow

If you’re dealing with a chronic illness, the ability to continuously monitor your symptoms is indispensable, helping you gain valuable insights into what makes your body tick – or, rather, mis-tick. However, for many illnesses, you need specialized equipment to monitor them, and it tends to be that you can only visit your doctor every so often. Thankfully, we hackers can figure out ways to monitor our conditions on our own. With a condition called BPH (Benign Prostate Hyperplasia), one of the ways to monitor it is taking measurements of urinary flow rate. Being able to take these measurements at home provides better insights, and, having found flow rate measurement devices to be prohibitively expensive to even rent, [Jerry Smith] set out to build his own.

This build is truly designed to be reproducible for anyone who needs such a device. Jerry has intricately documented the project and its inner workings – the 31-page document contains full build instructions, BOM for ordering, PCB description and pinout diagrams, calibration and validation instructions, and even software flowcharts; the GitHub repo has everything else you might need. We’re pleasantly surprised – this amount of documentation isn’t typically seen in hacker projects, and is even more valuable considering that this is a medical device that other hackers in need will want to reproduce.

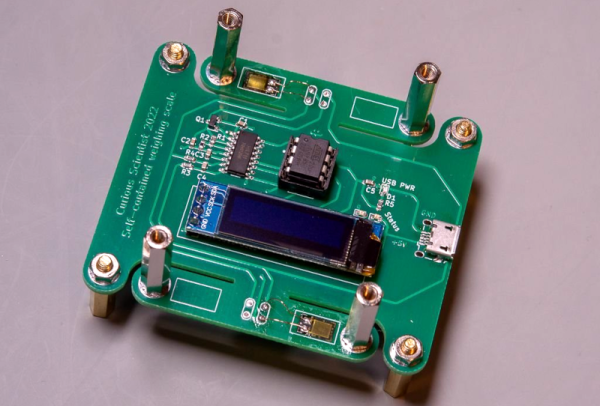
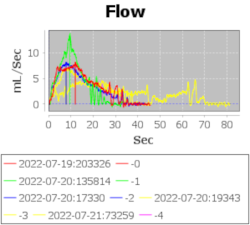
Graph titled "Flow", with X axis saying "seconds" and Y axis saying "ml/Sec". There's differently colored plots on the graph, each apparently corresponding to a different measurement.For the hardware, [Jerry] took a small digital scale of a certain model and reused its load cell-based weighing mechanism using an HX711 amplifier, replacing the screen and adding an extra box for control electronics. With an Arduino MKR1010 as brains of the operation, the hardware’s there to log flow data, initially recorded onto the SD card, with WiFi connectivity to transfer the data to a computer for plotting; a DS3234 RTC breakout helps keep track of the time, and a custom PCB ties all of these together. All of these things are easy to put together, in no small part due to the extensive instructions provided.
Continue reading “Urine Flow Measurement Made Accessible With UroFlow”

An In-Depth Look At The Haptic Smart Knob

At Hackaday, we love those times when we get a chance to follow up on a project that we’ve already featured. Generally, it’s because the project has advanced in some significant way, which is always great to see. Sometimes, though, new details on the original project are available, and that’s where we find ourselves with [Scott Bez] and his haptic smart knob project.

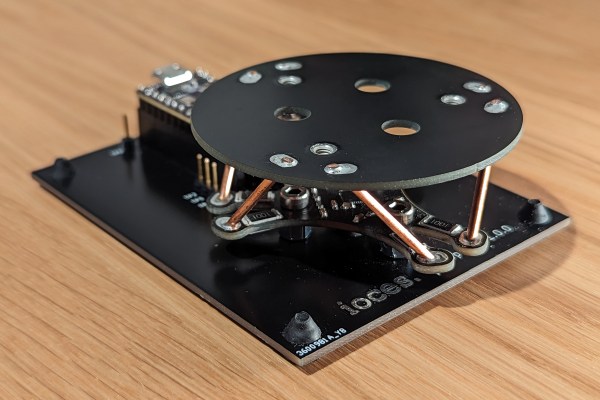
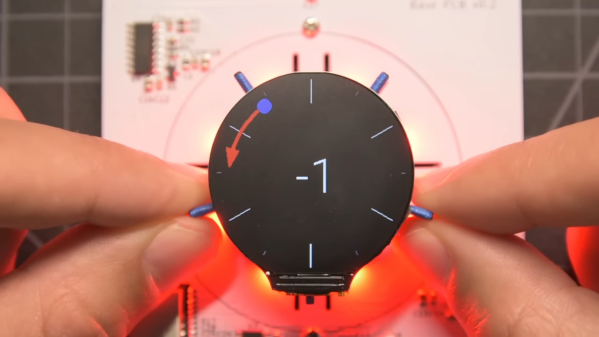
Alert readers may recall [Scott]’s announcement of this project back in March. It made quite a splash, with favorable comments and a general “Why didn’t I think of that?” vibe. And with good reason; the build quality is excellent, and the idea is simple yet powerful. By attaching a knob to the shaft of a brushless DC motor and mounting a small circular LCD screen in the middle, [Scott] came up with an input device that could be reprogrammed on the fly. The BLDC can provide virtual detents at any interval while generating haptic feedback for button pushes, and the LCD screen can provide user feedback.

But how is such a thing built? That’s the subject of the current video, which has a ton of neat design details and build insights. The big challenge for [Scott] was supporting the LCD screen in the middle of the knob while still allowing the knob — and the motor — to rotate. Part of the solution was, sadly, a hollow-shaft motor that was out of stock soon after he released this project; hopefully a suitable replacement will be available soon. Another neat feature is the way [Scott] built tiny strain gauges into the PCB itself, which pick up the knob presses that act as an input button. We also found the way button press haptics are provided by a quick jerk of the motor shaft very clever.

This is one of those projects that seems like a solution waiting for a problem, and something that you’d build just for the coolness factor. Hats off to [Scott] for following up a sweet build with equally juicy details.

Continue reading “An In-Depth Look At The Haptic Smart Knob”

Raspberry Pi Test Stand Tells You Which Glues To Use

Not all glues are created equal; or rather, not every glue is good for every application. But how is one to know which glue to use in which kinds of joints? The answer to that is not always clear, but solid numbers on the comparative strength of different glues are a great place to start.

To quantify what can ordinarily be a somewhat subjective process, there’s probably no one better than woodworker and hacker [Matthias Wandel], equipped as he is with his DIY strength-tester. Using its stepper-driven power to blast apart glued lap joints, [Matthias] measured the yield point of the various adhesives using a strain gauge connected to a Raspberry Pi.

His first round of tests had some interesting results, including the usually vaunted construction adhesive ending up in a distant last place. Also performing poorly, at least relative to its reputation and the mess it can cause, was the polyurethane-based Gorilla Glue. A surprise standout in overall strength was hot glue, although that seemed to have a sort of plastic yield mode. Ever the careful empiricist, [Matthias] repeated his tests using hardwoods, with remarkably different results; it seems that glues really perform better with denser wood. He also repeated a few tests to make sure every adhesive got a fair shake. Check out the video below for the final results.

It’s always good to see experiments like this that put what we often take for granted to the test. [John] over at the Project Farm channel on YouTube does this kind of stuff too, and even did a head-to-head test of epoxy adhesives.

Continue reading “Raspberry Pi Test Stand Tells You Which Glues To Use”

Haptic Smart Knob Does Several Jobs

A knob is a knob, a switch is a switch, and that’s that, right? And what about those knobs that have detents, set in stone at the time of manufacturing? Oh, and those knobs that let you jog left to right and then snap back to center — that can’t be modified…right? Well, you likely know where this is going, and in the video below the break, [scottbez1] shows off a new open source haptic input knob that can be all of these things with just some configuration changes!

The list of possibilities is long: virtual snap points, virtual spring loading, virtual detents, virtual end points. It’s a virtual smörgåsbord of configuration options that make this haptic smart knob a one stop shop for all of your knob needs. This is all possible because the knob contains a high resolution magnetic encoder chip that has a single degree resolution. The sensor is coupled, through software, to a brushless DC motor. The round LCD gives visual feedback as well.

As [Myself] on the Hackaday Discord channel noted, having configurable spacing and strength for detents, springs, and stops, is nothing short of incredible. Being able to reconfigure the knob at-will means that it can become context sensitive. It’s wonderfully unique and it’s open source, so you can make your own with the information available at GitHub.

And according to its creator, the only thing the Haptic Smart Knob can’t do is do your taxes or blend your margarita. Well, it’s open source, so perhaps some of our more enterprising readers can submit just the right pull request.

This isn’t Hackaday’s first Motorized Volume Knob feature, but it might be one of the neatest we have seen so far. Thanks to [mattvenn] on the Hackaday Discord server for the great tip!

Continue reading “Haptic Smart Knob Does Several Jobs”

wood strength tester

Shop-Built Rig Measures Strength Of Wood Accurately

Wood is an incredibly versatile material, but like everything else, it has its limits. Build a chair from weak wood and the worst that can happen is probably not that bad. But if you build machine tools from wood, the stakes for using the wrong wood can be a bit higher.

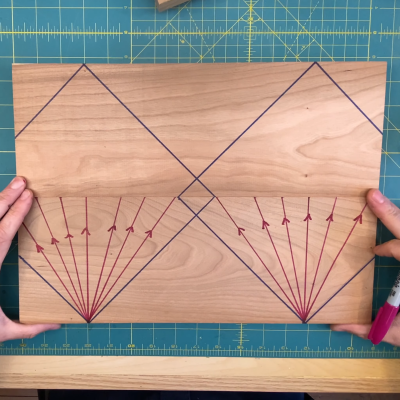
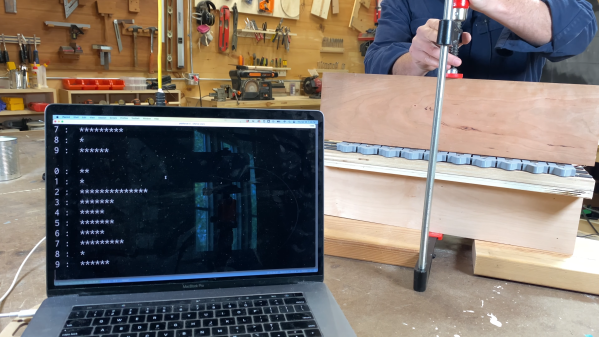
That’s the thinking behind the wood strength testing setup [Matthias Wandel] came up with. Previously, he had a somewhat jury-rigged test setup with a hydraulic bottle jack to apply force to the test piece and a bathroom scale to make measurements. That setup was suboptimal, so version two used a jackscrew to apply the force, but the bathroom scale still left the measurements open to interpretation. Version three, the topic of the video below, went with strain gauges and an A/D converter connected to a Raspberry Pi to automate data collection. The jackscrew was also integrated into the test setup with a stepper motor and, of course, [Matthias]’ famous wooden gears.

While the test rig is pretty simple in design, there’s a lot of subtlety to the calibration to make sure that it’s measuring the test material itself and not just compliance within the mechanism. It’s just another in a long line of data-gathering exercises that [Matthias] seems to groove on, like his recent woodshop electrical explorations.

Continue reading “Shop-Built Rig Measures Strength Of Wood Accurately”

Art of 3D printer in the middle of printing a Hackaday Jolly Wrencher logo

3D Printering: Is Hassle-Free Bed Leveling Finally Here?

3D printers have come a long way over the past several years, but the process of bed leveling remains a pain point. Let’s take a look at the different ways the problem has been tackled, and whether recent developments have succeeded in automating away the hassle.

Anycubic Vyper 3D printer, front view
Anycubic Vyper, with an auto-leveling feature we decided to take a closer look at.

Bed leveling and first layer calibration tends to trip up novices because getting it right requires experience and judgment calls, and getting it wrong means failed prints. These are things 3D printer operators learn to handle with time and experience, but they are still largely manual processes that are often discussed in ways that sound more like an art than anything else. Little wonder that there have been plenty of attempts to simplify the whole process.

Some consumer 3D printers are taking a new approach to bed leveling and first layer calibration, and one of those printers is the Anycubic Vyper, which offers a one-touch solution for novices and experienced users alike. We accepted Anycubic’s offer of a sample printer specifically to examine this new leveling approach, so let’s take a look at the latest in trying to automate away the sometimes stubborn task of 3D printer bed leveling.

Continue reading “3D Printering: Is Hassle-Free Bed Leveling Finally Here?”