BGA Soldering And Inspection

If you want to build cool things these days, you’ve probably had to master surface mount electronics. However, for many people, ball grid array (BGA) is still intimidating. Have a look at [VoltLog’s] video about his techniques for soldering BGA and inspecting that you managed to do it right.

He’s got quite a few tips about things like surface finish and flux selection. It looks easy when he does it. Of course, having a good PCB with good registration markings will help too.

Continue reading “BGA Soldering And Inspection”

Manual Pick And Place Turntable Makes Board Assembly Easier

Surface mount devices were once upon a time considered a huge imposition for the electronics hobbyist. Tiny, difficult to solder by hand, and barely even labelled, many wondered whether the pastime was about to hit a brick wall entirely. Instead, enterprising hackers and makers set about learning new tricks and techniques to work with the technology, and we’ve never looked back since. [Seon] is one such enthusiast, and has built a useful turntable for making manually picking and placing boards easier. (Video, embedded below.)

The design is something [Seon] has refined gradually over time, having built two initial versions of the turntable before finally feeling ready to do a wider public release with version 3. It consists of a rotating caddy that has radial slots that hold all the tiny SMD parts, that can be labelled for easy parts identification. There’s also an acrylic window that ensures only one segment of the caddy is open at a time, to avoid accidentally dropping similar, tiny looking parts into adjacent slots – a big improvement over the first design. There’s then a smaller rotating central pad upon which a PCB can be placed, ready to receive parts.

Files are available on Github for those wanting to build their own. [Seon] does a great job explaining how the final design came about, after populating hundreds of boards on his earlier designs and learning their limitations. If doing it by hand just doesn’t cut it for you, though, you can always built a fully automated PnP.

Continue reading “Manual Pick And Place Turntable Makes Board Assembly Easier”

Learn Bil Herd’s DIY Surface Mount Assembly Process

You can do your own Surface Mount Technology based PCB assembly with just a handful of tools and some patience. At the heart of my SMT process is stopping to inspect the various steps all while trying to maintain a bit of cleanliness in the process.

Surface mount or Surface Mount Technology (SMT) is the modern way to assemble Printed Circuit Boards (PCB) and is what is commonly seen when opening a modern piece of tech. It’s much smaller than the older Through-Hole (TH) technology where the component leads were inserted into holes in PCB, and act we called “stuffing” since we had to stuff the components into the holes.

A few specialized tools make this a lot easier, but resourceful hackers will be able to pull together a solder paste stencil jig, vacuum tweezers, and a modified toaster oven with a controller that can follow the reflow profile of the solder paste. Where you shouldn’t skimp is on the quality, age, and storage of the solder paste itself.

Join me after the break for my video overview of the process I use in my workshop, along with details of every step of my SMT assembly process.

Continue reading “Learn Bil Herd’s DIY Surface Mount Assembly Process”

Making PCBs With A Vinyl Cutter

You might assume that you need a lot of expensive stuff to make your own PCBs, but that isn’t the case: you can do it with a vinyl cutter and a few common chemicals and tools. [Emiliano Valencia] has laid out the entire process. While we’ve seen plenty of make your own PCB guides before, this one goes a bit further as it covers using the vinyl cutter to make solder masks, so you can use it for surface mount designs.

The end result of the process that [Emilano] lays out is the tinyDice, a cute little electronic die that can fit on a keyring. The whole process is very well written up, and even experienced PCB makers will probably find a few useful tricks here.

The really interesting part for us was using the vinyl cutter to make three parts of the process: the etching mask, the solder mask that protects the traces and the solder stencil that applies the solder to the pads for surface mounting. Continue reading “Making PCBs With A Vinyl Cutter”

DIY Dispenser Places Solder Paste Without The Mess

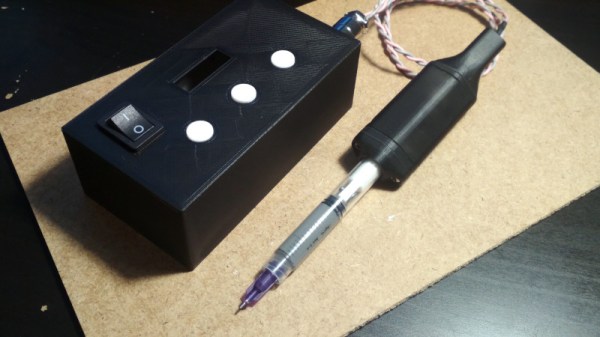
When doing surface-mount assembly you can certainly use a soldering iron in the traditional way, but it’s far more convenient to cover the pads with solder paste, place the components, and bake the board in a reflow oven. If you’re lucky enough to have a precut stencil this can be done in one go, otherwise a tiny blob of paste must be laboriously placed on each pad by hand. [Kevarek] has made this a bit easier by designing a low-cost handheld solder paste dispenser.

The unit takes the form of a handheld 3D printed wand containing a geared motor and a threaded shaft, that engages with a syringe full of paste clamped onto its end. There’s a control box powered by an STM32 microcontroller that not only allows adjustment of flow rate, but provides advanced features such as performing a slight retraction at the end of dispensing to avoid excess paste. There’s a push-button on the wand for control, as well as a set on the control box to adjust its parameters.

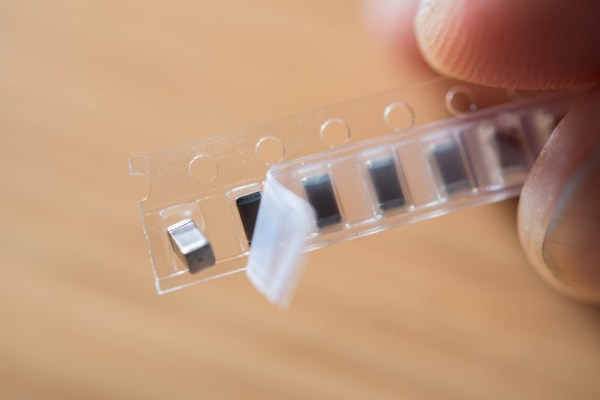
If you’ve ever handled solder paste, you’ll know it can be a uniquely annoying and finicky substance. Either it’s too stiff and clumps together, or too runny and spreads out. No doubt some readers are lucky enough to always have fresh paste of the highest quality to hand, but too often a hackerspace will have a tub of grey goop with uncertain provenance. We like this tool, and while it won’t make up for poor quality or badly stored paste, at least it’ll make applying paste a breeze.

We’ve covered paste dispensers quite a few times in the past, but you might also wish to read our in-depth guide to the subject.

Automatic Component Tape Cutter For When Your Electronics Kit Hits The Big Time

Even for the simplest of products, production at scale can be big challenge. For example, you might find yourself spending many hours manually counting and cutting strips of component tape to go with the DIY electronics kit your selling on Tindie. [Tom Keddie] found himself in similar position some time ago, and built himself an automated component counter and tape cutter.

[Tom] posted the video of his old machine (see it after the break) after a call for help from another Twitter user who found himself with a lot of component strips to cut. The frame of the machine is made from 20×20 aluminium extrusions and laser cut plexiglass. The tape is pulled off the reel by a stepper motor using a 3D printed sprocket, with the tape held on by Lego wheel and tension spring. A second idler sprocket with tensioner is used to guide the tape through two photo-interrupters that can count holes in opaque tape or the components in clear tape. The cutter itself it an Exacto blade mounted on a wooden block in a guillotine-like arrangement, driven by another stepper motor and a threaded rod as lead screw. Everything is of course controlled by an Arduino. Although not used any more, [Tom] says it worked very well in its day.

The availability of cheap laser cutting, 3D printing and components like aluminium extrusions and stepper motors have really made it possible for anyone to add some automation to production in the home workshop. You won’t be surprised that we’ve seen something like this before, but we’ve also seen similar machines for wiring prep and through-hole resistors. Let us hear your production hacks in the comments, or drop us a tip if you’ve documented it!

Continue reading “Automatic Component Tape Cutter For When Your Electronics Kit Hits The Big Time”

3D-Printed Magazines Tame The SMD Tape Beast

Chances are pretty good that you’ve got a box or a bin somewhere in your shop with coils of SMD component tapes in it. If you’re lucky, the coils are somewhat contained in their conductive Mylar bags; if you’re more like us, the tapes are flopping around loose in an attempt to seemingly tie themselves together. In either case, these 3D-printed SMD magazines will bring a little order to the chaos, and make board assembly a little bit easier.

When we saw [Robin Reiter]’s build, we thought these would be cassettes for some sort of pick-and-place machine. But while they certainly look like they could be adapted to an automated PnP setup, [Robin]’s main goal was to provide organized storage for loose tapes. Each magazine has a circular reservoir to hold the coiled tape, with an exit slot at the front and a wedge that directs the cover tape in the opposite direction. This removes the cover tape to expose the components, clears it away from the pickup area, and as a bonus, allows the component tape to be advanced just by pulling back on the cover. Each magazine has a spring-loaded latch that clips onto a base that looks a bit like a DIN-rail; the weighted base holds several magazines and makes it easy to set up a manual pick-and-place session. The video below shows all the details.

For certain personality types, this really scratches an itch. We love the modular design, and the organization that these would bring to our shop would really help clean things up a bit. And if [Robin] were ever to take this design to the next level, adding something like this could be useful.

Continue reading “3D-Printed Magazines Tame The SMD Tape Beast”