Peek Into This Synth’s Great Design (And Abandoned Features)

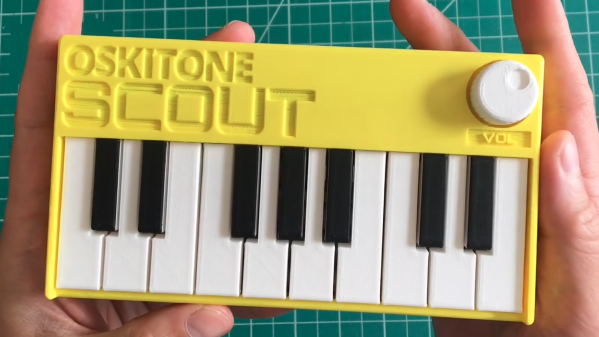
[Tommy]’s POLY555 is an analog, 20-note polyphonic synthesizer that makes heavy use of 3D printing and shows off some clever design. The POLY555, as well as [Tommy]’s earlier synth designs, are based around the 555 timer. But one 555 is one oscillator, which means only one note can be played at a time. To make the POLY555 polyphonic, [Tommy] took things to their logical extreme and simply added multiple 555s, expanding the capabilities while keeping the classic 555 synth heritage.

The real gem here is [Tommy]’s writeup. In it, he explains the various design choices and improvements that went into the POLY555, not just as an instrument, but as a kit intended to be produced and easy to assemble. Good DFM (Design For Manufacturability) takes time and effort, but pays off big time even for things made in relatively small quantities. Anything that reduces complexity, eliminates steps, or improves reliability is a change worth investigating.

For example, the volume wheel is not a thumbwheel pot. It is actually a 3D-printed piece attached to the same potentiometer that the 555s use for tuning; meaning one less part to keep track of in the bill of materials. It’s all a gold mine of tips for anyone looking at making more than just a handful of something, and a peek into the hard work that goes into designing something to be produced. [Tommy] even has a short section dedicated to abandoned or rejected ideas that didn’t make the cut, which is educational in itself. Want more? Good news! This isn’t the first time we’ve been delighted with [Tommy]’s prototyping and design discussions.

POLY555’s design files (OpenSCAD for enclosure and parts, and KiCad for schematic and PCB) as well as assembly guide are all available on GitHub, and STL files can be found on Thingiverse. [Tommy] sells partial and complete kits as well, so there’s something for everyone’s comfort level. Watch the POLY555 in action in the video, embedded below.

Continue reading “Peek Into This Synth’s Great Design (And Abandoned Features)”

Cassette Synth Plays With Speed Control

Tape may not sound that great compared to vinyl, but cassette players can be tons of fun when it comes to making your own music. See for instance the Mellotron, or this relatively easy DIY alternative, [Rich Bernett]’s Cassettone cassette player synth.

The Cassettone works by substituting the trim pot that controls the speed of the tape player’s motor with a handful of potentiometers. These are each activated with momentary buttons located underneath the wooden keys. In the video after the break, [Rich] gives a complete and detailed guide to building your own. There’s also a polished Google doc that includes a schematic and the pattern pieces for making the cabinet.

Speaking of which, isn’t the case design nice? It’s built out of craft plywood but aged with varnish and Mod-Podged bits and bobs from vintage electronics magazines. This really looks like a fun little instrument to play.

Would you rather control your tape synth with a MIDI keyboard? Just add Arduino.

Continue reading “Cassette Synth Plays With Speed Control”

Procedural Barcode Synth Is As Simple As Black And White

We are no stranger to peculiar and wonderful musical instruments here at Hackaday. [James Bruton] has long been fascinated with barcode scanners as an input source for music and now has a procedural barcode-powered synth to add to his growing collection of handmade instruments. We’ve previously covered his barcode guitar, which converts a string of numbers from the PS/2 output to pitches. This meant having a large number of barcodes printed as each pitch required a separate barcode. As you can imagine, this makes for a rather unwieldy and large instrument.

Rather than looking at the textual output of the reader, [James] cracked it open and put it to the oscilloscope. Once inside, he found a good source that outputs a square wave corresponding to the black and white lines that the barcode sees. Since the barcodes [James] is using don’t have the proper start and stop codes, the barcode reader continuously scans.  Normally it would stop the laser to send the text over the USB or PS/2 connection. A simple 5v to 3.3v level shifter feeds that square wave into a Teensy board, which outputs the audio.

A video showcasing a similar technique inspired [James] with this project. The creators of that video have a huge wall of different patterns of black and white lines. [James’s] next stroke of brilliance was to have a small HDMI display to generate the barcodes on the fly. A Raspberry Pi 4 reads in various buttons via GPIO and displays the resulting barcode on the screen. A quick 3d printed shell rounds out the build nicely, keeping things small and compact. All the code and CAD files are up on GitHub.

Continue reading “Procedural Barcode Synth Is As Simple As Black And White”

Adding MIDI To A Mini Synth Is Easy As Pi

There are a handful of relatively dirt cheap synths out there like the KORG Monotron, but many of them use ribbon controllers that aren’t very precise.  Ribbon controllers basically slide pots that you operate with your finger or a stylus.  They’re painted to look like piano keys in order to show you approximately where the notes are supposed to be. The Stylophone is another extremely affordable synth that does even less as a synthesizer and uses this type of input. It’s a fun input if you don’t mind imprecision, but can be annoying otherwise.

[schollz] isn’t satisfied to synth this way, so they added MIDI input to their KORG Monotron using a Raspberry Pi and a DAC. Fortunately, the Monotron is quite the hackable little synth, with nice, big, labelled pads on the PCB.

All it really took was a couple of solder joints in the right places, plus a clever Python script. The script listens for MIDI input from a keyboard, and then controls an MCP4725 DAC, which sends voltages to the Monotron. [schollz] wrote a tuning function that computes the FFT of the MIDI tones to find the fundamental frequencies of each to send along to the Monotron. Check it out after the break.

If liquid control is what you’re after but all you have is a keyboard, try making your own ribbon controller.

Continue reading “Adding MIDI To A Mini Synth Is Easy As Pi”

The Game Boy As A Midi Synthesiser

In the world of chiptune music there are many platforms to choose from, each with their own special flavour tot heir sound. The Game Boy has a particular following, but it differs from some of its contemporary platforms in having a custom sound chip built into the same silicon as its processor. You can’t crank open a Game Boy and lift out the sound chip for your own synth project, instead you must talk to it through the Game Boy’s Z80 processor. This is something [Adil Soubki] knows well, as he’s completed a project that turns the handheld console into a MIDI synthesiser.

A Game Boy was designed to play games and not as a developer’s toy, so it doesn’t exactly roll out the red carpet for the hacker. He’s got under the console’s skin by mapping a section of its memory address map to the pins on a Teensy microcontroller board, and running some Game Boy code that reads the vaues there and uses them to configure the sound hardware. The Teensy handles the translation between MIDI and these byte values, turning the whole into a MIDI synthesiser. It’s a succesful technique, as can be seen in the video below the break. Best of all, the code is available, so you can have a go for yourself.

We’ve featured Game Boy synths before here at Hackaday, but usually they have been of the more conventional variety.

Continue reading “The Game Boy As A Midi Synthesiser”

Quality Upgrades Give Old Synth New Lease On Life

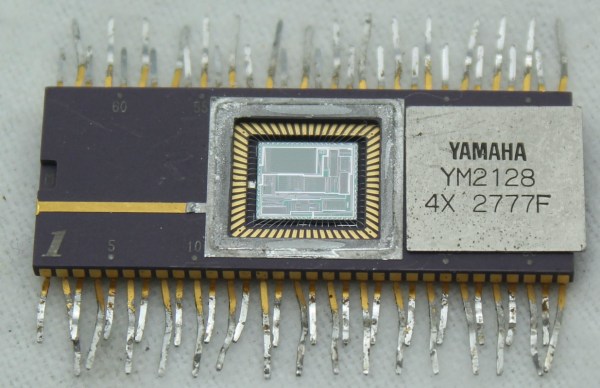
Technology marches on at a rapid pace, but in many fields much love remains for older hardware. While still highly capable, there’s often room for improvement thanks to components made available in the intervening years. After longing for his SY-77 synthesiser of the 90s, [Mark] sourced a tired SY-99, the next model up in the line – and set to work on some upgrades.

The SY-99 relied on floppy disks for storage, but the mechanical drives are now difficult to maintain, to say nothing of the unreliability of floppy media. [Mark] installed a SD Card HXC floppy emulator instead, using a Sparkfun SD breakout to neatly install the card slot in the synth’s case. The tired LCD was replaced with a newer model using the same controller, with an LED backlight proving a nice upgrade over the original EL unit.

Additionally, [Mark] realised that there was scope to create his own upgrade modules with off-the-shelf SRAM chips. This proves far cheaper than sourcing second-hand Yamaha stock off eBay, and is readily achievable by anyone with a basic understanding of digital logic. The ICs can be had for a few dollars, versus well over $50 for the original cards – if you can even find them. Some labor is involved, but it’s a lot less painful to the wallet.

[Mark]’s work is a great example of how hardware that was once prohibitively expensive can be given greater functionality at a lower cost thanks to new technology. We’ve seen other synths modded too, like this Korg Monotron. If you’ve been tinkering away in a keyboard yourself, be sure to let us know!

[Thanks to CRJEEA] for the tip]

Adora-BLE Synth Wails Without Wires

Isn’t this the cutest little synth you ever saw? The matching sparkly half-stack amp really makes it, visually speaking. But the most interesting part? There’s not a wire in sight, ’cause [Blitz City DIY]’s futuristic rig sends the bleep boops over Bluetooth LE.

Hardware-wise, both the synth and the amp are fairly simple. Underneath each of those cute little printed keys is one of those clicky momentaries that usually come with bright button caps in primary colors — the keys themselves just press-fit over the tops. All twelve ebonies and ivories are connected up to an Adafruit Feather, which communicates over Bluetooth LE to a CircuitPlayground Bluefruit (CPB) in the amp. Each time a note is played on the synth, its corresponding color circles comet-like around the CPB’s NeoPixels, which shine through the amp’s speaker grille.

The super interesting part is that all the hard work is happening in the code. Both boards have the same array of colors in rainbow order, and the CPB has an array of tone frequencies that match up one for one with the colors. For every note played, the CPB looks up the color, swirls it, and plays the note. If you want to build one, this project is wide open — [Blitz City DIY] even made a learn guide with all the dirty details. Be sure to check out the demo and extended walk-through after the break.

More in the market for making a computer keyboard? Just grab the nearest ESP32.

Continue reading “Adora-BLE Synth Wails Without Wires”