How many times have you wished for a pocket-sized multimeter? How about a mini microcontroller-based testing rig? Have you ever dared to dream of a device that does both?
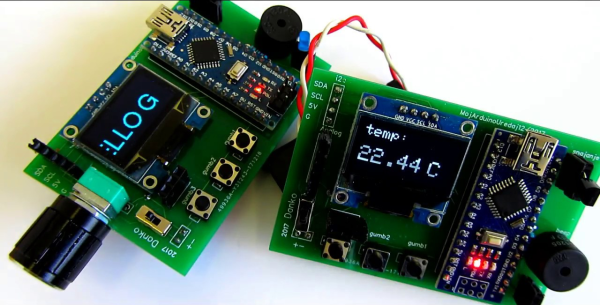
Multiduino turns an Arduino Nano into a Swiss Army knife of portable hacking. It can function as an analog multimeter to measure resistance, voltage drop, and continuity. It can also produce PWM signals, read from sensors, do basic calculator functions, and display the health of its rechargeable battery pack.
Stick a 10kΩ pot in the left-side header and you can play a space shooter game, or make line drawings by twisting the knob like an Etch-A-Sketch. Be sure to check out the detailed walk-through after the break, and a bonus video that shows off Multiduino’s newest functions including temperature sensing, a monophonic music player for sweet chiptunes, and a virtual keyboard for scrolling text on the OLED screen. [Danko] has a few of these for sale in his eBay store. They come assembled, and he ships worldwide. The code for every existing function is available on his site.
More of a maximalist? Then check out this Micro-ATX Arduino.
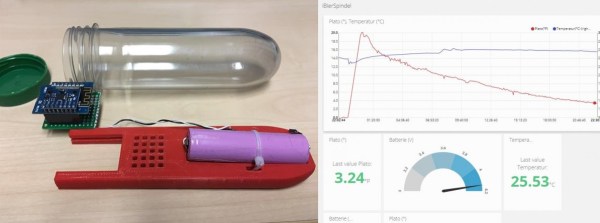


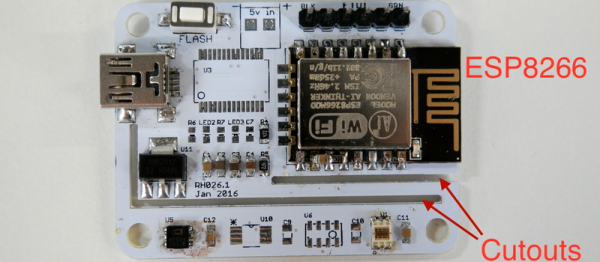
 Next came the clever bit. [Richard] put cutouts into the board to hopefully stop the flow of heat from the ESP8266 module to the temperature sensor. Again, he found that the board heats up by around four degrees Celcius or nine degrees Farenheit. That’s a horrible result in any units.
 Fail of the Week is a Hackaday column which celebrates failure as a learning tool. Help keep the fun rolling by writing about your own failures and