Threaded Insert Press Is 100% 3D Printed

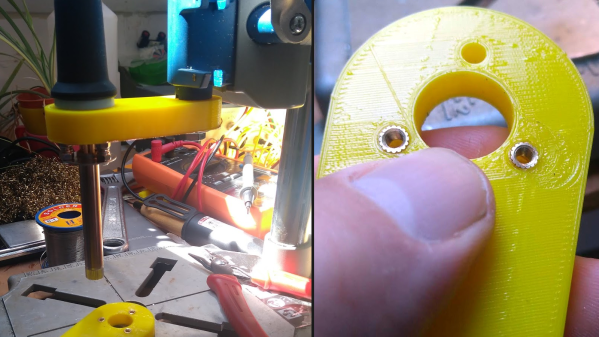
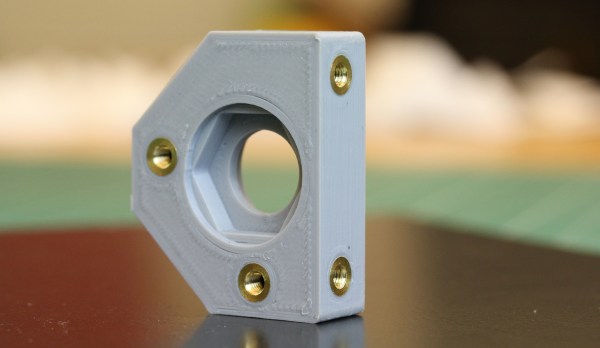
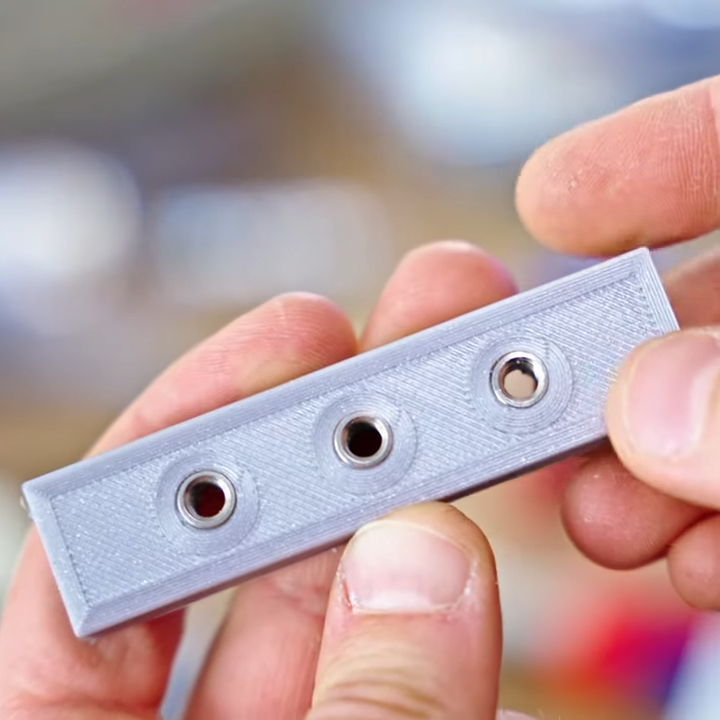
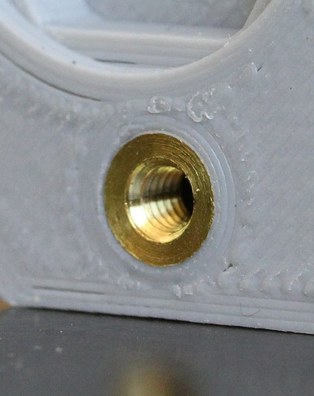
Sometimes, when making a 3D printed object, plastic just isn’t enough. Probably the most common addition to our prints is the ubiquitous brass threaded inset, which has proven its worth time and again over the years in providing a secure screw attachment point with less hassle than a captive nut. Of course to insert these bits of machined brass, you need to press them in, and unless you’ve got a very good hand with a soldering iron it’s usually a good idea to use a press of some sort. [TimNummy]  shows us that, ironically enough, making such a press is perfectly doable using only printed parts. Well, save for the soldering iron, of course.

He calls it the Superserter. Not only is it 100% printed plastic, but the entire design fits on a single 256 mm by 256 mm bed. In his case it was done on the Bambulab X1C, but it’s a common enough print bed size and can be printed without any supports. It’s even sized to fit the popular Gridfinity standard for a neat and tidy desk and handy bin placement for the inserts.

[TimNummy] clearly spent some time thinking about design for 3D printed manufacturing in order to create an assembly that does not need linear rails, sliders, or bearings as other press projects often do. The ironic thing is that if that same amount of effort went into other designs, it might eliminate the need for threaded inserts entirely.

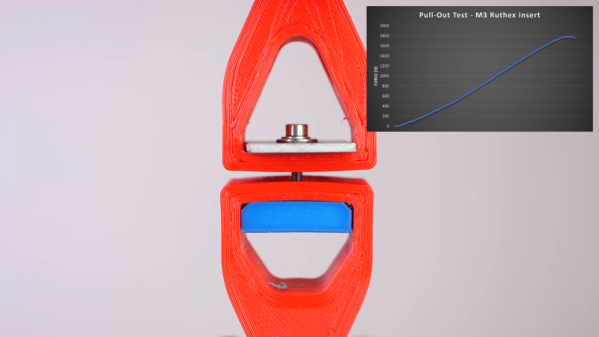
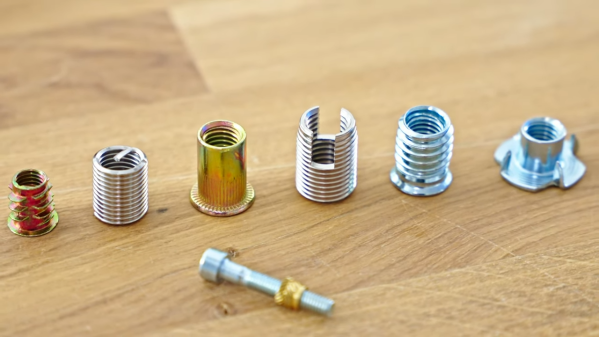
If you haven’t delved into the world of threaded inserts, we put up a how-to-guide a few years ago. If you’re wondering if you can get away with just printing threads, the answer is “maybe”– we highlighted a video comparing printed threads with different inserts a while back to get you started thinking about the design limitations there.

Continue reading “Threaded Insert Press Is 100% 3D Printed”

Alternate Threaded Inserts For 3D Prints

The usual way to put a durable threaded interface into a 3D print is to use a heat-set insert, but what about other options? [Thomas Sanladerer] evaluates a variety of different threaded inserts, none of which are actually made with 3D printing in mind but are useful nevertheless.

There are a number of other easily-available threaded inserts, including the rivnut (or rivet nut), chunky hex socket threaded inserts intended for wood and furniture, heli-coils or helical inserts (which resemble springs), self-tapping threaded inserts (also sold as thread adapters), and T-nuts or prong nuts. They all are a bit different, but he measures each one and gives a thorough rundown on how they perform, as well as offering his thoughts on what works best.

[Thomas] only tests M5 fasteners in this video, so keep that in mind if you get ideas and go shopping for new hardware. Some of the tested inserts aren’t commonly available in smaller sizes. Self-tapping threaded inserts, for example, are available all the way down to M2, but the hex socket threaded inserts don’t seem to come any smaller than M4.

These threaded inserts might be just what your next project calls for, so keep them in mind. Heat-set inserts are of course still a great option, and our own Sonya Vasquez can tell you everything you need to know about installing heat-set inserts into 3D printed parts in a way that leaves them looking super professional.

Continue reading “Alternate Threaded Inserts For 3D Prints”

Custom Tool Helps Hakko Set Threaded Inserts

When the tool you need doesn’t exist, you have to make it yourself. Come to think of it, even if the tool exists, it’s often way more fun to make it yourself. The former situation, though, is one that [Sean Hodgins] found himself in with regard to threaded inserts. Rather than suffer from the wrong tool for the job, he machined his own custom threaded insert tool for his Hakko soldering iron.

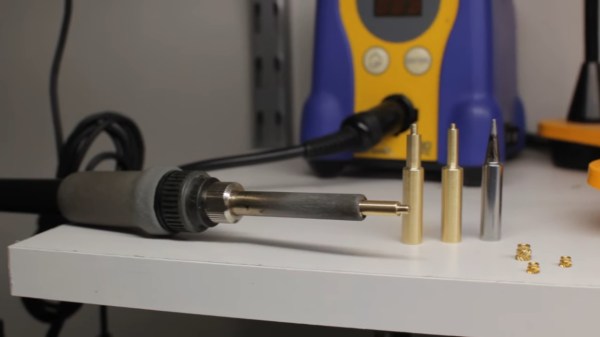
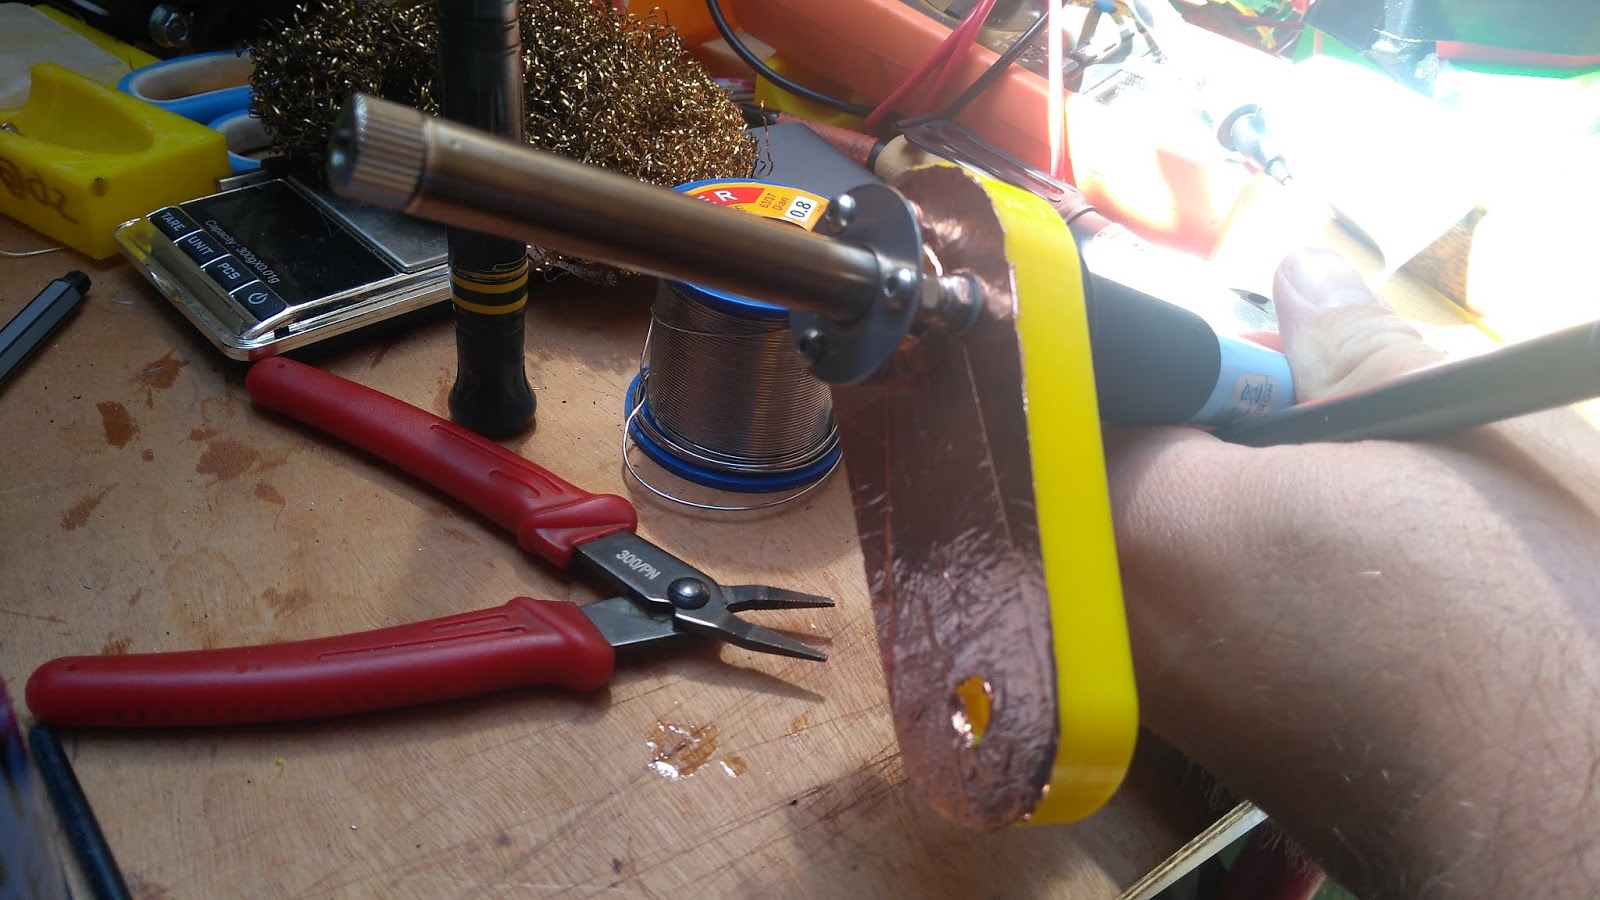
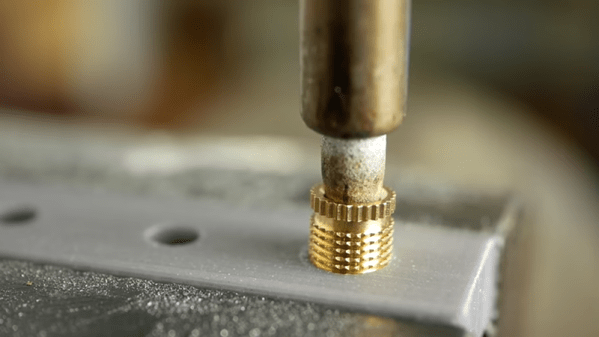
Like many of us, [Sean] has embraced the use of heat-set threaded inserts to beef up the mechanical connections on his 3D-printed parts. [Sean] dedicated a soldering iron to the task, equipping it with a tip especially for the job. But it was the flavor of iron proverbially known as a “fire stick” and he found that this iron was too hot for PLA prints. As the new owner of a lathe, he was able to make quick work of the job using a piece of brass rod stock. Luckily, Hakko tips just slip on the heating element, so no threading operations were needed. [Sean] made insert tips for multiple sized inserts, and the results speak for themselves.

If you haven’t tried these out yet, check out [Joshua Vasquez’s] excellent guide on heat-set inserts. You’ll find this guide to the relative merits of the different types useful when ordering inserts. And if you’ve got the itch to buy a lathe now, we’ve got you covered there too.

Continue reading “Custom Tool Helps Hakko Set Threaded Inserts”

Dremel Workstation’s New Job: Applying Threaded Inserts With Cheap Soldering Iron

Dremel has been helping people fit square pegs into round holes for years, and [concretedog] saw that the Dremel 220 Workstation — a piece of hardware similar to a drill press — could be convinced to hold a cheap soldering iron just as easily as it holds a rotary tool. A soldering iron makes an effective thermal insert tool, and the job of heating and pressing the threaded metal rings into plastic is made much easier when it can be done similar to operating a drill press. With a few modifications and a 3D-printed adapter, the thermal insert rig was born.

Whenever one is working around a design that already exists, it pays to be flexible and adjust to the unexpected. The Dremel 220 has a holder intended to clamp a rotary tool, and the original plan was to simply design and print an adapter so a soldering iron could sit in place of the rotary tool. That plan changed upon realizing that the entire rotary tool holder disconnected from the tool’s frame with a single bolt. It made much more sense to make the soldering iron replace the rotary tool holder, instead.

The resulting modified soldering iron is mounted via standoffs to a 3D-printed adapter with a copper foil heat shield. [concretedog] admits it’s not ideal from a heat management perspective, but it makes a fine prototype that seems to work well for light duty. The next step would be a metal version.

If you’re intrigued by threaded heat-set inserts, you can learn all about how to use them from Joshua Vasquez’s guide to the handy things. And should you prefer to make your own DIY press from 3D printed parts and off-the-shelf hardware, we have that covered as well.

Are You Getting Your Money’s Worth From Threaded Inserts?

Have you ever wondered whether it’s worth the time and expense to install threaded inserts into your 3D-printed projects? [Stefan] from CNC Kitchen did, and decided to answer the question once and for all, with science.

If this sounds familiar, it’s with good reason: we covered [Stefan]’s last stab at assessing threaded inserts back in March. Then, he was primarily interested in determining if threaded inserts are better than threads cut or printed directly into parts. The current work is concerned with the relative value of different designs of threaded inserts. He looked at three different styles of press-in inserts, ranging in price from pennies apiece to a princely 25 cents. The complexity of the outside knurling seems not to be correlated with the price; the inserts with opposed helical knurls seem like they’d be harder to manufacture than the ones with simple barbs on the outside of the barrel, but cost less. And in fact, the mid-price insert outperformed the expensive one in pull-out tests. Surprisingly, the cheapest inserts were actually far worse at pull-out resistance than printing undersized holes and threading an M3 screw directly into the plastic.

[Stefan] also looked at torque resistance, and found no substantial difference between the three insert types. Indeed, none of the inserts proved to be the weak point, as the failure mode of all the torque tests was the M3 bolt itself. This didn’t hold with the bolt threaded directly into the plastic, of course; any insert is better than none for torque resistance.

We enjoyed seeing [Stefan]’s tests, and appreciate the data that can help us be informed consumers. [John] over at Project Farm does similar head-to-head tests, like this test of different epoxy adhesives.

Continue reading “Are You Getting Your Money’s Worth From Threaded Inserts?”

Threaded 3D Printed Part Comparison

If you want to make serious assemblies out of 3D printed parts, you’ll eventually need to deal with threading. The easiest way is to make a nut trap that you can either insert a standard nut into after printing or even during printing. However, there are limitations to this method. If you want a real threaded part you can print the thread, cut the thread with a tap or bolt, or use a threaded insert. [Stefan] ran some tests to see how each of those methods held up to real use. (YouTube, embedded below.) He used fifty test parts to generate data for comparison.

We like the threaded insert method where a brass insert is pushed into the plastic while hot. Special features in the insert cause the brass part to grab the plastic, making it difficult to pull the insert out or twist it within the hole. Another thing we liked was that the tests used holes printed in the horizontal and vertical plane. You can clearly see that the orientation does alter how the holes work and fail to work.

Continue reading “Threaded 3D Printed Part Comparison”

Threading 3D Printed Parts: How To Use Heat-Set Inserts

We can make our 3D-printed parts even more capable when we start mixing them with some essential “mechanical vitamins.” By combining prints with screws, nuts, fasteners, and pins, we get a rich ecosystem for mechanism-making with capabilities beyond what we could simply print alone.

Today I’d like to share some tips on one of my favorite functional 3D-printing techniques: adding heat-set inserts. As someone who’s been installing them into plastic parts for years manually, I think many guides overlook some process details crucial to getting consistent results.

Make no mistake; there are a handful of insert guides already out there [1, 2]. (In fact, I encourage you to look there first for a good jump-start.) Over the years though, I’ve added my own finishing move (nothing exotic or difficult) which I call the Plate-Press Technique that gives me a major boost in consistency.

Join me below as I fill in the knowledge gaps (and some literal ones too) to send you back to the lab equipped with a technique that will give you perfectly-seated inserts every time.

Continue reading “Threading 3D Printed Parts: How To Use Heat-Set Inserts”