A Year Long Time Lapse Camera

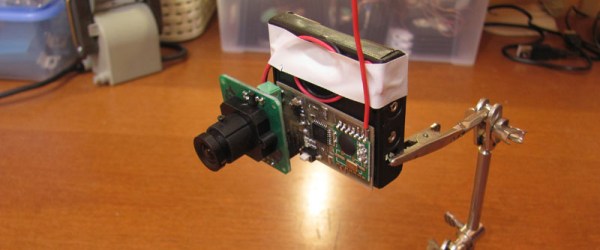
All [val3tra] wanted was an RF-accessible camera. A camera that would take pictures, save them to an SD card, and occasionally send them over an RF link to a computer. This project has grown out of control, and now it has become an open-source camera that’s able to take year-long time-lapse movies.

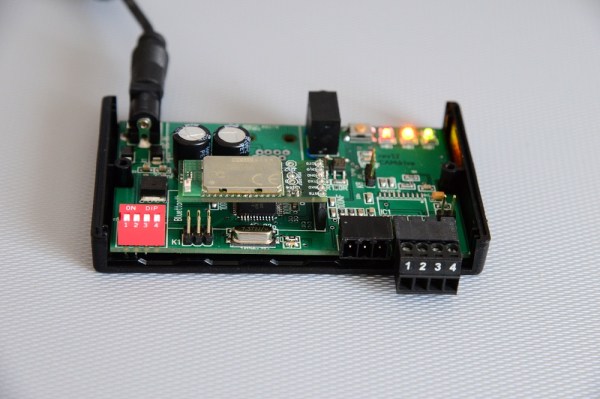
The build started as a low power camera using an eBay JPEG camera modified for 3.3V. That’s only 640×480, but each frame averages only 48kb – small enough to store a few thousand pictures on a FAT16 formatted SD card. A $4 RF module, an ATMega, and an RTC make up the rest of the build that has a power draw of about 100 Joules per hour. A D-cell has about 60,000 Joules, and a pessimistic estimate of a battery of four in series, two in parallel gives a run time of 200 days.

This build was then improved, bringing the total battery consumption down to about 3.5-4 Joules per frame, or at one frame every 10 minutes, about 24 Joules an hour. That’s impressive, and getting this camera to run longer than a dozen or so months raises some interesting challenges. The self-discharge of the battery must be taken into account, and environmental concerns – especially when leaving this camera to run in a Moscow winter, seen in the video below – are significant.

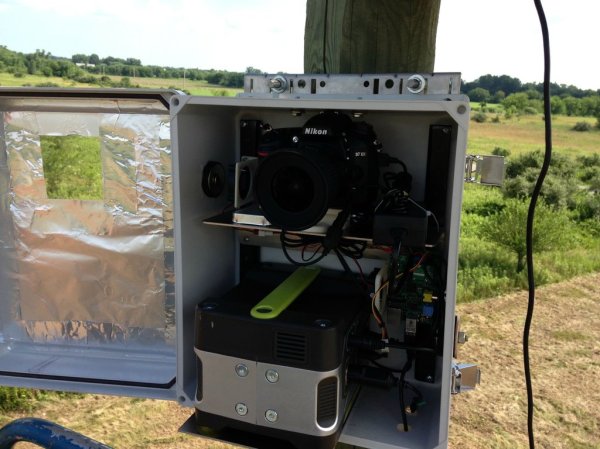
If you don’t want to go equipment-lite you could seal your DSLR, Pi, and some serious batteries in a weatherproof enclosure.

Continue reading “A Year Long Time Lapse Camera”

Recording Time Lapse Of Endangered Reptiles Hatching

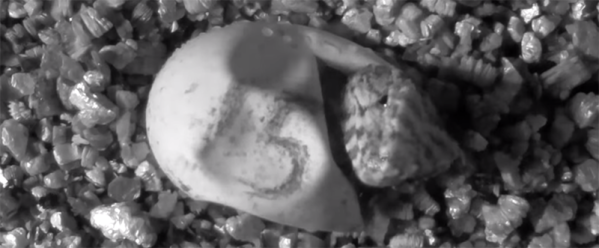
The tuatara is a reptile native to New Zealand, and thanks to the descendants of stowaway rats on 17th century ships, these little lizards are critically endangered. [Warren] was asked if he could film one of these hatchlings being born and pulled out a Raspberry Pi to make it happen.

[Warren] constructed a small lasercut box to house the incubating egg, but he hit a few snags figuring out how to properly focus the Raspi camera board. The original idea was to use a Nikkor macro lens, without any kind of adapter between it and the camera board. A bit of googling lead [Warren] to this tutorial for modifying the focus on the Raspi camera, giving him a good picture.

The incubator had no windows and thus no light, making an IR LED array the obvious solution to the lighting problem. Time was of the essence, so an off-the-shelf security camera provided the IR illumination. After dumping the video to his computer, [Warren] had a video of a baby tuatara hatching. You can check that out below.

Continue reading “Recording Time Lapse Of Endangered Reptiles Hatching”

camera dolly

Timelapse Photography On An Android-Powered Dolly

If you’re heading off on a trip to Alaska, you need to make sure you have plenty of supplies on hand for the wilderness that awaits. If you’re [Bryce], that supply list includes some interesting photography equipment, including a camera dolly that he made to take time-lapse video of the fantastic scenery.

On the hardware side, the dolly carries the camera on a rail that is set up on a slant. The camera starts on one side and moves up and towards the otherside which creates a unique effect in the time-lapse. The rig is driven by a stepper motor, and rides on some pretty fancy bearings. The two cameras [Bryce] plans to use are a Canon T2i and a EOS-M which sit on the top from a tripod.

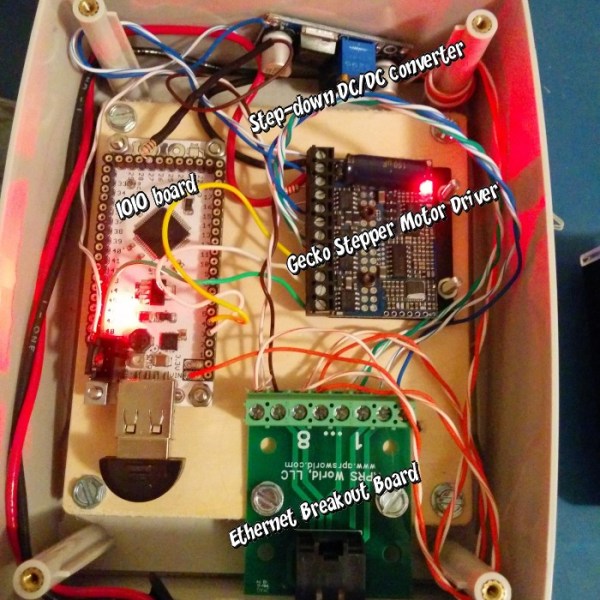
The software and electronics side is interesting as well. Instead of the usual Arduino, [Bryce] opted for controlling the rig through Android and a IOIO board. This gives the project a lot of options for communications, including Bluetooth. The whole thing is powered by a 19V battery pack. If you’re looking for something a little simpler, you might want to check out the egg timer for time lapse! Check out the video of [Bryce]’s rig in action after the break.

Continue reading “Timelapse Photography On An Android-Powered Dolly”

Hyperlapse Makes Your HeadCam Videos Awesome

hyperlapse First person video – between Google Glass, GoPro, and other sports cameras, it seems like everyone has a camera on their head these days. If you’re a surfer or skydiver, that might make for some awesome footage. For the rest of us though, it means hours of boring video. The obvious way to fix this is time-lapse. Typically time-lapse throws frames away. Taking 1 of every 10 frames results in a 10x speed increase. Unfortunately, speeding up a head mounted camera often leads to a video so bouncy it can’t be watched without an air sickness bag handy. [Johannes Kopf], [Michael Cohen], and [Richard Szeliski] at Microsoft Research have come up with a novel solution to this problem with Hyperlapse.
Hyperlapse photography is not a new term. Typically, hyperlapse films require careful planning, camera rigs, and labor-intensive post-production to achieve a usable video. [Johannes] and team have thrown computer vision and graphics algorithms at the problem. The results are nothing short of amazing.

The full details are available in the team’s report (35MB PDF warning). To obtain usable data, the fisheye lenses often used on these cameras must be calibrated. The team accomplished that with the OCamCalib toolbox. Imported video is broken down frame by frame. Using structure from motion algorithms, hyperlapse creates a 3D models of the various scenes in the video. With the scenes in this virtual world, the camera can be moved and aimed at will. The team’s algorithms then pick a smooth path that follows the original cameras trajectory. Once the camera’s position is known, it’s simply a matter of rendering the final video.

The results aren’t perfect. The mountain climbing scenes show some artifacts caused by the camera frame rate and exposure changing due to the varied lighting conditions. People appear and disappear in the bicycling portion of the video.

One thing the team doesn’t mention is how long the process takes. We’re sure this kind of rendering must require some serious time and processing power. Still, the output video is stunning.

Continue reading “Hyperlapse Makes Your HeadCam Videos Awesome”

Hackaday Reader [David] Wins A Camera From Make And Nikon


Make the shot fixed[David Schwarz] whipped up this moving time-lapse camera rig and won himself a sweet Nikon setup. You might remember our post about the Nikon Make:The Shot Challenge. [David] saw our post, and started thinking about what he wanted to enter. Like a true engineer, he finally came up with his idea with just 3 days left in the contest.

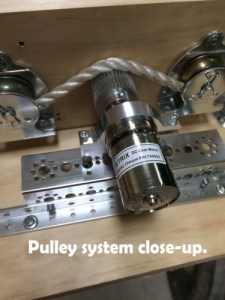
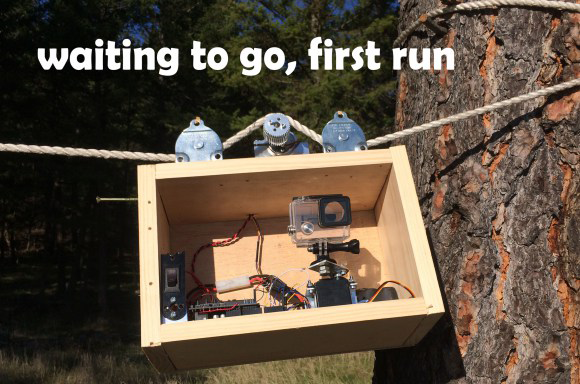
[David] wanted to build a moving time-lapse rig, but he didn’t have the aluminum extrusion rails typically used to build one. He did have some strong rope though, as well as a beefy DC motor with a built-in encoder. [David] mounted a very wide gear on the shaft of the motor, then looped the rope around the gear and two idler pulleys to ensure the gear would have a good bite on the rope. The motor is controlled by an Arduino, which also monitors the encoder to make sure the carriage doesn’t move too far between shots.

[6__pulley_systemDavid] built and tested his rig over a weekend. On Monday morning, he gave the rig its first run. The video came out pretty good, but he knew he could get a better shot. That’s when Murphy struck. The motor and controller on his rig decided to give up the ghost. With the contest deadline less than 24 hours away, [David] burned the midnight oil and replaced his motor and controller.
Tuesday morning, [David] pulled out his trump card – a trip to Tally Lake in Montana, USA. The equipment worked perfectly, and nature was cooperating too. The trees, lake, and the shadows on the mountains in the background made for an incredible shot. Once the time-lapse photos were in the can, [David] rushed home, stitched and stabilized the resulting video. He submitted his winning entry with just 2 hours to spare.

Click past the break for more on [David’s] time-lapse rig, and to see his final video.

Continue reading “Hackaday Reader [David] Wins A Camera From Make And Nikon”

Self-contained Time-lapse Rig Braves Elements From Thirty Feet

Perspective is a bit hard to grasp in this image, but all of this hardware is mounted thirty feet above the ground. This time-lapse photography box makes use of the sun and a Raspberry Pi to document the goings on. The rig is one of three that were built by [Patty Chuck] to record progress on a seventy acre construction site over the course of eighteen months. The gallery linked above shows off the project well, but a much more in-depth text description is found in his Reddit thread.

What’s not shown in the image is a solar array which powers the box. When they were installed there were no utilities on site. To guard against power-loss there’s a hardware RTC that keeps ticking. The Raspberry Pi uses GPIO pins to switch the Nikon D7100 camera on once every five minutes during the work day. It snaps a photo before powering it down again. It also monitors a temperature sensor and actuates circulation fans if necessary.

He’s planning to post the videos once the project’s done in 18 months. If you see them and remember this post, send us the link and we’ll post the update.

GoPro Panning Time-lapse With Ikea Egg Timer

ikea-go-pro-time-lapse

[Sebastian Schuster’s] weekend project was to turn his GoPro camera into a panning time-lapse rig. You’ll notice it’s in a waterproof case as his demo for the hack was an outdoor session and the weather’s not the best right now. He put this together quickly, easily, and on-the-cheap thanks to the Ikea egg timer and a 3D printed camera mount.

An egg timer is a popular choice for panning hacks. Any type that includes a dial that spins on the horizontal axis will do. The Ikea Stam egg timer has that raised handle which is easily gripped by the 3D printed part. You can get a hold of the design files through a web service which is new to us. [Sebastian] used Tinkercad for the design, and shared it in his project post linked above.

This is just one more tool in his collection of camera hacks. A couple years back we looked at a motorized pan and tilt platform he built.

Continue reading “GoPro Panning Time-lapse With Ikea Egg Timer”