All About USB-C: Connector Mechanics

There’s two cases when hackers have to think about USB-C connector mechanics. The first is when a USB-C connector physically breaks, and the second is when we need to put a connector on our own board. Let’s go through both of them.

Clean That Connector

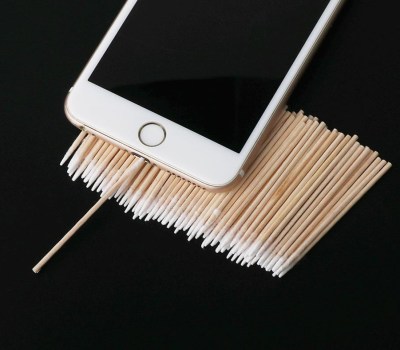
What if a socket on your phone or laptop fails? First off, it could be due to dust or debris. There’s swabs you can buy to clean a USB-C connector; perhaps adding some isopropyl alcohol or other cleaning-suitable liquids, you can get to a “good enough” state. You can also reflow pins on your connector, equipped with hot air or a sharp soldering iron tip, as well as some flux – when it comes to mechanical failures, this tends to remedy them, even for a short period of time.

How could a connector fail, exactly? Well, one of the pins could break off inside the plastic, or just get too dirty to make contact. Consider a device with a USB-C charging and data socket, with USB 2.0 but without high-speed pairs – which is to say, sadly, the majority of the phones out there. Try plugging it into a USB-A charger using a USB-A to USB-C cable. Does it charge, even if slowly? Then, your VBUS pins are okay.

Plug it into a Type-C charger using a Type-C cable, and now the CC pins are involved. Does it charge in both orientations? Then both of your CC pins are okay. Does it charge in only one orientation? One of the CC pins has to be busted. Then, you can check USB 2.0 pins, used for data transfer and legacy charging. Plug the phone into a computer using a USB-A to USB-C cable. Does it enumerate as a device? Does it enumerate in both orientations? If not, you might want to clean D- and D+ pins specifically, maybe even both sets. Continue reading “All About USB-C: Connector Mechanics”

All About USB-C: Cable Types

USB-C cables and connectors: these are controversial topics, and rightfully so – I don’t want to pull any punches. I will also show you that things don’t have to be that bad for you, as long as you’re willing to apply a few tricks and adjust your expectations.

Wild West of Wiring

You might have a bunch of USB-C cables, and they all might look exactly the same, but you’ve likely experienced that they’re not the same internally, and often there’s not a label in sight. Yes, it’s pretty bad, and one could argue it’s getting worse.

I’d like to clarify that I’m only talking about USB C male – USB C male cables here. While cables like USB-A to USB-C are popular, they are quite simple; you get USB 2.0 or USB 3.0 data and 2 A of current at most, and the USB-C plug is usually hardwired as “host, will supply five volts”, which is defined by a pullup resistor. Also, while cables like “Type-C to DisplayPort” might look like cables at a glance, they are adapters with a meaningful amount of active circuitry in them.

Purely following the specification, there used to be six types of USB-C to USB-C cables out there. Then, it became eight. Now, I’m afraid, there’s twelve of them, purely following the spec, and there’s way more when counting all the out-of-spec cables. Good news is – for most of the time, majority of these cables will be suitable for simple tasks like charging and data transfer, and situations where you need a very specific cable are going to be rare enough. Still, let’s go through it, and you’ll see that they’re easier to tell apart than it might look. Continue reading “All About USB-C: Cable Types”

All About USB-C: Introduction For Hackers

We’ve now had at least five years of USB-C ports in our devices. It’s a standard that many manufacturers and hackers can get behind. Initially, there was plenty of confusion about what we’d actually encounter out there, and manufacturer-induced aberrations have put some people off. However, USB-C is here to stay, and I’d like to show you how USB-C actually gets used out there, what you can expect out of it as a power user, and what you can get out of it as a hobbyist.

Modern devices have a set of common needs – they need a power input, or a power output, sometimes both, typically a USB2 connection, and often some higher-speed connectivity like a display output/input or USB 3. USB-C is an interface that aims to be able to take care of all of those. Everything aforementioned is optional, which is a blessing and a curse, but you can quickly learn to distinguish what to expect out of a device based on how it looks; if ever in doubt, I’d like to show you how to check.

Continue reading “All About USB-C: Introduction For Hackers”

Throwback: USB Hotplate Used 30 Whole Ports

Once upon a time, USB was still hip, cool, and easy to understand. You could get up to 500 mA out of a port, which wasn’t much, but some companies produced USB cup warmers anyway which were a bit of a joke. However, one enterprising hacker took things further back in 2004, whipping up a potent USB hot plate powered by a cavalcade of ports.

Delicious.

The project was spawned after a USB cup warmer sadly failed to cook a decent fried egg. To rectify this, a souped-up version was built. The cup warmer was stripped of its original hardware, and fitted with six 2-ohm resistors instead. At 5 volts, each would draw 2.5 amps and the total power draw would be on the order of 75 watts. Each resistor would thus need five USB ports to power it to stay under the 500 mA limit, for a total of 30 USB ports in total. Six PCI-to-USB cards were installed in a motherboard for this purpose, providing the requisite ports.  A 500 watt power supply meant the computer had plenty of juice to run the hot plate.

Cooking proved successful, generating a decent amount of heat to brown up some beef. Served with some white rice, it proved an adequate meal, though apparently with a noted taste of electronic components.

This wouldn’t be such a challenge today. USB-C is capable of delivering 100 watts through a single port at 20 volts and 5 amps. However, there’s something joyous and charming about cooking on a ridiculous hotplate running off 30 USB 1.1 ports. The ingenuity is to be applauded, and it is truly a project of its time.

A Handy OSHW USB Cable Tester For Your Toolkit

There’s no shame in admitting you’ve been burned by a cheapo USB cable — ever since some bean counter realized there was a few cents to be saved by producing “power only” USB cables, no hardware hacker has been safe. But with this simple tester from [Álvaro Prieto] in your arsenal, you’ll never be fooled again.

It’s about as straight-forward a design as possible, utilizing nothing more than a two dozen LEDs, their associated resistors, and a common CR2032 coin cell. Simply plugging both sides of your cable into the various flavors of USB connectors on the tester will complete the necessary circuits to light up the corresponding LEDs, instantly telling you how many intact wires are inside the cable. So whether you’re dealing with some shady cable that doesn’t have the full complement of conductors, or there’s some physical damage that’s severed a connection or two, you’ll know at a glance.

A sage warning for most of the devices we build.

Obviously the tester is designed primarily for the 24 pins you’ll find in a proper USB-C connector, but it’s completely backwards compatible with older cables and connectors. We appreciate that he even included the chunky Type B connector, which we’ve always been fond of thanks to its robustness compared to the more common Mini and Micro variants.

Keep in mind though that this tester will only show you if there’s a connection between two pins, it won’t verify how much power it can actually handle. For that, you’ll need some extra equipment.

Automate Your Desk With The Upsy Desky

It might be surprising for some, but humans actually evolved to be long-distance runners. We aren’t very fast comparatively, but no other animal can run for as long or as far as a human can. Sitting at a desk, on the other hand, is definitely not something that we’re adapted to do, so it’s important to take some measures to avoid many of the problems that arise for those that sit at a desk or computer most of the day. This build takes it to the extreme, not only implementing a standing desk but also a ton of automation for that desk as well.

This project is an improvement on a prior build by [TJ Horner] called the WiFi Standing Desk Controller. This new version has a catchier name, and uses an ESP32 to run the show. The enclosure is 3D printed and the control board includes USB-C and a hardware UART to interface with the controller. The real perks of this device are the automation, though. The desk can automatically lift if the user has been sitting too long, and could also automatically lift if it detects no one is home (to help keep a cat off of the desk, for example). It also includes presets for different users, and can export data to other software to help analyze sitting and standing patterns.

The controller design is open source and could be adapted to work on a wide-array of powered desks. As we’ve seen in the past, with the addition of a motor, even hand-crank standing desks can be upgraded. If you haven’t gotten into the standing desk trend yet, we hope that you are at least occasionally going for a run.

USB-C Charging Mod Brings In The Juice

By now we’re well under way with the consolidation of low-voltage power supplies under the USB-C standard, and the small reversible connector has become the de facto way to squirt some volts into our projects. But for all this standardization there are still a few places where the harmony of a unified connector breaks down, and things don’t work quite the way they are supposed to. One such case has occupied [James Ide] — devices which will accept power from a USB-A to USB-C cable, but not from a USB-C to USB-C one. His solution? A small flexible PCB upgrade.

The problem lies with how different power supplies and peripherals identify each other, and quite likely in device manufacturers skimping on a few components here and there. A compliant USB-C power supply expects to see pull-down resistors on the data lines, and will thus refuse to serve power to devices that don’t possess them. Meanwhile the USB-A supply will quite happily serve juice without such checks, which is what the manufacturer is relying on. The solution is a tiny flexible PCB with the resistors, designed to be retrofitted behind a USB-C socket. On one hand it’s probably one of the simplest circuits we’ve ever shown you, and on the other it’s a cleverly designed solution to the issue at hand.

If the nitty-gritty of USB-C interests you, then we’ve taken a much closer look in the past.

Thanks to [Andrea] for the tip.