Vacuum Chamber Gets Automation

[Nick Poole] does a lot of custom work with vacuum tubes — so much so that he builds his own vacuum tubes of various shapes, sizes, and functions right on his own workbench. While the theory of vacuum tubes is pretty straightforward, at least to those of us who haven’t only been exposed to semiconductors, producing them requires some specialized equipment. A simple vacuum won’t get you all the way there, and the complexity of the setup that’s needed certainly calls for some automation.

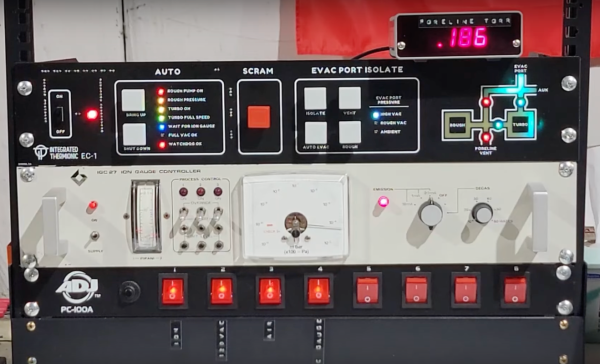
The vacuum system that [Nick] uses involves three sections separated by high-vacuum valves in order to achieve the pressures required for vacuum tube construction. There’s a rough vacuum section driven by one pump, a high vacuum section driven by a second pump, and a third section called the evac port where the tube is connected. Each second must be prepared properly before the next section can be engaged or disengaged. An Arduino Pro is tasked with all of this, chosen for its large amount of ADC inputs for the instrumentation monitoring the pressures in each section, as well as the digital I/O to control the valves and switches on the system.

The control system is built into a 19-inch equipment rack with custom faceplates which outline the operation of the vacuum system. A set of addressable LEDs provide the status of the various parts of the system, and mechanical keyboard switches are used to control everything, including one which functions as an emergency stop. The automation provided by the Arduino reduces the chances for any mistakes to be caused by human error, allows the human operator to focus on other tasks like forming the glass, and can also react much faster to any potentially damaging situations such as the high-pressure pump being exposed to atmospheric pressure.

As you can probably tell, [Nick] is pretty passionate about this stuff — last year he gave a talk at the Hackaday Supercon that went over all the intricacies of building one’s own vacuum tubes.

Continue reading “Vacuum Chamber Gets Automation”

GLASNOST Is A Computer That Makes Transparency A Priority

We live in a world where most of us take the transistor for granted. Within arm’s length of most people reading this, there are likely over ten billion of them sending electrons in every direction. But the transistor was not the first technology to come around to make the computer a possibility, but if you go to the lengths of building something with an alternative, like this vacuum tube computer, you may appreciate them just a tiny bit more.

This vacuum tube computer is called GLASNOST, which according to its creator [Paul] means “glass, no semiconductors” with the idea that the working parts of the computer (besides the passive components) are transparent glass tubes, unlike their opaque silicon-based alternatives. It boasts a graphical display on an oscilloscope, 4096 words of memory, and a custom four-bit architecture based only on NOT, NOR, and OR gates which are simpler to create with the bulky tubes.

The project is still a work in progress but already [Paul] has the core memory figured out and the computer modeled in a logic simulator. The next steps are currently being worked through which includes getting the logic gates to function in the real world. We eagerly await the next steps of this novel computer and, if you want to see one that was built recently and not in the distant past of the 1950s, take a look at the Electron Tube New Automatic Computer that was completed just a few years ago.

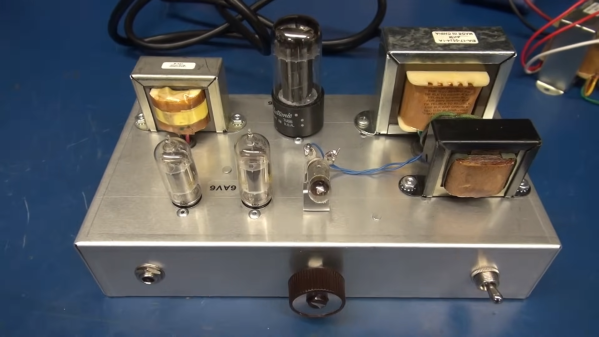
Spy Radio Setup Gets A Tiny Power Supply For Field Operations

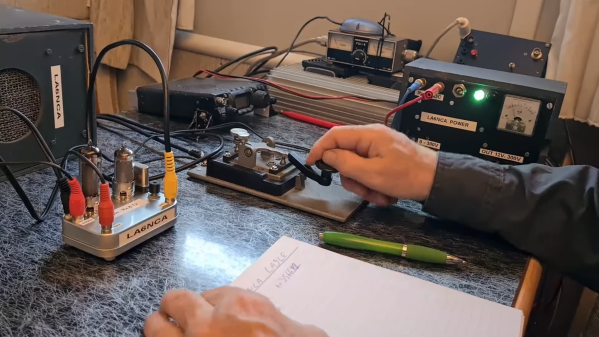
[Helge Fyske (LA6NCA)] may not be an actual spy — then again, he may be; if he’s good at it, we wouldn’t know — but he has built a couple of neat vacuum tube spy radios in the past. And there’s no better test for such equipment than to haul it out into the field and try to make some contacts. But how do you power such things away from the bench?

To answer that question, skip ahead to the 3:18 mark of the video below, where [Helge] shows off his whole retro rig, including the compact 250-volt power supply he built for his two-tube 80-m Altoids tin spy transceiver. In the shack, [Helge] powers it with a bench power supply of his own design to provide the high anode voltage needed for the tubes, as well as 12 volts for their heaters. Portable operations require a more compact solution, preferably one that can be run off a battery small enough to pack in.

By building his power supply in a tin, [Helge] keeps to his compact build philosophy. But the circuit is all solid state, which is an interesting departure for him. The switch-mode supply uses a 4047 astable multivibrator chip as a 50-kHz oscillator, which switches back and forth between a pair of MOSFETs to drive a transformer. This steps up the 12-volt input to 280 volts AC, which is then rectified, filtered, and regulated to 250 volts DC.

To round out his spy rig, [Helge] also designed a tiny Morse key, which appears to be 3D printed and fits in its own tin, and a compact dipole antenna. Despite picking what appears to be a challenging location — the bottom of a steep-sided fjord — [Helge] was easily able to make contacts over a distance of 400 km. His noise floor was remarkably low, a testament to the solid design of his power supply. Including the sealed lead acid battery, the whole kit is compact and efficient, and it’s a nice example of what vacuum tubes and solid state can accomplish together.

Continue reading “Spy Radio Setup Gets A Tiny Power Supply For Field Operations”

The PDP8 That Never Was: Hollow State Logic

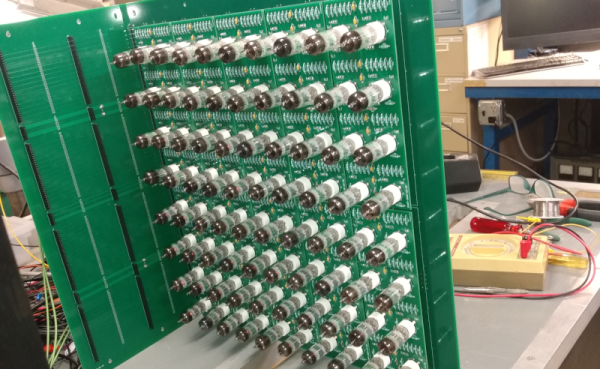
[Outer World Apps] noted that there was no PDP-8/V made by DEC — a variant that used vacuum tubes. So he’s decided to make one using about 320 6J6A tubes. He’s got a plan and a few boards completed — we can’t wait to see it finished.

The logic is actually done by crystal rectifiers, but the tubes do inversion. To make an and/or/invert gate requires a single triode or half of a 6J6A. A D flip flop requires three tubes or two tubes for a latch. In addition to the “crystal diodes,” the memory and I/O are a Raspberry Pi, and there are transistors to do level conversion between the tube logic and the Pi.

Continue reading “The PDP8 That Never Was: Hollow State Logic”

Spy Transceiver Makes Two Tubes Do The Work Of Five

Here at Hackaday, we love following along with projects as they progress. That’s especially true when a project makes a considerable leap in terms of functionality from one version to another, or when the original design gets more elegant. And when you get both improved function and decreased complexity at the same time? That’s the good stuff.

Take the recent improvements to a vacuum tube “spy radio” as an example. Previously, [Helge (LA6NCA)] built both a two-tube transmitter and a three-tube receiver, either of which would fit in the palm of your hand. A little higher math seems to indicate that combining these two circuits into a transceiver would require five tubes, but that’s not how hams like [Helge] roll. His 80-m CW-only transceiver design uses only two tubes and a lot of tricks, which we admit we’re still wrapping our heads around. On the receive side, one tube serves as a mixer/oscillator, combining the received signal with a slightly offset crystal-controlled signal to provide the needed beat frequency. The second tube serves as the amplifier, both for the RF signal when transmitting, and for audio when receiving.

The really clever part of this build is that [Helge] somehow stuffed four separate relays into the tiny Altoids tin chassis. Three of them are used to switch between receive and transmit, while the fourth is set up as a simple electromagnetic buzzer. This provides the sidetone needed to effectively transmit Morse code, and is about the simplest way we’ve ever seen to address that need. Also impressive is how [Helge] went from a relatively expansive breadboard prototype to a much more compact final design, and how the solder was barely cooled before he managed to make a contact over 200 km. The video below has all the details.

Continue reading “Spy Transceiver Makes Two Tubes Do The Work Of Five”

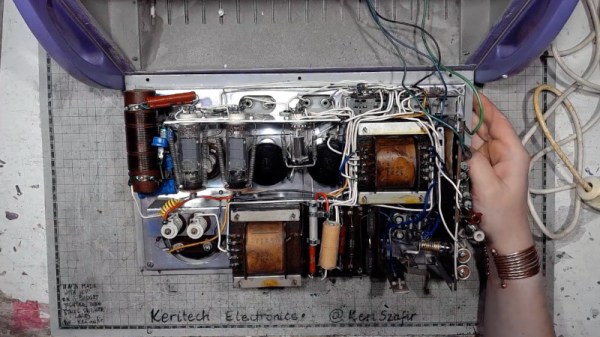
The Peak Of Vacuum Tube Radio Design

One of the more popular trends in the ham radio community right now is operating away from the shack. Parks on the Air (POTA) is an excellent way to take a mobile radio off-grid and operate in the beauty of nature, but for those who want to take their rig to more extreme locations there’s another operating award program called Summits on the Air (SOTA) that requires the radio operator to set up a station on a mountaintop instead. This often requires lightweight, low-power radios to keep weight down for the hike, and [Dan] aka [AI6XG] has created a radio from scratch to do just that.

[Dan] is also a vacuum tube and CW (continuous wave/Morse code) operator on top of his interest in summiting various mountains, so this build incorporates all of his interests. Most vacuum tubes take a lot of energy to operate, but he dug up a circuit from 1967 that uses a single tube which can operate from a 12 volt battery instead of needing mains power, thanks to some help from a more modern switch-mode power supply (SMPS). The SMPS took a bit of research, though, in order to find one that wouldn’t interfere with the radio’s operation. That plus a few other modern tweaks like a QCX interface and a switch to toggle between receive to transmit easily allows this radio to be quite versatile when operating while maintaining its portability and durability when summiting.

For those looking to replicate a tube-based radio like this one, [Dan] has made all of the schematics available on his GitHub page. The only other limitation to keep in mind with a build like this is that it tends to only work on a very narrow range of frequencies without adding further complexity to the design, in this case within the CW portion of the 40-meter band. But that’s not really a bad thing as most radios with these design principles tend to work this way. For some other examples, take a look at these antique QRP radios for operating using an absolute minimum of power.

Tiny Three-Tube Receiver Completes Spy Radio Suite

In our surface-mount age, it’s easy to be jaded about miniaturization. We pretty much expect every circuit to be dimensionally optimized, something that’s easy to do when SMDs that rival grains of sand are available. But dial the calendar back half a century or so and miniaturization was a much more challenging proposition.

Challenging, perhaps, but by no means unachievable, as [Helge Fyske (LA6NCA)] demonstrates with this ultra-compact regenerative vacuum tube receiver. It’s a companion to his recent “spy transmitter,” a two-tube radio built in — or on, really — an Altoids tin. The transmitter was actually a pretty simple circuit, just a crystal-controlled oscillator and an RF amplifier really, but still managed about 1.5 Watts output on the 80-meter ham band.

The receiver circuit ended up being much more complicated, as receivers do, and therefore harder to cram into the allotted space. [Helge]’s used a three-tube regenerative design, with one tube each devoted to the RF amp, detector/mixer, and audio amplifier stages. As in the transmitter, the receiver tubes are mounted on the outside of the box, with the inside crammed full of components. [Helge] had to be quite careful about component positioning, to prevent interstage coupling and other undesirable side effects of building in such close quarters.

Was it worth it? Judging by the video below, absolutely! We’ve rarely heard performance like that from even a modern receiver with all the bells and whistles, let alone from a homebrew design under such constraints. It sounds fantastic, and hats off to [Helge] for completing his spy radio suite in style.

Continue reading “Tiny Three-Tube Receiver Completes Spy Radio Suite”