Reverse Engineering A Soundsystem’s API

We’ve all been stymied by a smart thermostat, coffee maker, or other device which would work fine on its own but ultimately seems to be worse off for having an Internet connection —  so when something actually pulls off this feat it’s quite noteworthy. [James] has a powerful set of connected speakers and while they don’t have all of the functionality he needed built-in, an included web API at least allowed him to build in the features he wanted.

The major problem with these speakers isn’t that they’re incredibly loud (although they are), but rather that the wide range of available volumes for such a loud soundsystem doesn’t leave a lot of fine adjustment in the range where [James] typically uses these speakers. To tackle the problem, he first found the web interface the speakers present and then discovered a somewhat hidden application programming interface (API) within that allows for some manual control. He built a second website which serves as a volume slider within the range he wants, and the web server sends this volume to the speakers via this API which allows much finer control than the built-in user interface.

Having a usable API included with Internet-connected devices is not always the case, although it’s a great model for any company wanting to allow their customers better control of the products they buy. If you need to roll out your own API for connected devices that don’t have one already, take a look at [Sean Boyce]’s guide from 2019.

A Nicer Controller For Cheap Power Supply Modules

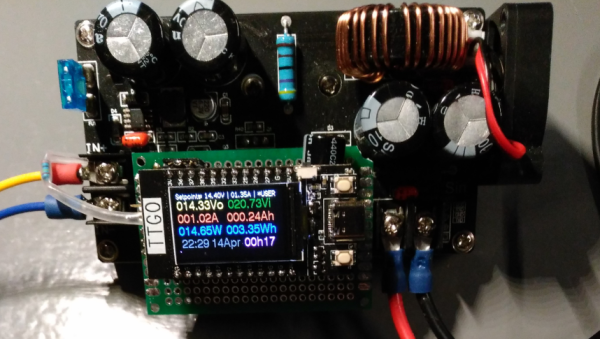
These days, you can get all kinds of cheap power supply modules off a variety of online vendors. A lot of examples from brands like Juntek and Drok often have pretty poor interfaces though, with a couple of tactile buttons and a simple 7-segment display. [rin67630] decided to whip up a better controller with a much more informative display.

The controller is designed to work with programmable buck converter modules like the DPS3806, Buck3603, and BST900. It’s based on a TTGO ESP32 with an integrated color TFT LCD. It displays voltage at the input and output, the same for current, along with current setpoints. It also allows for control of a fan and charge cycles if so desired, and it has the ability to fetch time from an NTP server for proper scheduling.  There’s also a web interface complete with graphs for really diving down into the nitty-gritty. Future plans include adding an MPPT solar charging capability.

If you’ve ever wanted a cheap power supply module with really low-level control and rich data display, this could be just what you need. Meanwhile, you’ve got your own neat power supply in the works, don’t hesitate to drop us a line. 

Retro TV Shows Off Family Memories With Raspberry Pi

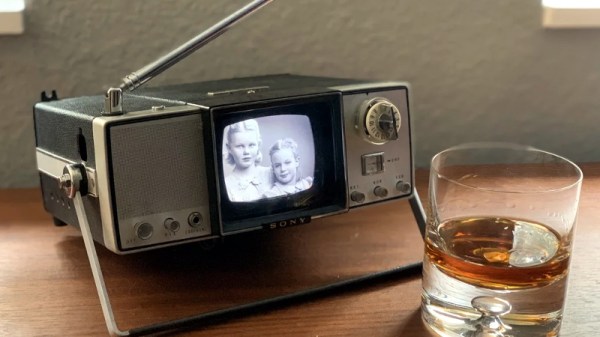
Fascinated by the look and feel of vintage electronics, [Democracity] decided to turn an old Sony Micro TV into a digital picture frame that would cycle through old family photos in style. You’d think the modern IPS widescreen display would stick out like a sore thumb, but thanks to the clever application of a 1/16″ black acrylic bezel and the original glass still installed in the front panel, the new hardware blends in exceptionally well.

Driving the new display is a Raspberry Pi 4, which might sound overkill, but considering the front-end is being provided by DAKboard through Chromium, we can understand the desire for some extra horsepower and RAM. If it were us we’d probably have gone with a less powerful board and a few Python scripts, and of course there are a few turn-key open source solutions out there, though we’ll admit that this is probably faster and easier to setup.

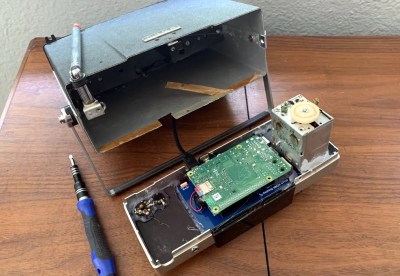
[Democracity] provides some general information on how he took apart the TV and grafted in the new gear, but of course the exact steps will vary a bit depending on which old TV you end up sending to the big parts bin in the sky. We did like that he made sure to keep all the mechanisms for the buttons and knobs intact, so even if they don’t do anything, you can still fiddle around with them.

Otherwise, his steps for setting up a headless Chromium instance are probably more widely applicable. As are the tips about setting up this particular LCD module and getting the display rotated into the proper orientation. If you just follow along for that part of the guide, you can spin up your own stand-alone Raspberry Pi DAKboard endpoint to take the service for a test drive.

It probably won’t come as much of a surprise to hear that this isn’t the first time [Democracity] has upgraded a piece of vintage hardware. Back in 2017, we covered this gorgeous art deco speaker that he outfitted with RGB LEDs and an Amazon Echo Dot. As with the previous post, it’s likely some commenters will be upset that a vintage piece of gear has been gutted for this project. But we’d counter that by saying his family is going to get a lot more enjoyment out of this beautiful piece of hardware now than they would have if it was still collecting dust in a closet.

FreeBSD Experiment Rethinks The OS Install

While the medium may have evolved from floppy disks to DVDs and USB flash drives, the overall process of installing an operating system onto a desktop computer has been more or less the same since the 1980s. In a broad sense you could say most OS installers require more clicking than typing these days, but on the whole, not a lot has really changed. Of course, that doesn’t mean there isn’t room for improvement.

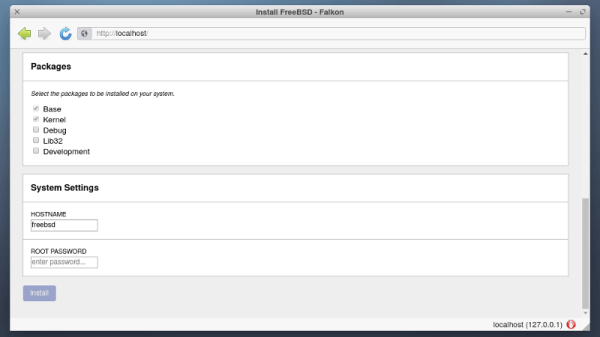
Among the long list of projects detailed in FreeBSD’s April to June 2021 Status Report is a brief update on an experimental installer developed by [Yang Zhong]. In an effort to make the installation of FreeBSD a bit more user friendly, the new installer does away with the classic terminal interface and fully embraces the modern web-centric design paradigm. Once the user has booted into the live OS, they simply need to point the browser to the loopback address at any time to access the installer’s GUI.

Now that alone wouldn’t be particularly groundbreaking. After all, Google has implemented an entire operating system with web frameworks in Chrome OS, so is making the installer a web app really that much of a stretch? But what makes [Yang]’s installer so interesting is that the web interface isn’t limited to just the local machine, it can be accessed by any browser on the network.
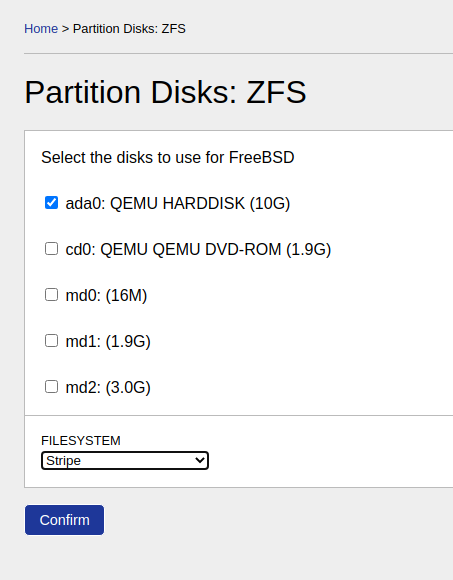
That means you can put the install disc for FreeBSD into a headless machine on your network, and use the browser on your laptop or even smartphone to access the installer. The Graybeards will point out that savvy users have always been able to access the text installer from another computer over SSH, but even the most staunch Luddite has to admit that simply opening a browser on whatever device you have handy and pointing it to the target machine’s IP address is a big usability improvement.

While the software appears complete enough to get through a basic installation, we should remind readers these are still early days. There’s currently no authentication in place, so once you’re booted into the live environment, anyone on the network can format your drives and start the install process.

Some sections of the GUI aren’t fully functional either, with the occasional note from [Yang] popping up to explain what does and doesn’t work. For example, the manual network configuration panel currently only works with WiFi interfaces, as that’s all he personally has to test with. Quite a modern installer, indeed.

Some would argue that part of what makes alternative operating systems like Linux and BSD appealing is the fact that they can happily run on older hardware, so we imagine the idea of an installer using a memory-hungry web browser to present its interface won’t go over well with many users. In our testing, the experimental installer ISO won’t even boot unless it detected at least 4 GB of RAM onboard. But it’s certainly an interesting experiment, and something to keep an eye on as it matures.

[Thanks to Michael for the tip.]

Motorized Camera Slider Gives Your Shots Style

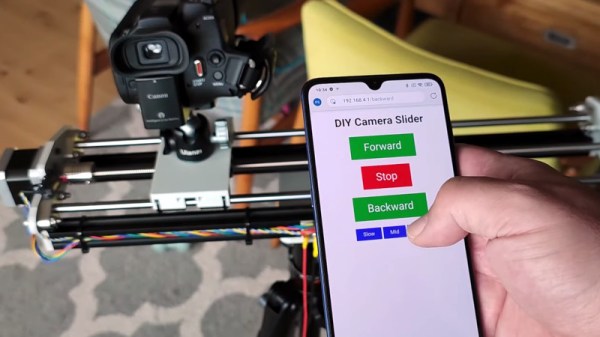
We’ve all seen those smooth panning shots, which combined with some public domain beats, are a hallmark of the modern YouTube tech video. Recreating that style in your own productions is as easy as pointing your browser to Amazon and picking up a motorized camera slider, so long as you don’t mind parting with a few hundred bucks, anyway. But [Paweł Spychalski] had a better idea. He decided to build his own camera slider and make it an open source project so others could spin up their own versions.

His design uses many components that have become popular and affordable thanks to the desktop 3D printer explosion, such as 2020 aluminum extrusion, LM8UU linear bearings, an 8 mm lead screw, and a NEMA 17 stepper motor. In fact, if you’ve got a broken 3D printer that you don’t know what to do with, stripping it for parts would get you a long way towards completing the BOM for this project.

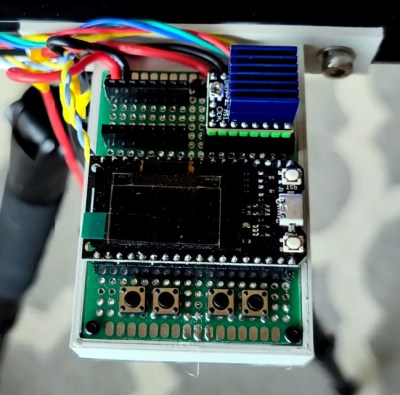
To control the slider, [Paweł] is using an ESP32 and TMC2209 “StepStick” driver connected to an OLED display and a few buttons. As designed, a smartphone connected to a simple web page hosted by the ESP32 is the primary method of controlling the camera, but the buttons and display on the slider itself gives you a physical backup should you need it.

If you need something a bit more advanced than a linear slider, we’ve seen some impressive DIY motion rigs that can spin the camera around the target and produce some very professional looking shots.

Continue reading “Motorized Camera Slider Gives Your Shots Style”

ESP8266 Adds Web Control To Old Home Theater

There was a time when you could hold onto a TV or A/V receiver for the better part of the decade and not feel as though you were missing out on the latest and greatest features. But today you’re lucky to get three years out of a “smart” TV before it’s either supplanted by a vastly improved version, or falls victim to some weird issue that (surprise, surprise) means you need to buy a new one.

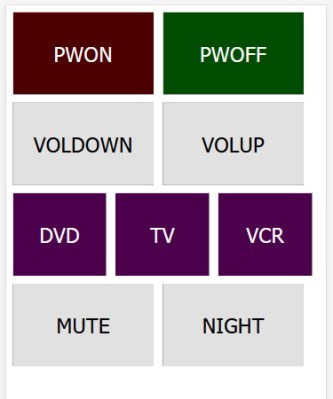
A simple touch interface hosted on the ESP8266

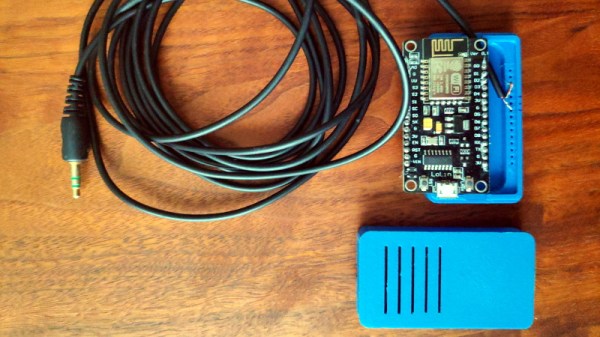
Not content with the status quo of planned obsolescence, [aamarioneta] recently set out to add a sprinkling of modern convenience to a circa 2008 Denon AVR 2308 home theater receiver. Like any good A/V receiver, the AVR 2308 features a dizzying array of ports on the back panel, one of which happens to be for an external infrared receiver. This turned out to be the perfect place to jack in an ESP8266, earning this 12 year old receiver an honorary membership into the Internet of Things.

The interesting thing about this hack is that there’s actually no IR involved. Sure, the code could be used to drive an IR LED attached to the ESP8266’s GPIO pins, and the AVR 2308 would respond as if the original remote was being used; but where’s the fun in that? Thanks to the receiver port, they’re able to inject the IR codes directly into the device. It’s the same protocol, just without the photons.

With a simple web-interface running on the ESP8266, they can control the AVR 2308 from a smartphone’s browser anywhere in the house. From here it would only take a few more lines of code to tie it into an existing home automation system or add in support for Alexa voice control.

We love seeing projects that add modern features to older hardware, as that’s one less piece of gear sent to an early grave because its owner felt they were behind the curve. It’s getting a bit unfriendly out there for consumers, and anything that puts the power back into the owner’s hands is a step in the right direction.

Start Your Day With The Mountain That Rises

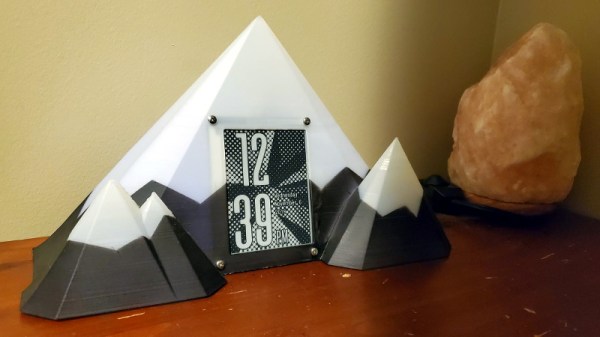
Like many of us, [Zach Archer] enjoys the comfort of his darkened room so much that he has trouble getting up and facing the day. To make things a little easier for himself, he decided to put together a custom alarm clock that would fill his mornings with the glorious glow of LEDs; and since he finds the mountains an inspirational sight he decided to wrap the whole thing up in a 3D printed enclosure that resembles snow capped peaks.

But even Bob Ross himself couldn’t have imagined a snowy mountain range that featured an integrated e-ink screen. The big 4.2″ panel is connected to a custom designed PCB by [romkey], which was graciously donated for this project. An ESP32 runs the show, providing a convenient web interface to control not only the clock, but various aspects of the mountain’s internal LEDs such as fade in time and total duration.

[Zach] says he originally printed the mountains in PLA, but the heat generated by the LEDs eventually started to cause things to warp. Switching over to translucent PETG not only solved the heat problem, but made for a very effective LED diffuser. Rather than complex animation patterns, he’s found that smoothly transitioning between different shades of blue and green seems to work best for him in the mornings.

This isn’t the first time we’ve seen somebody use LEDs to get them out of bed in the morning, but we do appreciate the aesthetic that [Zach] has achieved here between the design of the mountains and the impressive artwork on the e-ink display. Then again, we’re also quite partial to this version that looks like a warp core, so our tastes do run the gamut.