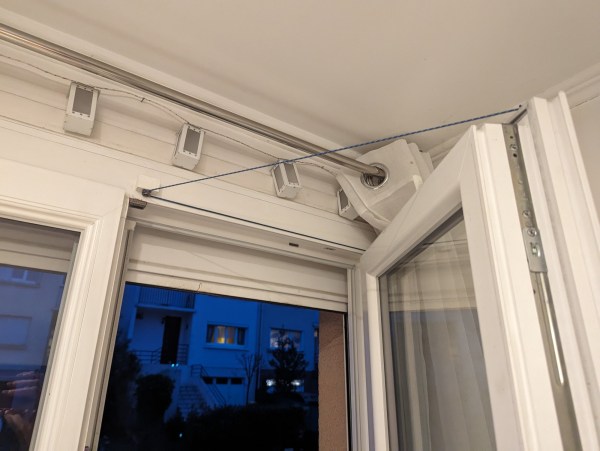
Of course, [Gauthier] didn’t arrive at this solution immediately. Their first thoughts went to RFID or perhaps a pressure sensor to detect the cats, coupled with something motorized to open and shut the window, like a belt or maybe a linear actuator. But ultimately, the system has to be robust, so that’s when [Gauthier] got the idea to employ gravity by using pulleys and weights.
One easy way to get started on the home automation front is with something that makes a house a home in the first place — lush, green plants. As nice as it is to have them around, it can be difficult to care (or remember to care) for them all the time.
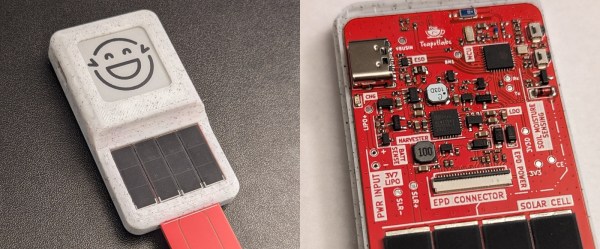
Plantpal makes easy work of that, with an e-paper display that makes it plain as day how your plant is feeling. As you might expect, it features a soil moisture sensor, but what might be unexpected is that it’s capacitive instead of the usual resistive type. This way, no traces are exposed to the elements of plant life. It also has a BME688 sensor to monitor air quality and CO₂, so your plant has the chance to thrive.
Around back you’ll find an ESP32-C6, an AEM10941 for solar energy harvesting, and another set of solar panels. Be sure to check out the project’s GitHub if you want to learn more about this adorable and useful device.
Your home is your castle, and what’s better than a fully automatic castle? Nothing! That’s why we’re inviting you to submit your sweetest home automation hacks for a chance to win one of three $150 DigiKey gift certificates. The contest starts now and runs until April 16th.
[Matej]’s Home Buttons gets the job done in open-source style.We love to play around with home automation setups and have seen our fair share, ranging from the simple “turn some lights on” to full-blown cyber-brains that learn your habits and adapt to them. Where is your project on this continuum?
Whether you’re focused on making your life easier, saving energy, gathering up all the data about your usage patterns, or simply stringing some random functions together and calling it a “system,” we’d like to see it. Nothing is too big or too small if it makes your home life easier.
Home is where the home automation is!
To enter, head over to Hackaday IO and start documenting your project there. We are, of course, interested in learning from what you’ve done, so the better the docs, the better your chances of winning. And if you need some inspiration, check out these honorable mention categories.
Honorable Mention Categories
Creature Comforts: Does your system make your house a home? Maybe it turns on and off the heaters to keep rooms just right, opens and closes the blinds for you, or maybe it turns on the nightlights when you’re heading downstairs for a midnight snack. The Creature Comforts category is for you.
Rube Goldberg: A “system” sounds so formal, but a lot of ad hoc home automation projects are nonetheless super effective. If your home system grew organically and maybe resembles a collection of hacks more than a carefully orchestrated plan, it could be a Rube Goldberg setup.
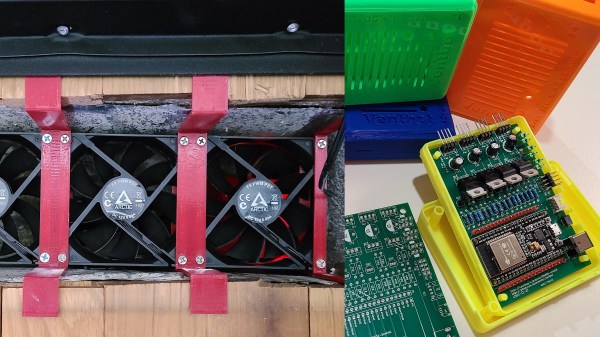
[WJCarpenter] had a common HVAC problem; not all the rooms got to a comfortable temperature when the heater was working to warm up their home. As often happens with HVAC systems, the rooms farthest from the heat source and/or with less insulation needed a boost of heat in the winter and cooling in the summer too. While [WJCarpenter] is a self-reported software person, not a hardware person, you will enjoy going along on the journey to build some very capable vent boosters that require a mix of each.
There’s a great build log on hackaday.io here, but for those who need more of a proper set of instructions, there’s a step-by-step guide that should allow even a beginner hardware hacker to complete the project over on Instructables. There you’ll find everything you need to build ESPHome controlled, 3D printed, PC fan powered vent boosters. While they can be integrated into Home Assistant, we were interested to learn that ESPHome allows these to run stand-alone too, each using its own temperature and pressure sensor.
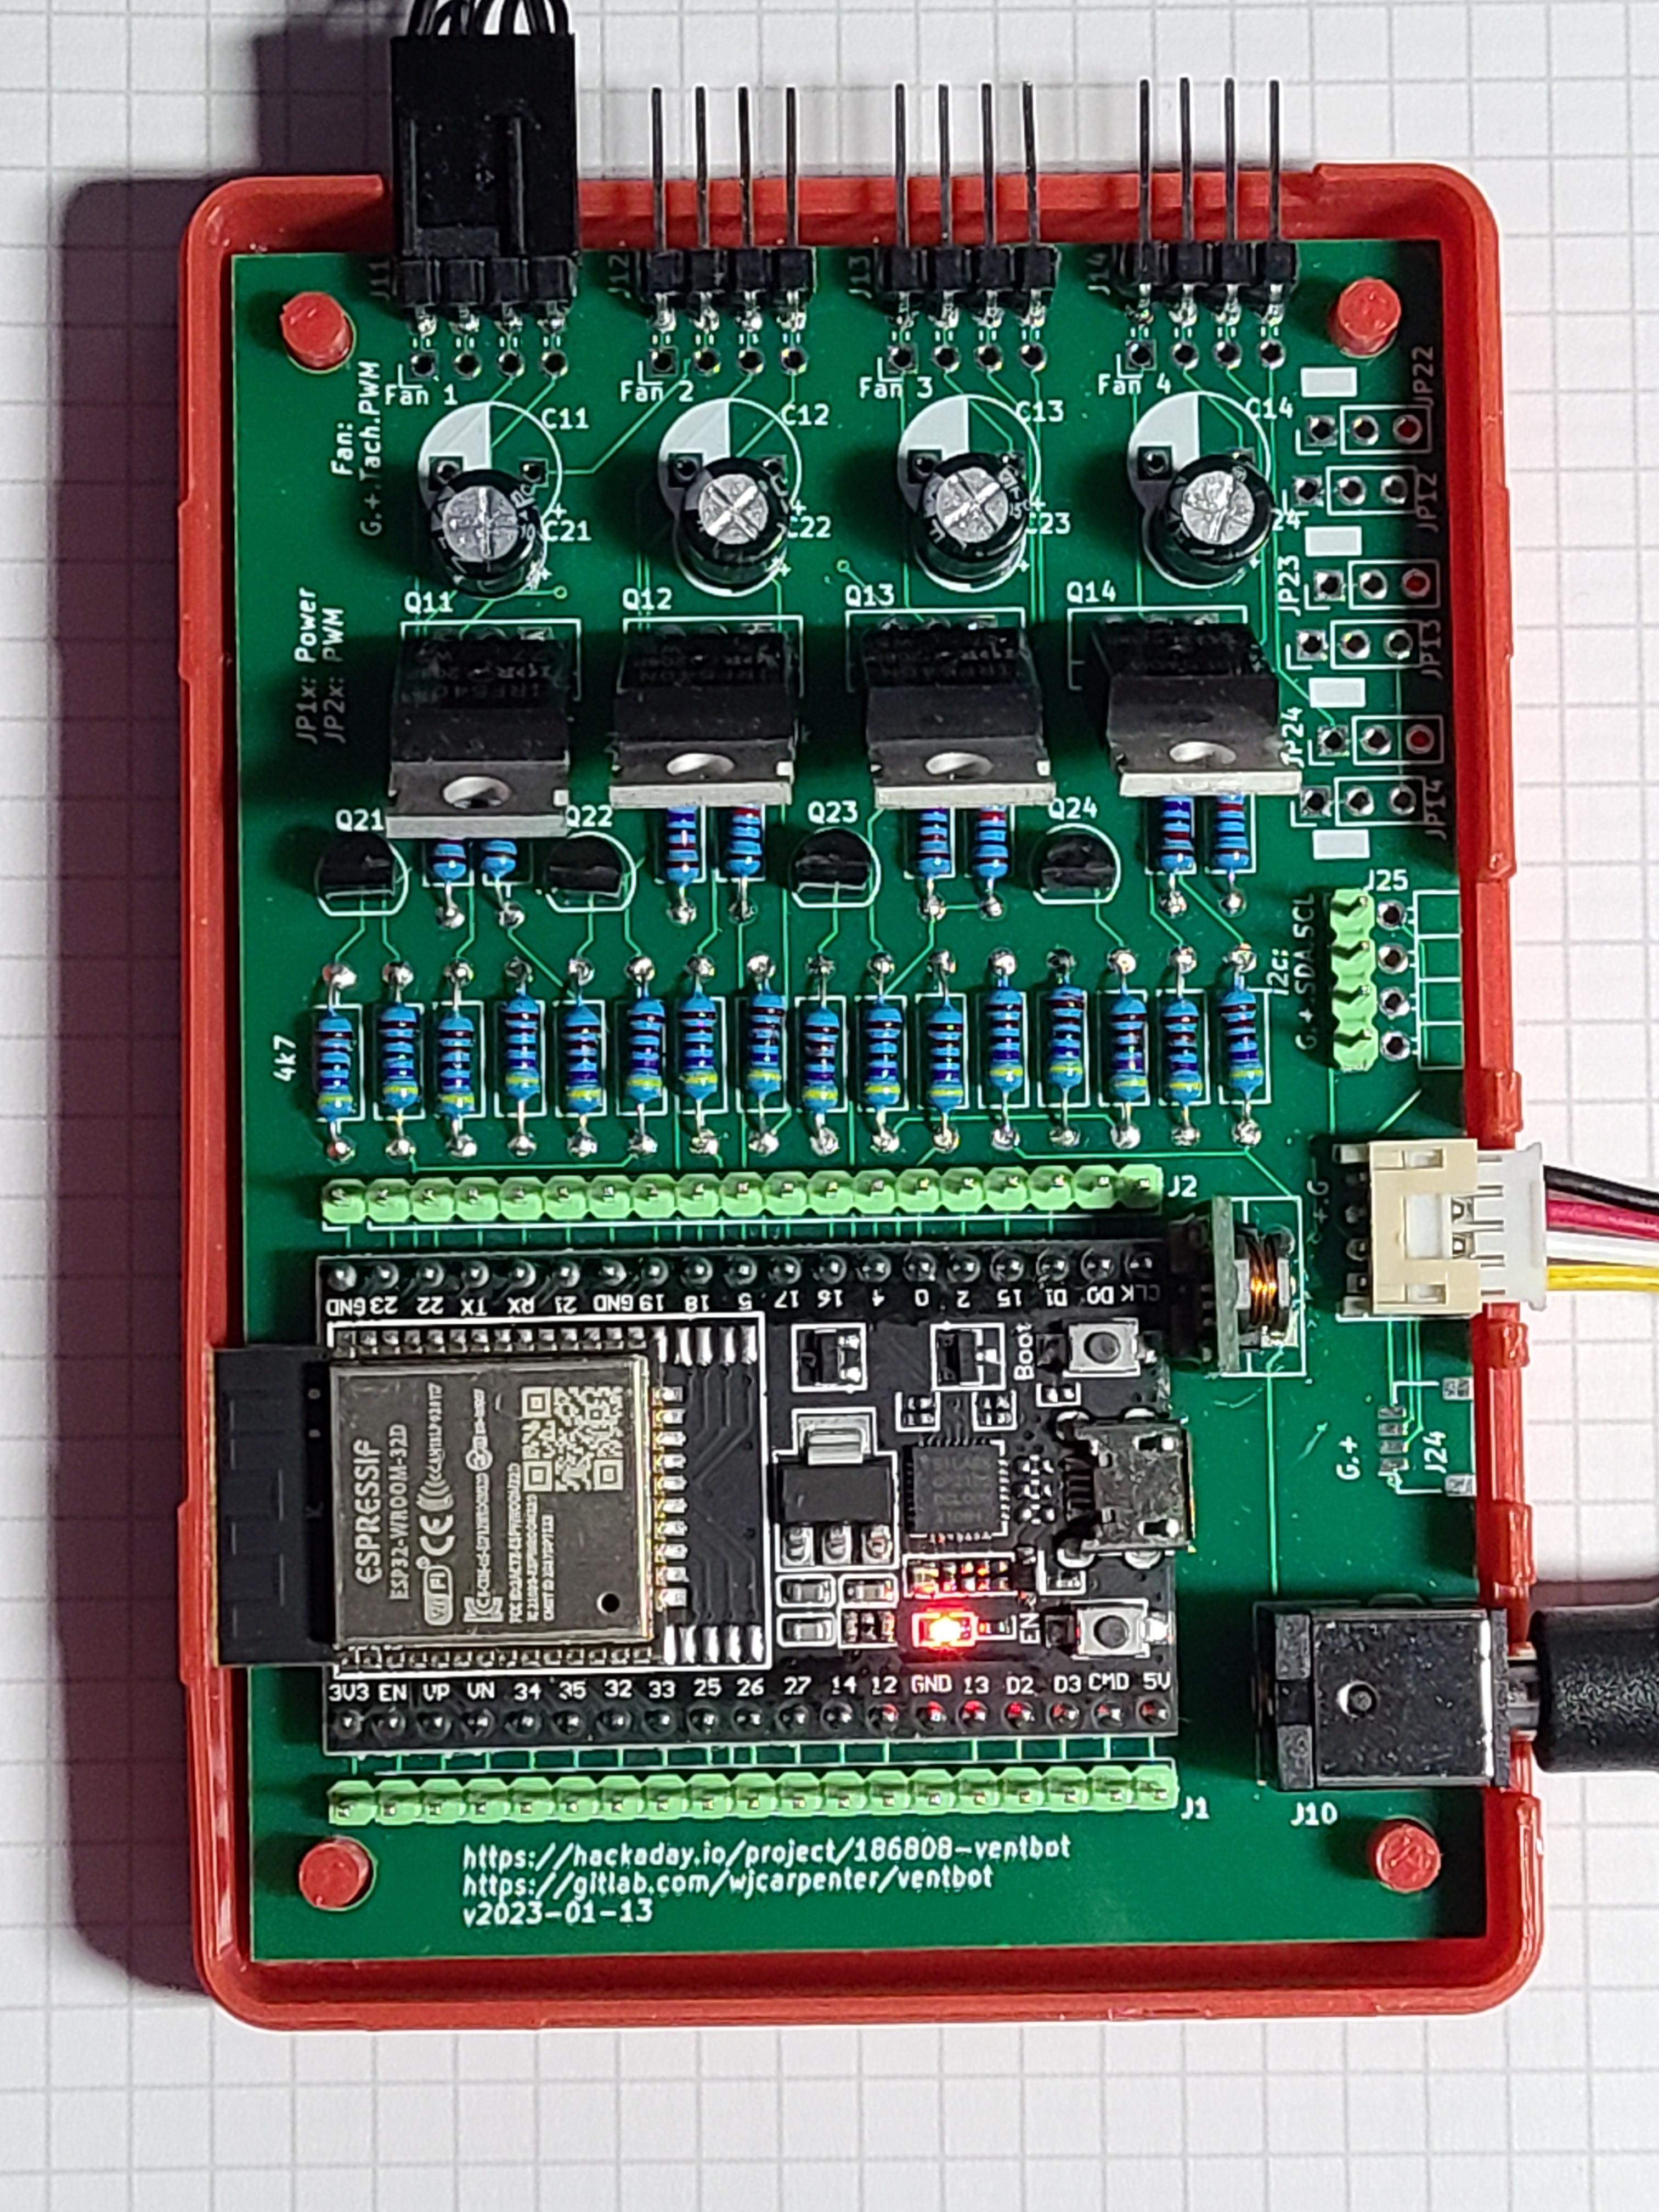
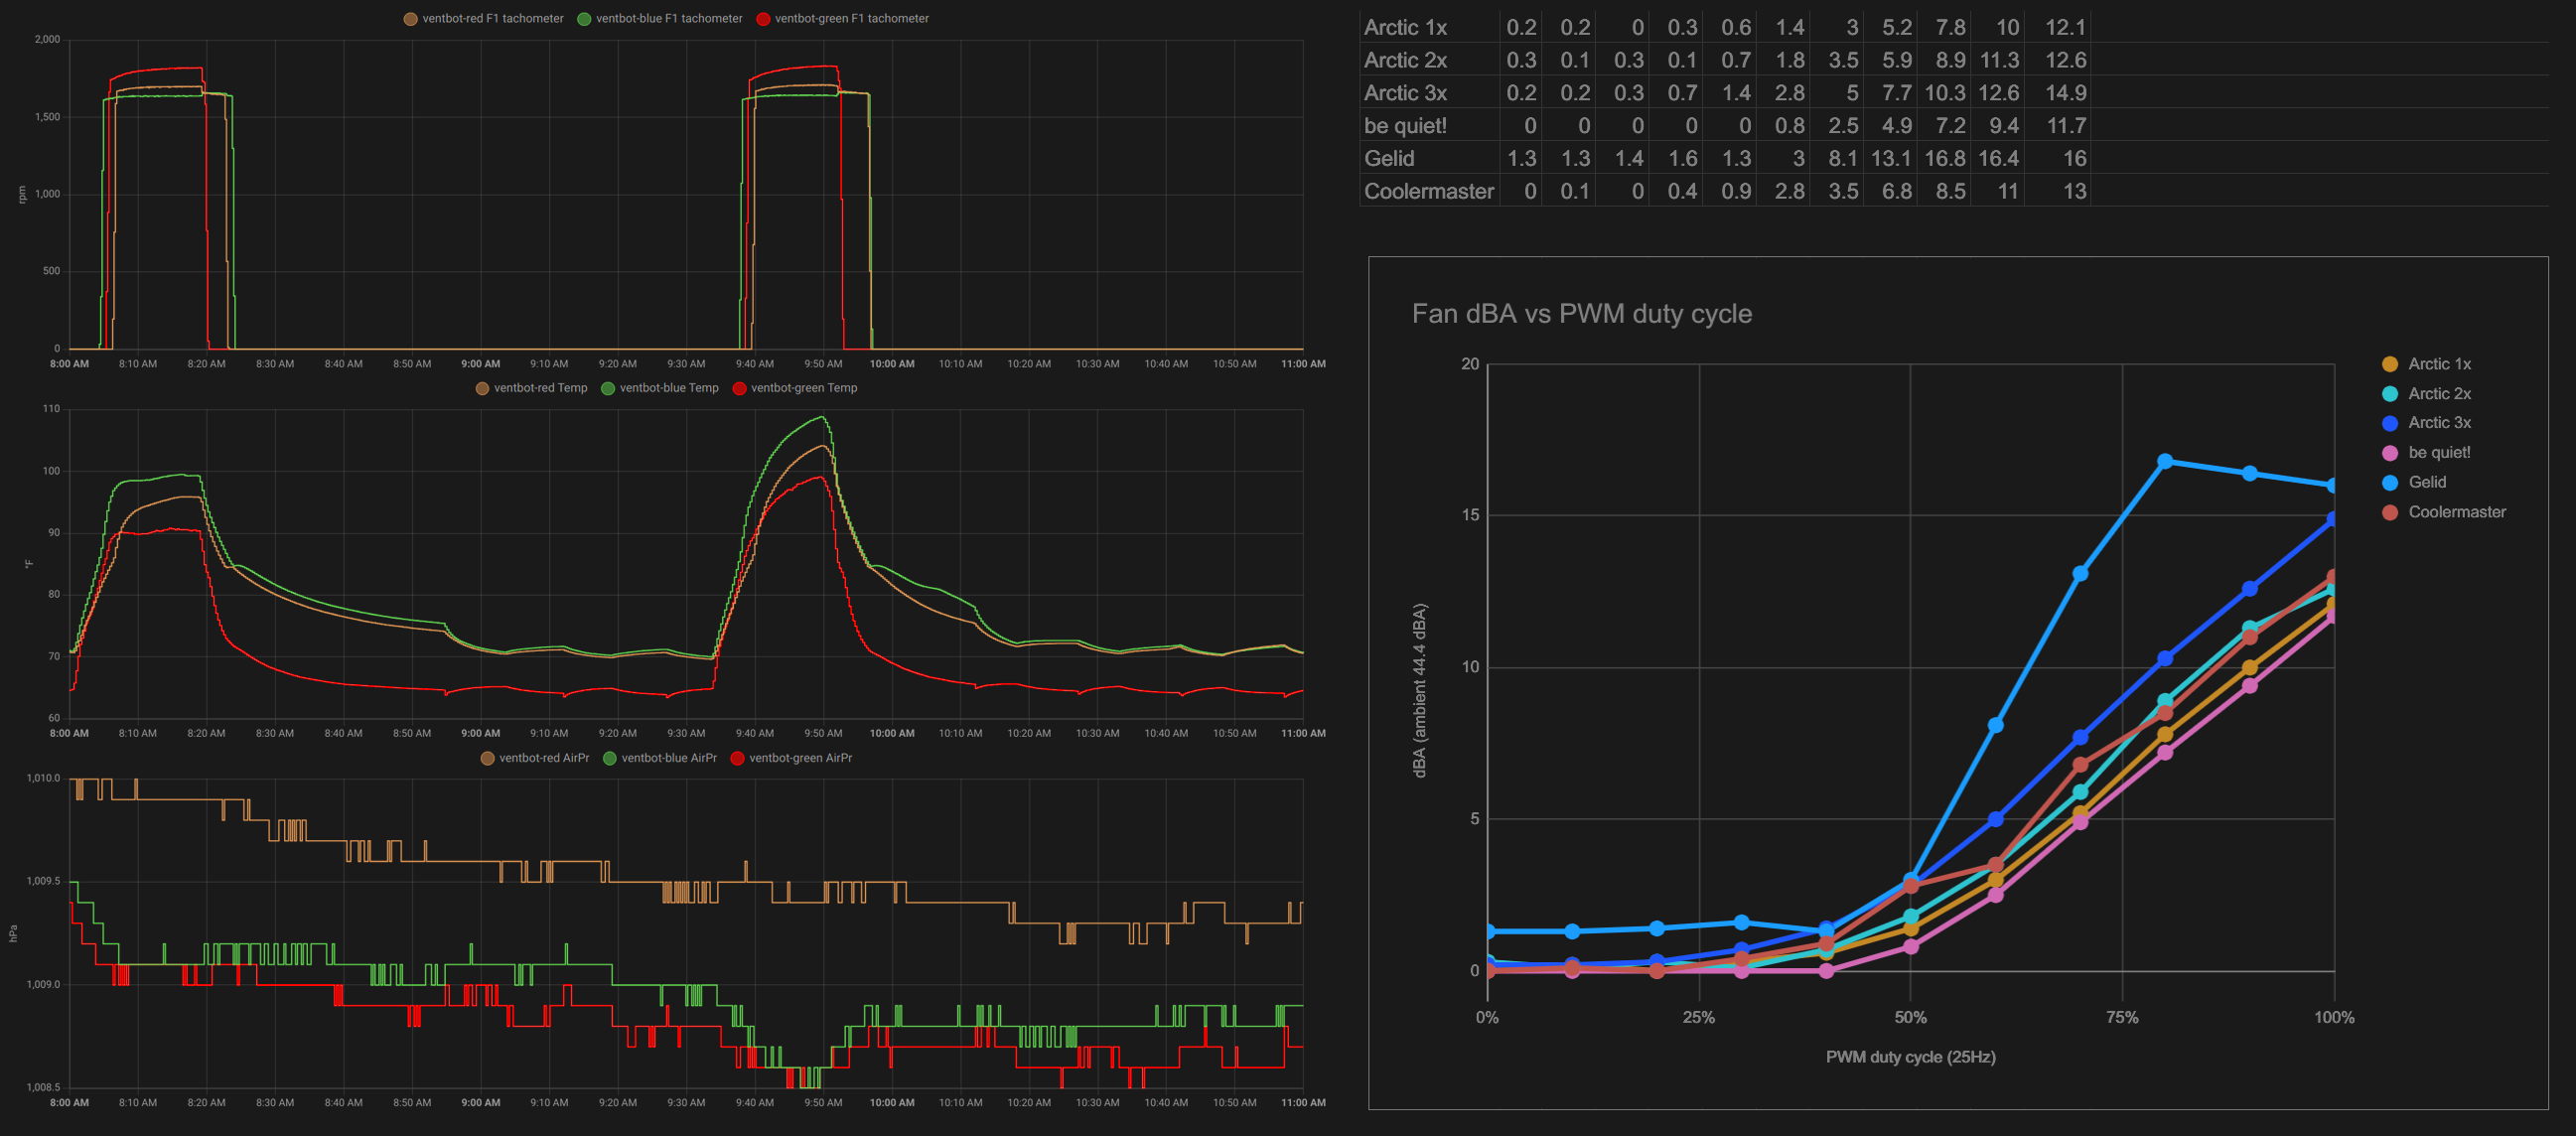
The many iterations of hardware and software show, resulting in thoughtful touches like a startup sequence that checks for several compatible temperature sensors and a board layout that accommodates different capacitor lead spacings. Along the way, [WJCarpenter] also graphed the noise level of different fans running at multiple speeds and the pressure sensor readings against the temperatures to see if they could be used as more reliable triggers for the fans. (spoiler, they weren’t) There are a bunch of other tips to find along the way, so we highly recommend going through all that [WJCarpenter] has shared if you want to build your own or just want some tips on how to convert a one-off project to something that a wider audience can adapt to their own needs.
See a video after the break that doesn’t show the whole project but includes footage of the start-up sequence that tests each fan’s tachometer and the customizable ramp-up and ramp-down settings. Continue reading “Ventbots Are Fans Of HVAC And Home Automation”→
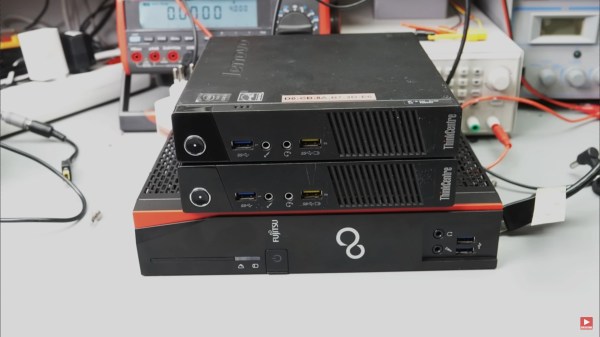
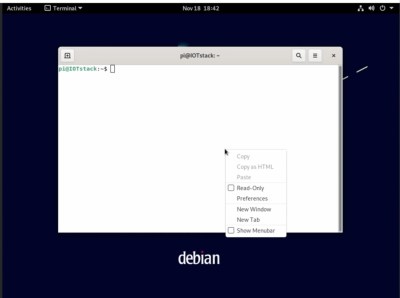
Do you need a cheap, small computer for a low power computing project? Historically, many of us would reach straight for a Raspberry Pi, even if we didn’t absolutely need the GPIO. But with prices elevated and supplies in the dumps, [Andreas Spiess] decided that it was time to look for alternatives to now-expensive Pi’s which you can see in the video below the break.
Setting up Debian for IOTstack
Many simply use the Pi for its software ecosystem, its lower power requirements, and diminutive size. [Andreas] has searched eBay, looking for thin PC clients that can be had for as little as $10-15. A few slightly more expensive units were also chosen, and in the video some comparisons are made. How do these thin clients compare to a Pi for power consumption, computing power, and cost? The results may surprise you!
Software is another issue, since many Pi projects rely on Raspbian, a Pi-specific ARM64 Linux distribution. Since Raspbian is based on Debian, [Andreas] chose it as a basis for experimentation. He thoughtfully included such powerful software as Proxmox for virtualization, IOTstack, and Home Assistant, walking the viewer through each step of running Home Assistant on x86-64 hardware and noting the differences between the Linux distributions.
All in all, if you’ve ever considered stepping out of the Pi ecosystem and into general Linux computing, this tutorial will be an excellent starting point. Of course [Andreas] isn’t the first to bark up this tree, and we featured another thin client running Klipper for your 3D printer earlier this month. Have you found your own perfect Pi replacement in these Pi-less times? Let us know in the comments below.
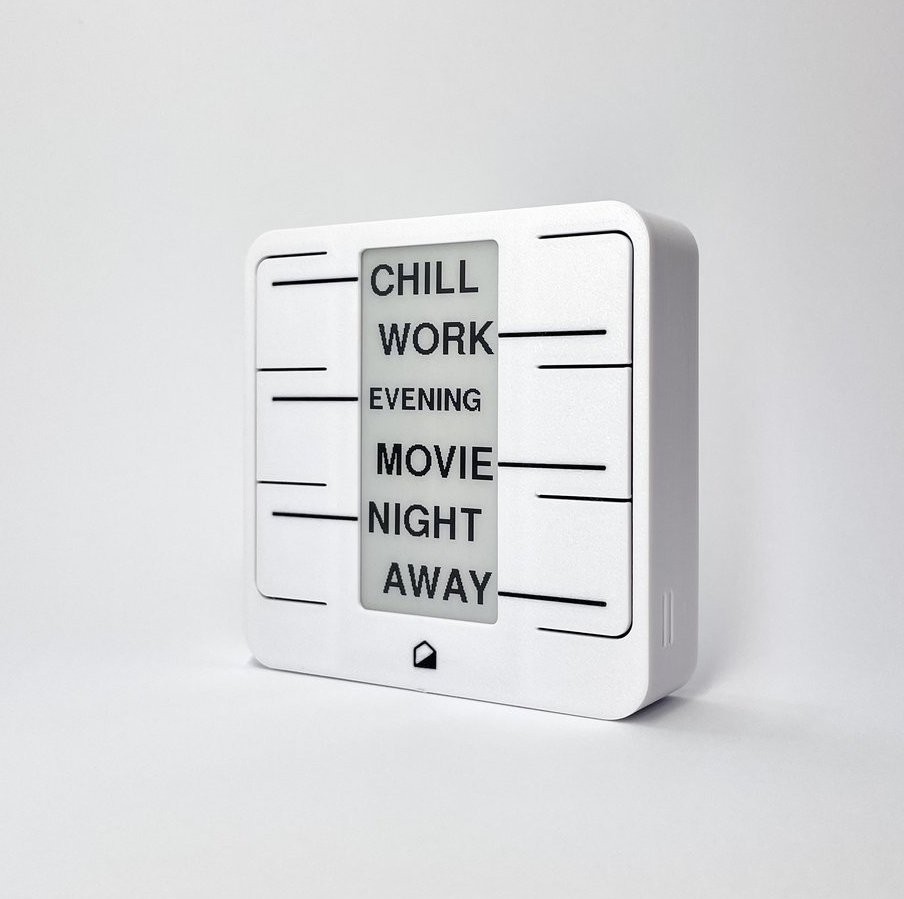
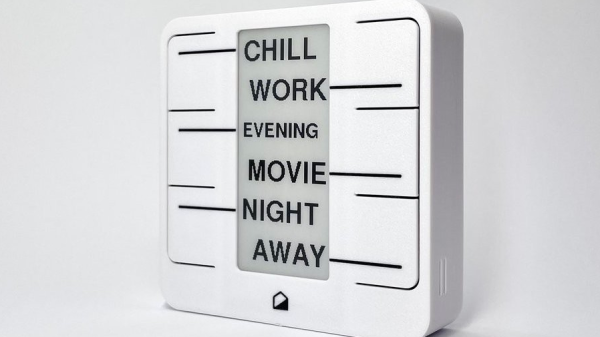
Home automation systems are all well and good, so long as the person who built it all is around to drive it. Let’s face it, they’re quite often a complex web of interconnected systems, all tied to the specifics of one’s home — and someone less familiar with it all could get a little irritated if, on a chilly day, the interface to the boiler is via a Python script, and something won’t work. Just saying. Home Buttons by [Matej Planinšek] over on Hackaday.IO is a nicely polished project, which aims to take some of the hackiness out of such automation by providing a sleek front end to those automation routines, enabling anyone to rock on over and set one in action without hassle.
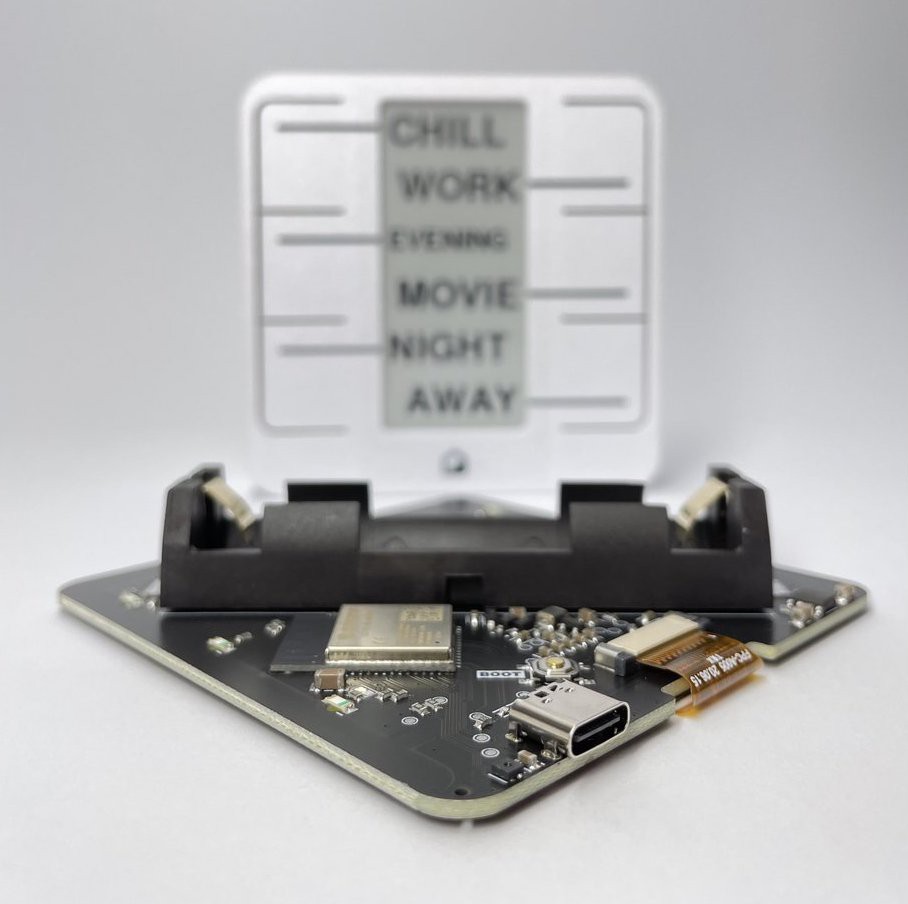
The PCB is based around the ESP32-S2-mini which deals with WiFi connectivity and integration with Home Assistant using the usual MQTT protocol. We expect integration with other flavors of home automation would not be difficult to achieve. The center of the unit holds a simple E-Ink display, for that low-standby power. Specifically, the unit chosen is a Good Display GDEY029T94 2.9″ which this scribe can confirm is easy to interface and pretty cheap to purchase from the usual Chinese online vendors. This was matched up with six clicky Alps SKRB-series low-profile tact switches, which sit on either side of the display, and corresponds to a flexure-type affair on the 3D printed front casing. Neat and simple.
The PCB design was provided in Altium format, which you can find on the project GitHub page. This shows a straightforward design, with a few nice little details here and there. The internally mounted 18650 cell is reportedly good for at least a year of operation, but when time, it can be charged via USB. A Xysemi XB8608AF (PDF) protection chip provides appropriate limiting for the 18650 cell, shielding it from the perils of overcharging, discharging, and whatnot. Not that that is likely in this current setup. A Sensiron SHTC3 humidity and temperature sensor is also in there, hanging off the I2C bus, which makes sense for this application.
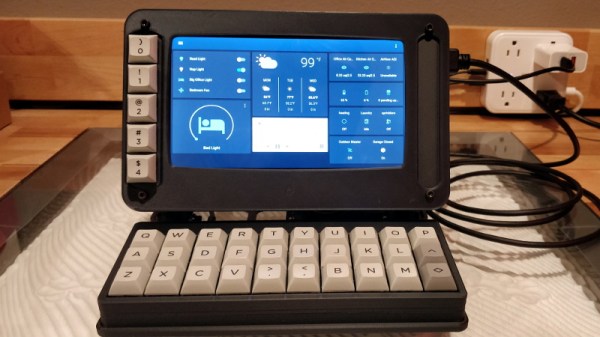
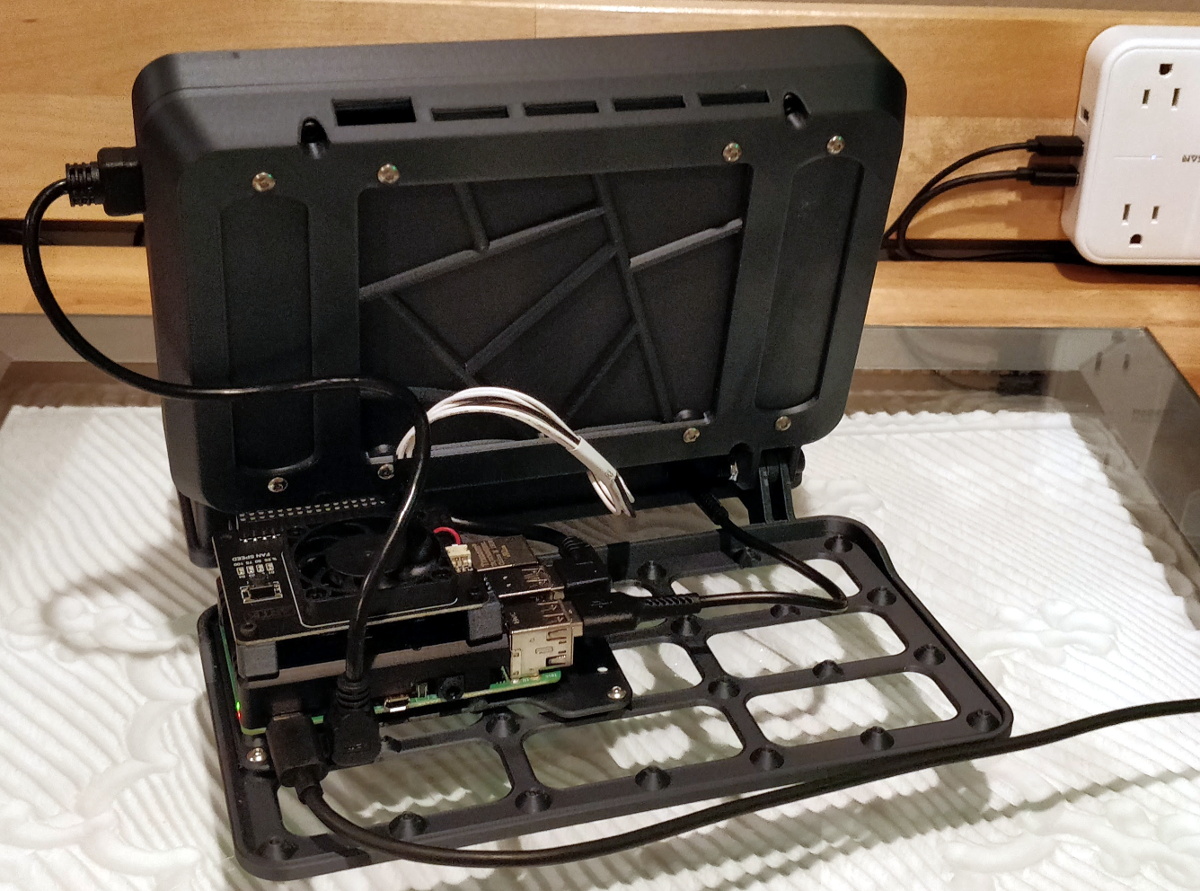
The OLKB-Terminal designed by [Jeff Eberl] doesn’t have a battery, can’t fold up (even if it seems like it could), and is only portable in the sense that you can literally pick it up and move it somewhere else. So arguably it’s not really a cyberdeck per se, but it certainly does look the part. If you need to be furiously typing out lines of code in a dimly lit near-future hacker’s den, this should do you nicely.
[Jeff] has provided everything you’d need to recreate this slick little machine on your own, though he does warn that some of the hardware decisions were based simply on what he had on-hand at the time, and that better or cheaper options may exist. So for example if you don’t want to use the Raspberry Pi 4, you can easily swap it out for some other single-board computer. Though if you want to change something better integrated, like the LCD panel, it will probably require modifications to the 3D printed components.
The rear electronics tray offers plenty of room for expansion.
The slim mechanical keyboard that [Jeff] used for the OLKB-Terminal, which in some ways set the tone for the whole design, is actually a completely separate open source project from [Victor Lucachi]. The VOID30 is a 3D printed, 30% handwired ortholinear keyboard that runs the popular QMK firmware on an Arduino Pro Micro. He’s implemented a couple tweaks, namely using a USB-C equipped Arduino clone, but otherwise it’s the same as upstream. So if you’re not in the market for a little bedside cyberpunk terminal but love its sleek keyboard, you’re in luck.
Software wise, [Jeff] has the OLKB-Terminal hooked into his larger Home Assistant system. This gives him an attractive status display of the whole network, and with just a tap on the terminal’s seven inch touch screen, he’s able to directly control devices around the home. That said, at the end of the day it’s just a Raspberry Pi, so it could really run whatever you want.