Homebrew Relay Computer Looks Like It Could Be A Commercial Product

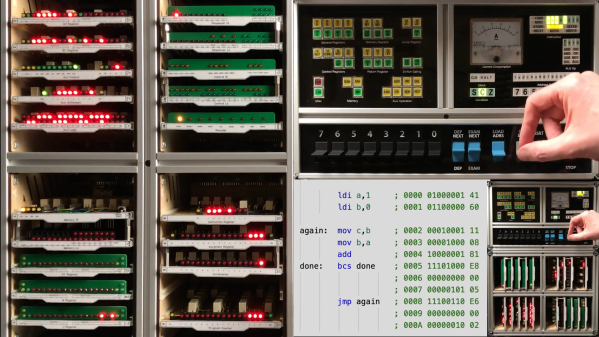
You may not have noticed, but we here at Hackaday really love our clicky stuff. Clicky mechanical keyboards, unnecessarily noisy flip-dot displays, and pretty much anything made with a lot of relays — they all grab our attention, in more ways than one. So it’s with no small surprise that we appear to have entirely missed perhaps the clickiest build of all: a fully operational 8-bit computer using nothing but relays.

What’s even more amazing about our failure to find and feature [Paul Law]’s excellent work is that he has been at it for the better part of a decade now. The first post on his very detailed and very well-crafted blog describing the build dates from 2013, when he was just testing LEDs in the arithmetic-logic unit (ALU). Since then, [Paul] has made incredible progress, building module after module, each containing a small portion of the computer’s functionality. The modules plug into card cages with backplanes to connect them, and the whole thing lives in an enclosure made from aluminum extrusion and glossy black panels for a truly sleek look. The computer is incredibly compact for something that uses 400+ DPDT relays to do its thinking.

In addition to the blog, [Paul] has a criminally undersubscribed YouTube channel with a quite recent series going over the computer in depth. We included the overall tour below, but you should really check out the rest of the videos to appreciate how much work went into this build. We’ve seen relay computers ranging in size from single-board to just plain ludicrous, but this one really takes the prize for fit and finish as well as functionality.

Continue reading “Homebrew Relay Computer Looks Like It Could Be A Commercial Product”

DIY 8-Bit Computer Knows All The Tricks

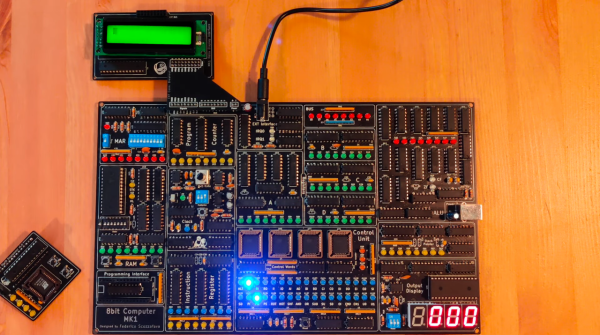
Some projects are a rite of passage within their respected fields. For computer science, building one’s own computer from scratch is certainly among those projects. Of course, we’re not talking about buying components online and snapping together a modern x86 machine. We mean building something closer to a fully-programmable 8-bit computer from the ground up, like this one from [Federico] based on 74LS logic chips.

The computer was designed and built from scratch which is impressive enough, but [Federico] completed this project in about a month as well. It can be programmed manually through DIP switches or via a USB connection to another computer, and also includes an adjustable clock which can perform steps anywhere from 1 Hz to 32 kHz. Complete with a 1024 byte memory, a capable ALU, four seven-segment LEDs and (in the second version of the computer) a 2×16 LCD disply, this 8-bit computer has it all.

Not only is this a capable machine designed by someone who clearly knows his way around a logic chip, but [Federico] has also made the code and schematics available on his GitHub page. It’s worth a read even without building your own, but if you want to go that route without printing an enormous PCB you can always follow the breadboard route.

Thanks to [killergeek] for the tip!

Continue reading “DIY 8-Bit Computer Knows All The Tricks”

A CPU-Less Computer With A Single NOR-Gate ALU

We see a lot of discrete-logic computer builds these days, and we love them all. But after a while, they kind of all blend in with each other. So what’s the discrete logic aficionado to do if they want to stand out from the pack? Perhaps this CPU-less computer with a single NOR-gate instead of an arithmetic-logic unit is enough of a hacker flex? We certainly think so.

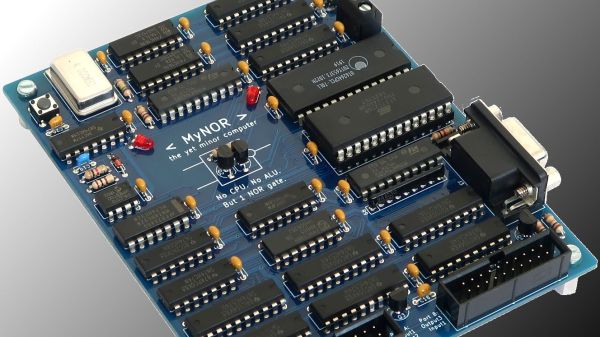
We must admit that when we first saw [Dennis Kuschel]’s “MyNor” we thought all the logic would be emulated by discrete NOR gates, which of course can be wired up in various combinations to produce every other logic gate. And while that would be really cool, [Dennis] chose another path. Sitting in the middle of the very nicely designed PCB is a small outcropping, a pair of discrete transistors and a single resistor. These form the NOR gate that is used, along with MyNor’s microcode, to perform all the operations normally done by the ALU.

While making the MyNor very slow, this has the advantage of not needing 74-series chips that are no longer manufactured, like the 74LS181 ALU. It may be slow, but as seen in the video below, with the help of a couple of add-on cards of similar architecture, it still manages to play Minesweeper and Tetris and acts as a decent calculator.

We really like the look of this build, and we congratulate [Dennis] on pulling it off. He has open-sourced everything, so feel free to build your own. Or, check out some of the other CPU-less computers we’ve featured: there’s the Gigatron, the Dis-Integrated 6502, or the jumper-wire jungle of this 8-bit CPU-less machine.

Continue reading “A CPU-Less Computer With A Single NOR-Gate ALU”

64-bit And A Display: Minecraft Computers 10 Years Later

Some people build their own computer to play games, while others play games to build their own computer. Minecraft is the prime candidate for the latter, and while you can certainly arrange the blocks to make them look like a computer, we’re of course talking about replicating the actual functionality of a CPU or parts thereof, and/or external components within the game. Many such creations have spawned in the decade since the first Minecraft-built ALU surfaced, and [Rockfarmor] built a 64-bit specimen to add to that list — and made a video to showcase it.

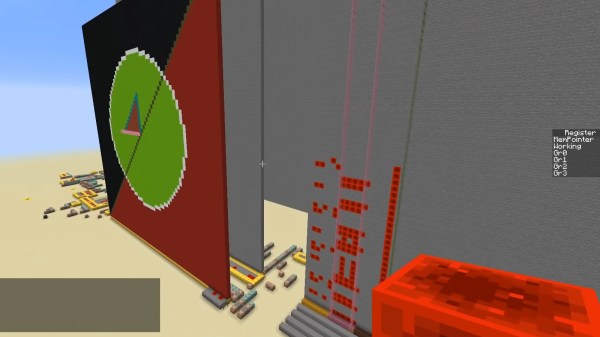
Instead of emulating a common architecture, [Rockfarmor] went for a more home-made approach, and re-used the architecture from an old school assignment (in Swedish) as basis. The result is a simple yet fully functional 64-bit CPU with 32 registers, 32kB main memory and a separate 16kB stack. The instruction set mostly contains ALU and branching operations, but also a few special opcodes to control an additional 64×64 pixel blocks, 64-color display — including drawing circles, lines, and color fills.

More details on the architecture can be found in its documentation and in an older video (with subpar audio circumstances unfortunately). An additional time-lapse video of the initial build is also available, and you will find all of them after break. To simplify development, [Rockfarmor] also wrote a desktop app to program the computer in assembly and upload it straight to the Minecraft version.

As with all computers built in Minecraft, the driving force is redstone, which essentially allows circuit design within the game, and [Rockfarmor]’s is no difference here. He also uses command blocks to avoid the laboriously and slow “wiring” required otherwise, turning it more into a “wireless redstone” circuit.

No doubt, purists will consider this cheating, but another angle would be to see it as Moore’s Law applied to Minecraft computers, considering the computer’s size and speed compared to the first Minecraft ALU. Or maybe as the equivalent of microcode in real-world CPUs? Or then, maybe we should just accept and embrace different options and preferences.

Continue reading “64-bit And A Display: Minecraft Computers 10 Years Later”

The Math That Makes Computers Go, Built On A Tiny PCB

A computer is, at its core, just a bunch of transistors wired together. Once you have enough transistors on a board, though, one of the first layers of abstraction that arises is the Arithmetic Logic Unit. The ALU takes in two sets of data, performs a chosen math function, and outputs one data set as the result. It really is the core of what makes computers compute.

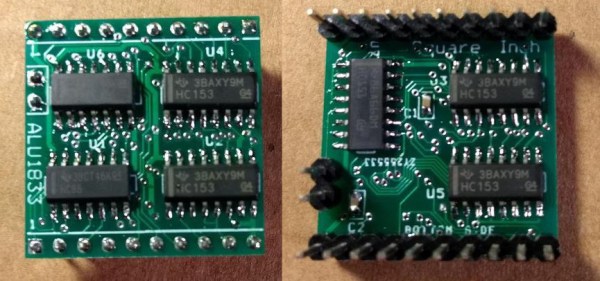
An ALU is built into modern processors, but that wasn’t always how it was done. If you’re looking to build a recreation of an early computer you may need a standalone, and that’s why [roelh] designed an ALU that fits in a square inch piece of circuit board using five multiplexer chips and two XOR chips.

One of the commonly used components for this purpose, the 74LS181 ALU, is not in production anymore. [roelh’s] ALU is intended to be a small footprint replacement of sorts, and can perform seven functions: ADD, SUB, XOR, XNOR, AND, OR, A, B, and NOT A. The small footprint for the design is a constraint of our recent contest: Return of the Square Inch Project. Of course, this meant extra design challenges, such as needing to move the carry in and carry out lines to a separate header because there wasn’t enough space on one edge.

Exploring the theory behind an ALU isn’t just for people building retrocomputers. It is integral to gaining an intuitive understanding of how all computers work. Everyone should consider looking under the hood by walking through the nand2tetris course which uses simulation to build from a NAND gate all the way up to a functioning computer based on The Elements of Computing Science textbook.

If you’re a homebrew computer builder, it might be worthwhile to use one of these ALUs rather than designing your own. Of course, if building components from scratch is your thing we definitely understand that motivation as well.

An 8-Bit ALU, Entirely From NAND Gates

One of the things that every student of digital electronics learns, is that every single logic function can be made from a combination of NAND gates. But nobody is foolhardy enough to give it a try, after all that would require a truly huge number of gates!

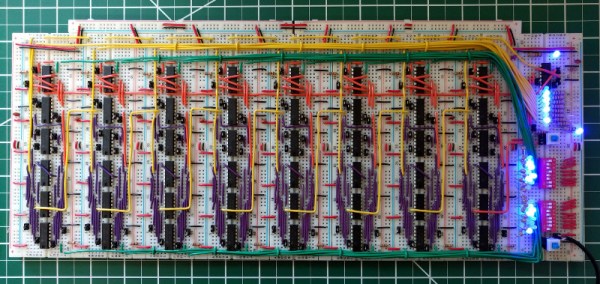
Someone evidently forgot to tell [Notbookies], for he has made a complete 8-bit ALU using only 4011B quad NAND gates on a set of breadboards, and in doing so has created a minor masterpiece with his wiring. It’s inspired by a series of videos from [Ben Eater] describing the construction of a computer with the so-called SAP (Simple As Possible) architecture. The 48 4011B DIP packages sit upon 8 standard breadboards, with an extra one for a set of DIP switches and LEDs, and a set of power busbar breadboards up their sides. He leaves us with the advice borne of bitter experience: “Unless your goal is building a NAND-only computer, pick the best IC for the job“.

We have covered countless processors and processor components manufactured from discrete logic chips over the years, though this makes them no less impressive a feat. The NedoNAND has been a recent example, a modular PCB-based design. TTL and CMOS logic chips made their debut over 50 years ago so you might expect there to be nothing new from that direction, however we expect this to be  well of projects that will keep flowing for may years more.

Via /r/electronics/.

Huge 74181 Is A Classic ALU You Can Actually Understand

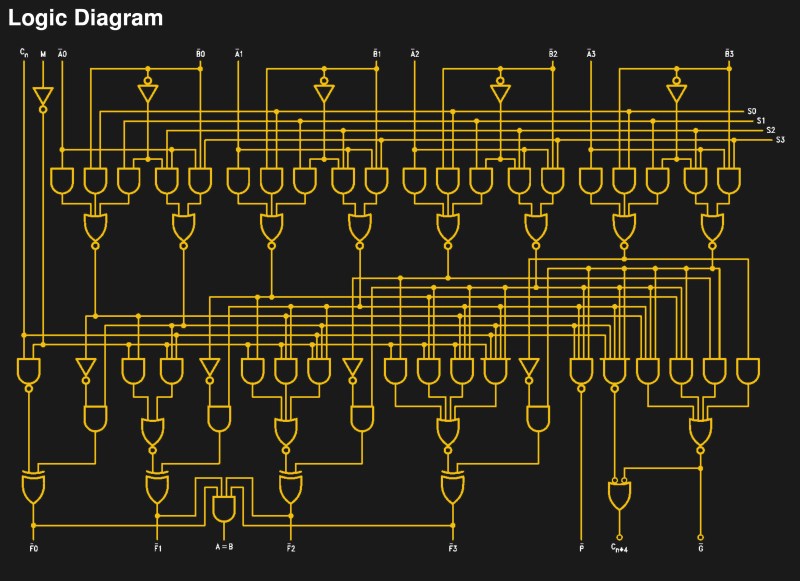
You can no longer buy a brand-new 74181, they’ve been out of production for years. All is not lost though, for [Dave’s Dev Lab] have created a facsimile of one on a printed circuit board, using modern single-gate 74-series chips.

Why on earth would you want an oversized replica of an outdated logic chip from nearly five decades ago, we hear you ask? The answer lies in education. If you were to embark on learning about the internals of a microprocessor by taking a modern example such as the one that powers the device on which you are reading this, you would find it to be a daunting task. Over six decades of progress in computer technology have delivered the performance enhancements that put a supercomputer in your smartphone, but at the expense of a contemporary microprocessor being an extremely complex machine which you can’t peer into for any level of understanding.

Simple enough to work your way through the logic

The starting point for the student of microprocessor internals often lies in the past. The technology of the early 1970s holds the fundamentals from which a modern processor can be understood, but remains simple enough to grasp in its entirety as a beginner. Registers, instruction decoders, counters, and an arithmetic/logic unit, or ALU. And for decades the 74181, as an all-in-one 4-bit ALU on a chip that you might have found in a minicomputer at the turn of the 1970s, represented the most convenient way to teach the operation of these devices. Electronic engineers and computer scientists of all ages will have encountered them as they gained their qualifications.

The PCB version of the 181 faithfully follows the original, but with modern 74LVC gates laid out as they would be in the circuit diagram of the chip, and LEDs to show logic state at the different parts of the circuit. Thus when it is used to teach ALU operation it can show every part of the device in detail in a way a real 74181 would never have done.

If the 74181 has caught your interest, we’ve previously brought you [Ken Shirriff]’s reverse engineering of the device in detail using breathtaking images of the silicon.