AVR Bare Metal With Lisp

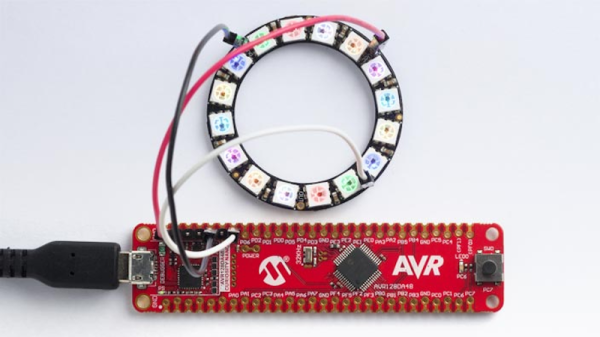
There are two kinds of programmers: those who don’t use Lisp, and those who need new parenthesis keycaps every six months. Lisp is one of those languages you either really love or really hate. If you love it, you may have checked out ulisp, which runs on Arduino boards of the AVR and ARM variety, as well as ESP chips, RISC-V, and others. A recent update allows the language to insert assembler into AVR programs.

We probably don’t need to convince anyone reading Hackaday why adding assembler is a good thing. It seems to integrate well with the environment, too, so you can write assembler macros in Lisp, which opens up many possibilities.

Continue reading “AVR Bare Metal With Lisp”

AVR Reverse Engineering Hack Chat

Join us on Wednesday, April 21 at noon Pacific for the AVR Reverse Engineering Hack Chat with Uri Shaked!

We’ve all become familiar with the Arduino ecosystem by now, to the point where it’s almost trivially easy to whip up a quick project that implements almost every aspect of its functionality strictly in code. It’s incredibly useful, but we tend to lose sight of the fact that our Arduino sketches represent a virtual world where the IDE and a vast selection of libraries abstract away a lot of the complexity of what’s going on inside the AVR microcontroller.

While it’s certainly handy to have an environment that lets you stand up a system in a matter of minutes, it’s hardly the end of the story. There’s a lot to be gained by tapping into the power of assembly programming on the AVR, and learning how to read the datasheet and really run the thing. That was the focus of Uri Shaked’s recent well-received HackadayU course on AVR internals, and it’ll form the basis of this Hack Chat. Then again, since Uri is also leading a Raspberry Pi Pico and RP2040 course on HackadayU in a couple of weeks, we may end up talking about that too. Or we may end up chatting about something else entirely! It’s really hard to where this Hack Chat will go, given Uri’s breadth of interests and expertise, but we’re pretty sure of one thing: it won’t be boring. Make sure you log in and join the chat — where it goes is largely up to you.

join-hack-chatOur Hack Chats are live community events in the Hackaday.io Hack Chat group messaging. This week we’ll be sitting down on Wednesday, April 21 at 12:00 PM Pacific time. If time zones have you tied up, we have a handy time zone converter.

Click that speech bubble to the right, and you’ll be taken directly to the Hack Chat group on Hackaday.io. You don’t have to wait until Wednesday; join whenever you want and you can see what the community is talking about.
Continue reading “AVR Reverse Engineering Hack Chat”

Keep Cool With This Open Source AVR Fan Controller

We’ve all got projects kicking around that we haven’t had time to document for our own purposes, let alone expose to the blinding light of the Internet. There are only so many hours in a day, and let’s face it, building the thing is a lot more fun than taking pictures of it. It took [Matthew Millman] the better part of a decade to combine everything he’s learned over the years to finally document the definitive version of his open source intelligent fan controller, but looking at the final result, we’re glad he did.

At the heart of this board is an ATmega328P, but don’t call it an Arduino. [Matthew] makes it very clear that if you want to hack around with the code for this project, you’re going to need to not only have a programmer for said chip, but know your way around AVR-GCC. He’s provided pre-built binaries for those content to run with the default settings, but you’ve still got to get it flashed onto the chip yourself. The project is designed to use the common DS18B20 temperature sensor, and as an added bonus, the firmware can even check if yours is a bootleg (spoilers: there’s an excellent chance it is).

Arguably the most interesting feature of this fan controller is its command line interface. Just plug into the serial port on the board, open your terminal emulator, and you’ll have access to a concise set of functions for querying the sensors as well as setting temperature thresholds and RPM ranges for the fans. There’s even a built-in “help” function should you forget a command or the appropriate syntax.

Originally [Matthew] developed this project as a way to control multiple fans inside of a PC case, but naturally, things have changed quite a bit since those early days. While today there’s no shortage of fancy controllers that can handle throttling an array of fans based on the internal temperature of your rig, there’s still something to be said for rolling your own solution. More importantly, there’s certainly other potential uses for a fully open source programmable fan controller.

AVR Configurable Custom Logic As A Frequency Divider At 4x Chip’s Clock Speed

What a time to be alive when you can find inexpensive microcontrollers that come with programmable(ish) logic that can operate independently of the system clock. [David Johnson-Davies] recently built a proof of concept using the Configurable Custom Logic (CCL) that is available in some of the newer AVR microcontroller designs. It’s a simple implementation, a set of frequency dividers that blink three LEDs with up to a 90 MHz input signal. But the simplicity is the reason to love his write-up — you can wrap your head around it right away.

There are four lookup table (LUTs) used to form the frequency divider. Think of these like a NAND or XOR gate, but you get to decide how the output truth tables will perform. The output is fed into a sequencer which can be configured as a D/JK flip-flop or a D/RS latch, plus you can specify the signal edge, and of course define the clock source. An interesting trick here is to hold the G input of both D flip-flops high by feeding them LUTs set to all ones. Note that the output of the first divider (PA3) is feeding the external input (PD2) of the second divider.

While the CCL is configured using the C code you flash to the microcontroller, it’s a hardware peripheral capable of operating independent of the chip’s system clock. The AVR128DA28 that’s used here tops out at 24 MHz (double that if you use the PLL) but [David] got reliable results from his clock divider feeding a signal as high as 90 MHz to the input pin. Of course you have the option of feeding internal clock signals to the CCL, but that wouldn’t seem nearly as interesting here. For the demo, [David] is actually toggling an IO pin which is connected to PA2 as the external input for the logic. Make sure you click through to his write-up linked above as he does an excellent job of walking through the sample code (just a couple-dozen lines to set this all up). Here’s the datasheet for this chip (PDF, page 447 for pertinent registers) and for a deeper dive the appnote on CCL (PDF).

So what is this all good for? We already saw an answer to that question back in January when [SM6VFZ] used the CCL peripheral to build a software-defined switch-mode converter. How awesome is that?

HackadayU Announces Rhino, Mech Eng, And AVR Classes During Winter Session

The winter lineup of HackadayU courses has just been announced, get your tickets now!

Spend those indoor hours leveling up your skills — on offer are classes to learn how to prototype like a mechanical engineer, how to create precision 3D models in Rhino, or how to dive through abstraction for total control of AVR microcontrollers. Each course is led by an expert instructor over five classes held live via weekly video chats, plus a set of office hours for further interaction.

  • Introduction to 3D using Rhino
    • Instructor: James McBennett
    • Course overview: Introduces students to Rhino3D, a NURBS based 3D software that contains a little of everything, making it James’ favorite software to introduce students to 3D. Classes are on Tuesdays at 6pm EST beginning January 26th
  • Prototyping in Mechanical Engineering
    • Instructor: Will Fischer
    • Course overview: The tips and tricks from years of prototyping and mechanical system design will help you learn to think about the world as a mechanical engineer does. Classes are on Tuesdays at 1pm EST beginning January 26th
  • AVR: Architecture, Assembly, & Reverse Engineering
    • Instructor: Uri Shaked
    • Course overview: Explore the internals of AVR architecture; reverse engineer the code generated by the compiler, learn the AVR assembly language, and look at the different peripherals and the registers that control their behavior. Classes are on Wednesdays at 2pm EST beginning January 27th

Consider becoming an Engineering Liaison for HackadayU. These volunteers help keep the class humming along for the best experience for students and instructors alike. Liaison applications are now open.

HackadayU courses are “pay-as-you-wish” with a $10 suggested donation; all proceeds go to charity with 2019 contributions topping $10,100 going to STEAM:CODERS. There is a $1 minimum to help ensure the live seats don’t go to waste. Intro videos for each course from the instructors themselves are found below, and don’t forget to check out the excellent HackadayU courses from 2020.

Continue reading “HackadayU Announces Rhino, Mech Eng, And AVR Classes During Winter Session”

Minimal TinyAVR 0 Programming

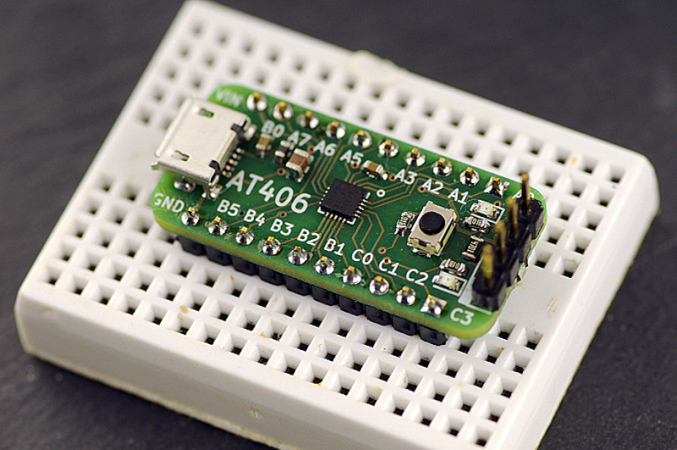
When [Alain] wanted to use some of the new TinyAVR 0 chips — specifically, the Attiny406 — it seemed overkill to use the Windows IDE. There are plenty of sources of information on programming other AVR chips using simple command line tools, but not for these newer 0-series parts which use a new programming protocol known as UPDI. That led to a deep diving into how to program a TinyAVR 0 with a text editor, makefile, and USB-to-serial cable.

The Attiny406 has 4K of flash, 256 bytes of RAM and can run at 20 MHz with no external clock. You might think programming would be similar to a regular AVR part, but these tiny devices use UPDI (Unified Programming and Debug Interface) which uses 3 pins for programming. Older devices used different protocols.

It is very easy to create a UPDI programmer. A USB to logic-level serial cable and a 4.7K resistor is all it takes. There’s Python code that knows how to drive the protocol, too. You can also use the logic-level serial port on the Raspberry Pi with some device tree modifications explained in the code’s documentation.

[Alain] made a nice breakout board for the device. It fits a breadboard, allows for 5V or 3.3V operation, and has an LED and switch. Nothing fancy, but handy. Once you know how to ship a hex file to the chip, the rest is pretty standard. While the AVR version of gcc doesn’t cross-compile for the ATTiny out of the box, there is a device pack from Microchip that enables that feature.

The trend is to go to bigger processors, not smaller, but when you need to cram something in a small space, save a few pennies per unit, or draw very little power, these tiny processors can be just the ticket. The processors may be small, but if you work you can do some pretty big things with them.

Custom Bluetooth Joystick In A Nunchuk Shell

With the Wii’s unique controller, Nintendo not only provided new gaming experiences to players, but gave hardware hackers a platform for experimentation that’s still going strong. Case in point, this modification of a third party Wii “Nunchuk” by [Giliam de Carpentier] that turns the accessory into a stand-alone wireless controller powered by a ATtiny44A.

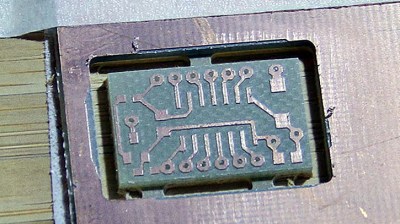
Milling a new home for the AVR

It turns out there’s a considerable amount of free space inside the Nunchuk case, so [Giliam] found adding in the new hardware wasn’t nearly as difficult as you might expect. Of course, it helps that the diminutive SMD ATtiny44A and its support hardware are housed on a very neatly milled PCB that attaches to the back of the original board.

Most of the other hardware comes in the form of modular components, like the  Bluetooth transmitter and TP4056 charge controller for the 300 mAh battery. A micro USB charging port is mounted where the original Nunchuk cable entered the case, making the whole thing look very professional.

Even if you aren’t interested in making your own controller, [Giliam] covers many interesting topics in this write-up such as handling different methods of Bluetooth connectivity and various power management techniques to eke out as much life from the relatively small battery as possible. It’s not only a fascinating read, but a great example of what thorough project documentation should look like.

In the past we’ve seen Bluetooth conversions for the Wii Nunchuck, but traditionally they left the original electronics in place. On the other side of the spectrum, we’ve also seen the internals get replaced with something as powerful as the Raspberry Pi Zero.

Continue reading “Custom Bluetooth Joystick In A Nunchuk Shell”