Change The Jingle In Your Makita Charger Because You Can

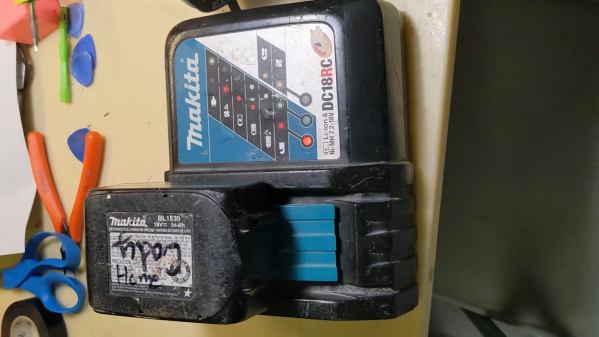
Lots of things beep these days. Washing machines, microwaves, fridge — even drill battery chargers. If you’re on Team Makita, it turns out you can actually change the melody of your charger’s beep, thanks to a project from [Real-Time-Kodi].

The hack is for the Makita DR18RC charger, and the implementation of the hack is kind of amusing. [Real-Time-Kodi] starts by cutting the trace to the buzzer inside the charger. Then, an Arduino is installed inside the charger, hooked up to the buzzer itself and the original line that was controlling it. When it detects the charger trying to activate the buzzer, it uses this as a trigger to play its own melody on the charger instead. The Arduino also monitors the LEDs on the charger in order to determine the current charge state, and play the appropriate jingle for the situation.

It’s an amusing hack, and one that could certainly confuse the heck out of anyone expecting the regular tones out of their Makita charger. It also shows that the simple ways work, too — there was no need to dump any firmware or decompile any code.

Continue reading “Change The Jingle In Your Makita Charger Because You Can”

This Open Hardware Li-Ion Charger Skips The TP4056

There’s a good chance that if you build something which includes the ability to top up a lithium-ion battery, it’s going to involve the incredibly common TP4056 charger IC. Now, there’s certainly nothing wrong with that. It’s a decent enough chip, and there are countless pre-made modules out there that make it extremely easy to implement. But if the chip shortage has taught us anything, it’s that alternatives are always good.

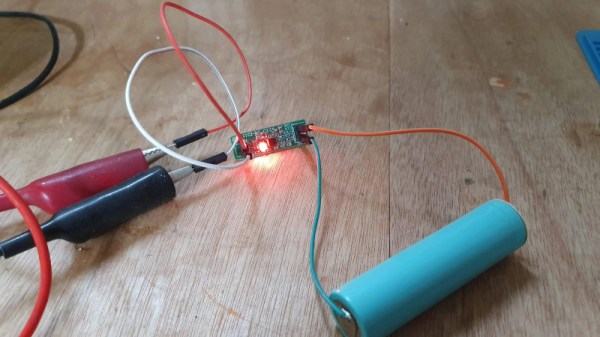
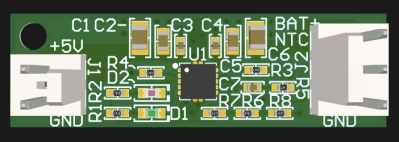
So we’d suggest bookmarking this opensource hardware Li-Ion battery charger design from [Shahar Sery]. The circuit uses the BQ24060 from Texas Instruments, which other than the support for LiFePO4 batteries, doesn’t seem to offer anything too new or exciting compared to the standard TP4056. But that’s not the point — this design is simply offered as a potential alternative to the TP4056, not necessarily an upgrade.

[Shahar] has implemented the design as a 33 mm X 10 mm two-layer PCB, with everything but the input and output connectors mounted to the topside. That would make this board ideal for attaching to your latest project with a dab of hot glue or double-sided tape, as there are no components on the bottom to get pulled off when you inevitably have to do some rework.

The board takes 5 VDC as the input, and charges a single 3.7 V cell (such as an 18650) at up to 1 Amp. Or at least, it can if you add a heatsink or fan — otherwise, the notes seem to indicate that ~0.7 A is about as high as you can go before tripping the thermal protection mode.

Like the boilerplate TP4056 we covered recently, this might seem like little more than a physical manifestation of the typical application circuit from the chip’s datasheet. But we still think there’s value in showing how the information from the datasheet translates into the real-world, especially when it’s released under an open license like this.

Handy Tool Drains 18650 Cells So You Don’t Have To

Draining a battery is easy. Just put a load across the terminals, maybe an incandescent bulb or a beefy power resistor, and wait. What’s quite a bit trickier is doing so safely. Put too large a load on, or leave it connected for longer than necessary, and you can end up doing damage to the cell. Not convinced he’d always remember to pull the battery out of his jury-rigged discharger at the opportune moment, [Jasper Sikken] decided to come up with a simple tool that could automatically handle the process with the cold and calculating precision of silicon.

V4 used the protection module from a pouch battery.

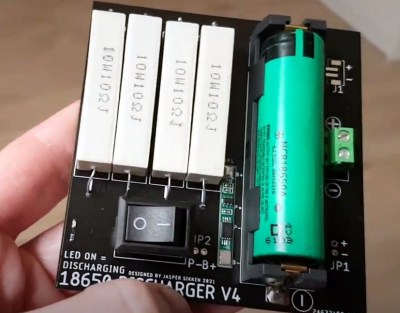
At a glance we can see the major components you’d expect in a discharger: a fairly simple PCB, four ceramic power resistors, a holder for a single 18650 cell, and a rocker switch to connect it all together. But wait, what’s that a TP4056 charging module doing in there?

While its presence technically makes this device a battery charger, [Jasper] is actually using it for the onboard protection IC. With the charging module between the cell and the power resistors, it will cut the connection when the voltage drops to 2.4 V. Oh yeah, and it can charge the battery back up if you connect up a USB cable.

[Jasper] says his little tool works great, with the resistor array putting just enough load on the battery to pull it down quickly without getting so hot that they’re dangerous to have exposed. He estimates the BOM for this gadget runs around $2 USD, and is considering offering it as a kit on Tindie in the near future.

If you’re looking for something a bit more advanced, [Jasper] built a programmable load a few years back that can discharge batteries and test power supplies all while logging the data to your computer for later analysis.

Continue reading “Handy Tool Drains 18650 Cells So You Don’t Have To”

Building A USB-C Charger For Canon NB-4L Batteries

One of the most appealing aspects of USB-C is that it promises to be a unified power delivery system. You’ll no longer need to have a separate power cords for for your phone, camera, and laptop; physically they’ll all use USB-C connectors, and the circuitry in the charger will know how much juice to send down the line for each gadget. But in reality, we’ve all got at least a few pieces of older equipment that we’re not about to toss in the trash just because it doesn’t support the latest USB spec.

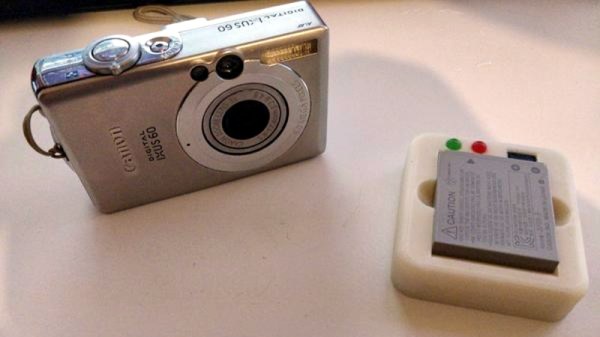
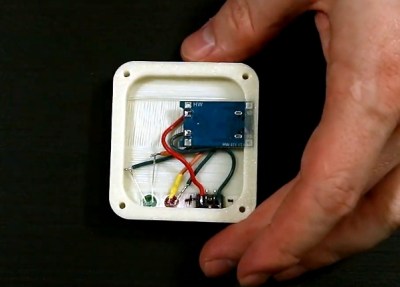
Note the relocated status LEDs.

Case in point, the old Canon camera that [Purkkaviritys] modified to take infrared pictures. Instead of abandoning it, he decided to make a custom USB-C charger for its NB-4L batteries. Since they’re just single cell 3.7 V lithium-ions, all he had to do was wire them up to the ubiquitous TP4056 charger module and design a 3D printed case to hold everything together.

He did go the extra mile and replace the SMD charging indicator LEDs on the PCB with 5 mm LEDs embedded into the 3D printed enclosure, though you could certainly skip this step if you were in a hurry. We imagine if you print the enclosure in a light enough color, you should be able to see the original LEDs glowing through the plastic.

This project is yet another example of how incredibly useful the TP4056 module really is. If there’s even a chance you might want to build a rechargeable gadget in the near future, you should have a few of these cheap boards ready to go in the parts bin.

Keep ‘Em Flying With This Monster DIY Battery

If you’ve spent an afternoon at the sticks of a remote-controlled aircraft, you’re probably well aware of the great limiter for such exploits: battery life. In the days when most RC aircraft were gas powered it was easy to cart along some extra fuel to keep the good times rolling, but now that everything except big scale models are using electric motors, RC pilots are looking for better ways to charge their batteries in the field.

Though it might seem counter-intuitive, [Adam Pyschny] is of the opinion that the best way to keep his quadcopter batteries charged is to simply use another, much bigger, battery. Rather than mess around with inverters or generators, he can simply use a DC-to-DC battery charger and his huge custom-built battery pack to keep flying.

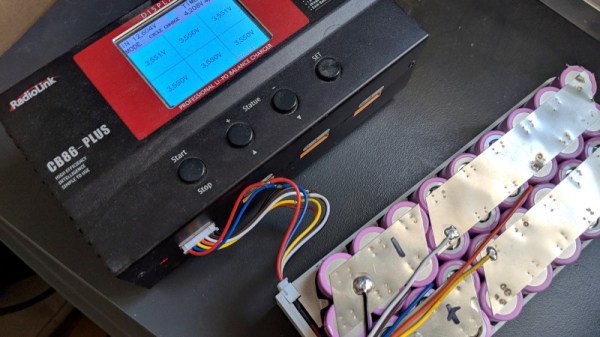
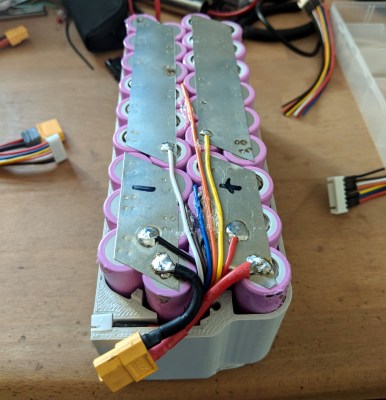
The pack contains 36 Samsung INR18650-35E 3500mAh cells, which gives it a total capacity of 454Wh. At 1965 grams (4.3 lbs) the pack isn’t exactly a featherweight, but it’s significantly lighter than carting a small generator or even a lead-acid battery to the field.

[Adam] designed a slick case in FreeCAD and printed it in Minadax ASA-X filament, which is specifically designed for outdoor use. A particularly nice detail in the case is that the balance connector (used to charge the cells) is cleanly integrated into the side of the pack, rather than just flapping around in the breeze; which annoyingly seems the norm even on commercially produced batteries.

An interesting next step for this project would be the addition of a solar panel and charge controller to help recover in-between charges. Beyond an automated platform to swap the batteries for you, a DIY pack like this might be the easiest way to maximize the amount of time your RC aircraft are in the air where they belong.

Tiny Solar Energy Module (TSEM) Brings Big Performance

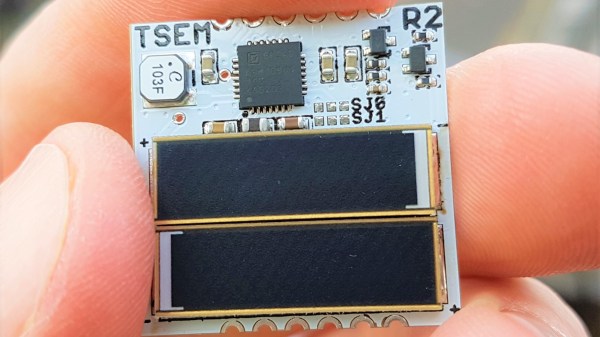
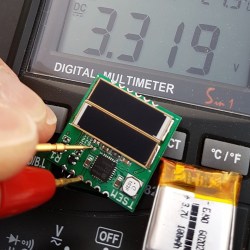
The Tiny Solar Energy Module (TSEM) by [Jasper Sikken] is not only physically tiny at one-inch square, but it is all about gathering tiny amounts of solar energy — amounts too small to be useful in a conventional sense — and getting meaningful work done, like charging a battery for later use. Elements that make this board easy to integrate into other projects include castellated vias, 1.8 V and 3.3 V regulated outputs that are active when the connected battery has a useful charge, and a low battery warning that informs the user of impending shutdown when the battery runs low. The two surface-mount solar cells included on the tiny board are capable of harvesting even indoor light, but the board also has connection points for using larger external solar cells if needed.

The board shows excellent workmanship and thoughtful features; it was one of the twenty Power Harvesting Challenge finalists chosen to head to the final round of The Hackaday Prize. The Hackaday Prize is still underway, with the Human-Computer Interface Challenge running until August 27th. That will be followed by the Musical Instrument Challenge before the finals spin up. If you haven’t started yet, there’s still time to make your mark. All you need is a documented idea, so start your entry today.

Ultra-Low Power, Energy Harvesting Battery Charger

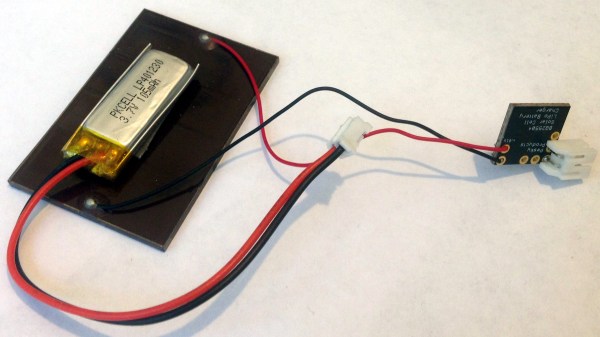
This half-inch square ultra-low power energy harvesting LiPo cell charger by [Kris Winer] uses a low voltage solar panel to top up a small lithium-polymer cell, which together can be used as the sole power source for projects. It’s handy enough that [Kris] uses them for his own projects and offers them for sale to fellow hackers. It’s also his entry into the Power Harvesting Challenge of the Hackaday Prize.

The board is essentially a breakout board for the Texas Instrument BQ25504, configured to charge and maintain a single lithium-polymer cell. The BQ25504 is an integrated part that takes care of most of the heavy lifting and has nifty features like battery health monitoring and undervoltage protection. [Kris] has been using the board along with a small 2.2 Volt solar panel and a 150 mAh LiPo cell to power another project of his: the SensorTile environmental data logger.

It’s a practical and useful way to test things; he says that an average of 6 hours of direct sunlight daily is just enough to keep the 1.8 mA SensorTile running indefinitely. These are small amounts of power, to be sure, but it’s free and self-sustaining which is just what a remote sensing unit needs.