Building A USB-C Charger For Canon NB-4L Batteries

One of the most appealing aspects of USB-C is that it promises to be a unified power delivery system. You’ll no longer need to have a separate power cords for for your phone, camera, and laptop; physically they’ll all use USB-C connectors, and the circuitry in the charger will know how much juice to send down the line for each gadget. But in reality, we’ve all got at least a few pieces of older equipment that we’re not about to toss in the trash just because it doesn’t support the latest USB spec.

Note the relocated status LEDs.

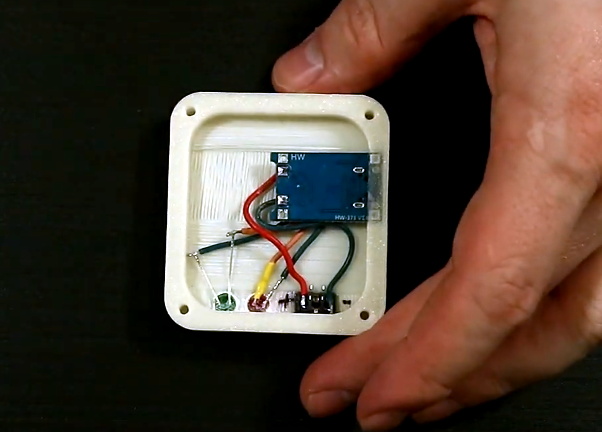
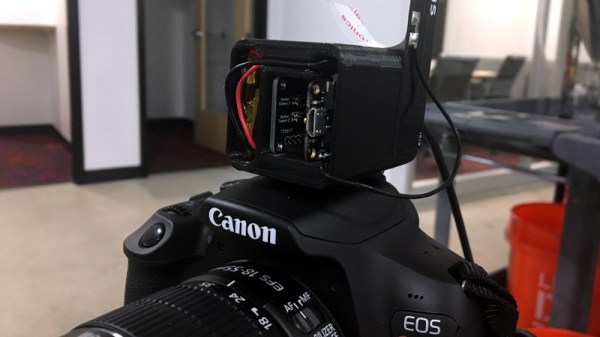
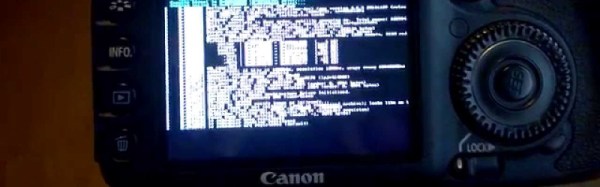
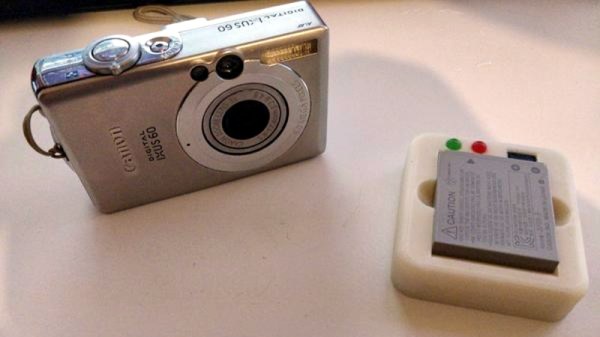
Case in point, the old Canon camera that [Purkkaviritys] modified to take infrared pictures. Instead of abandoning it, he decided to make a custom USB-C charger for its NB-4L batteries. Since they’re just single cell 3.7 V lithium-ions, all he had to do was wire them up to the ubiquitous TP4056 charger module and design a 3D printed case to hold everything together.

He did go the extra mile and replace the SMD charging indicator LEDs on the PCB with 5 mm LEDs embedded into the 3D printed enclosure, though you could certainly skip this step if you were in a hurry. We imagine if you print the enclosure in a light enough color, you should be able to see the original LEDs glowing through the plastic.

This project is yet another example of how incredibly useful the TP4056 module really is. If there’s even a chance you might want to build a rechargeable gadget in the near future, you should have a few of these cheap boards ready to go in the parts bin.

A Teeny Tiny 3D Printed Macro Extension Tube

When you hear the term “extension tube”, you probably think of something fairly long, right? But when [Loudifier] needed an extension tube to do extreme close-ups with a wide-angle lens on a Canon EF-M camera, it needed to be small…really small. The final 3D printed extension provides an adjustable length between 0 and 10 millimeters.

But it’s not just an extension tube, that would be too easy. According to [Loudifier], the ideal extension distance would be somewhere around 3 mm, but unfortunately the mounting bayonet for an EF-M lens is a little over 5 mm. To get around this, the extension tube also adapts to an EF/EF-S lens, which has a shorter mount and allows bringing it in closer than would be physically possible under otherwise.

[Loudifier] says the addition of electrical connections between the camera and the lens (for functions like auto focus) would be ideal, but the logistics of pulling that off are a bit daunting. For now, the most reasonable upgrades on the horizon are the addition of some colored dots on the outside to help align the camera, adapter, and lens. As the STLs and Fusion design file are released under the Creative Commons, perhaps the community will even take on the challenge of adapting it to other lens types.

For the polar opposite of this project, check out the 300 mm long 3D printed extension tube we covered a few weeks back that inspired [Loudifier] to send this project our way.

Particle Paves Way For LTE Selfies

From cars to refrigerators, it seems as if every new piece of tech is connected to the Internet. For better or for worse, we’re deep into the “Internet of Things”. But what about your camera? No, not the camera in your smartphone; that one’s already connected to the Internet and selling your secrets to the highest bidder. Don’t you think your trusty DSLR could be improved by an infusion of Wide Area Networking?

Regardless of what you’re answer to that question might be, [Thomas Kittredge] decided his life would be improved by making his beloved Canon EOS Rebel T6 an honorary member of the Internet of Things. Truth be told he says that he hasn’t quite figured out an application for this project. But since he was looking to mess around with both the LTE-enabled Particle Boron development board and designing his own PCB for professional production, this seemed a good a way to get his feet wet as any.

The resulting board is a fairly simple “shield” for the Particle Boron that let’s [Thomas] trigger up to two cameras remotely over the Internet or locally with Bluetooth. If LTE isn’t your sort of thing though, don’t worry. Since the Boron follows the Adafruit Feather specification, there’s a whole collection of development boards with various connectivity options that this little add-on can be used with.

In the GitHub repository, [Thomas] has put up the files for the PCB, the STLs for the 3D printed enclosure, and of course the firmware source code to load onto the Particle board. He currently has code to expose the two shutter triggers as functions the the Particle Cloud API, as well as a practical example that fires off the camera when specific words are used in a Slack channel.

Out for a little over a year, the Particle Boron is a fairly new addition to the world of cellular development boards. Historically we haven’t seen a whole lot of cellular capable projects, likely because it’s been such a hassle to get them online, but with new boards like the Boron we might start seeing an uptick in the random pieces of gear that have this form connectivity and an internet-facing IP address. Surely nothing bad could come of this!

Game Boy Camera mounted to Canon Lens using EF Mount

A Canon Lens Adapter For The Game Boy Camera

Released in 1998, the Game Boy camera was a bit ahead of its time. This specialized Game Boy cartridge featured a 128×128 pixel CMOS sensor and took 4-color greyscale photos. The camera even rotated, allowing for selfies years before that word existed.

The fixed lens on this camera meant no zoom was possible. [Bastiaan] decided to address this shortcoming by building a Canon EF Lens Mount. The resulting build looks hilarious, but actually takes some interesting photos.

[Bastiaan] designed the mount using Rhino 3D, and printed it out on a Monoprice 3D printer. After some light disassembly, the mount can be screwed onto the Game Boy Camera. With the massive 70-200 f4 lens and 1.4x extender shown here, the camera gets a max focal distance of just over 3000 mm.

One issue with the Game Boy Camera was the limited options for doing anything with the photos. They could be transferred to other Game Boy Camera cartridges, or printed using the Game Boy Printer. Fortunately, [Brian Khuu] has a modern day solution that emulates the Game Boy Printer using an Arduino. This lets you get PNG files out of the device.

Magic Lantern Brings Linux To Canon EOS Cameras

On April 1st the Magic Lantern team announced a proof of concept that lets you run Linux on a Canon EOS camera. Because of the date of the post we’ve poured over this one and are confident it’s no joke. The development has huge potential.

The hack was facilitated by a recent discovery that the LCD screen on the camera can be accessed from the bootloader. In case you don’t recognize the name, Magic Lantern is an Open Source project that adds features to these high-end cameras by utilizing the bootloader with binary files on the SD card. It’s long been a way of hacking more features in but has always been complicated by the fact that you must figure out how to play nicely with the existing firmware. Commanding the LCD was the last part of the hardware that had previously not been driven directly from Magic Lantern.

Now that the Linux kernel is in the picture, ground-up features can be built without dealing with the stock firmware in any way (and without overwriting it). We’re excited to see where this one goes. Currently it’s just a proof that you can boot Linux, it’s not actually functional yet. Here’s your chance to polish those kernel porting skills you’ve been holding in reserve.

Hackaday Links Column Banner

Hackaday Links: December 21, 2014

Most of the incredible flight simulator enthusiasts with 737 cockpits in their garage are from the US. What happens when they’re from Slovenia? They built an A320 cockpit. The majority of the build comes from an old Cyprus Airways aircraft, with most of the work being wiring up the switches, lights, and figuring out how to display the simulated world out of the cockpit.

Google Cardboard is the $4 answer to the Oculus Rift – a cardboard box and smartphone you strap to your head. [Frooxius] missed being able to interact with objects in these 3D virtual worlds, so he came up with this thing. He adapted a symbol tracking library for AR, and is now able to hold an object in his hands while looking at a virtual object in 3D.

Heat your house with candles! Yes, it’s the latest Indiegogo campaign that can be debunked with 7th grade math. This “igloo for candles” will heat a room up by 2 or 3 degrees, or a little bit less than a person with an average metabolism will.

Last week, we saw a post that gave the Samsung NX300 the ability to lock the pictures taken by the camera with public key cryptography. [g3gg0] wrote in to tell us he did the same thing with a Canon EOS camera.

The guys at Flite Test put up a video that should be handy for RC enthusiasts and BattleBot contenders alike. They’re tricking out transmitters, putting push buttons where toggle switches should go, on/off switches where pots should go, and generally making a transmitter more useful. It’s also a useful repair guide.

[Frank Zhao] made a mineral oil aquarium and put a computer in it. i7, GTX 970, 16GB RAM, and a 480GB SSD. It’s a little bigger than most of the other aquarium computers we’ve seen thanks to the microATX mobo, and of course there are NeoPixels and a bubbly treasure chest.

Adding A Digital Back To A Sweet Old Camera

[Eugene] wanted to use his vintage Leica M4 as a digital camera, and he had a Canon EOS 350D digital camera sitting around unused. So he Frankensteined them together and added a digital back to the Leica’s optical frontend.

It sounds simple, right? All you’d need to do is chop off the back from the EOS 350D, grind the digital sensor unit down to fit into exactly the right spot on the film plane, glue it onto an extra Leica M4 back door, and you’re set. Just a little bit of extremely precise hackery. But it’s not even that simple.

Along the way [Eugene] reverse-engineered the EOS 350D’s shutter and mirror box signals (using a Salae Logic probe), and then replicated these signals when the Leica shutter was tripped by wedging an Arduino MiniPro into an old Leica motor-winder case. The Arduino listens for the Leica’s bulb-flash signal to tell when the camera fires, and then sends along the right codes to the EOS back. Sweet.

There are still a few outstanding details. The shutter speed is limited by the latency in getting the signal from the Leica to the 350D back, so he’s stuck at shutter speeds longer than 1/8th of a second. Additionally, the Canon’s anti-IR filter didn’t fit, but he has a new one ordered. These quibbles aside, it’s a beautiful hack so far.

What makes a beautiful piece of work even more beautiful? Sharing the source code and schematics. They’re both available at his Github.

Of course, if you don’t mind completely gutting the camera, you could always convert your old Leica into a point and shoot.