A Dashboard Outside The Car

One of the biggest upsides of open communications standards such as CAN or SPI is that a whole world of vehicle hacking becomes available, from simple projects like adding sensors or computers to a car or even building a complete engine control unit from the ground up. The reverse is true as well; sensors and gauges using one of these protocols can be removed from a car and put to work in other projects. That’s the idea that [John] had when he set about using a vehicle’s dashboard as a information cluster for his home.

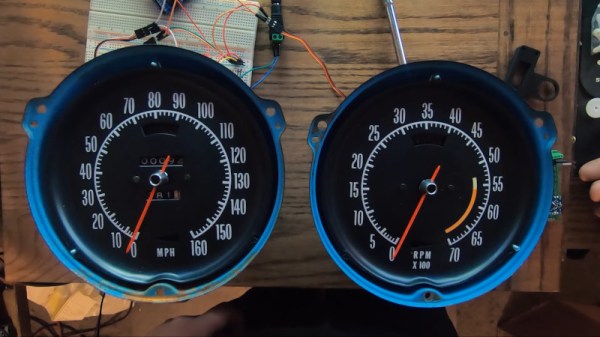
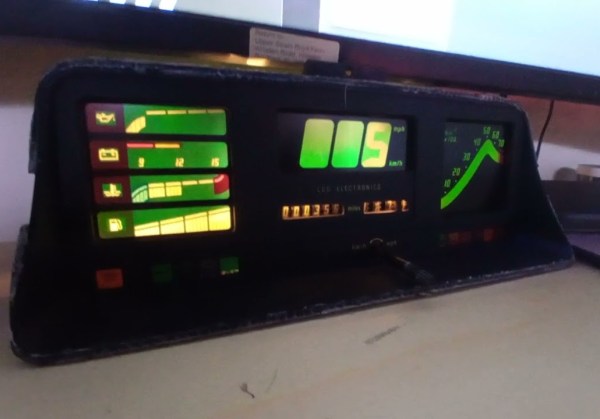
The core of the build is an Astra GTE dashboard cluster, removed from its host vehicle, and wired to an Arduino-compatible board, in this case an ESP32. The code that [John] wrote bit-bangs an SPI bus and after some probing is able to address all of the instrument gauges on the dashboard. For his own use at home, he’s also configured it to work with Home Assistant, where each of the gauges is configured to represent something his home automation system is monitoring using a bit mask to send data to specific dials.

While this specific gauge cluster has a lot of vehicle-specific instrumentation and needs a legend or good memory to tie into a home automation system without any other modification, plenty of vehicle gauges are more intuitive and as long as they have SPI they’d be perfect targets for builds that use this underlying software. This project takes a similar tack and repurposes a few analog voltmeters for home automation, adding a paper background to the meters to make them easier to read.

Continue reading “A Dashboard Outside The Car”

Mini Meters Monitor Microprocessor Maximization

[Lex] over at Computing: The Details loves to make fun projects. Recently, they have created a hardware CPU monitor that displays how PCs are parallelizing compile tasks at a glance. The monitor is built from 14 analog meters, along with some WS2812 RGB LEDs.

Each meter represents a core on [Lex]’s CPU, while the final two meters show memory and swap usage. The meters themselves are low-cost 5 mA devices. Of course, the original milliamps legends wouldn’t do much good, so [Lex] designed and printed graduations that glue over the top. The RGB LED strip is positioned so two LEDs fit under each meter. The LEDs allow a splash of color to draw attention to the current state of the machine. The whole bank going red would sure get our attention!

The system is controlled by an Arduino Mega, with the meters driven using the PWM pins. The only extra part is a 1 kΩ resistor. The Arduino wrangles the LEDs as well. Sadly [Lex] did not include the software. They did describe it though. Basically they are using a Rust program to call systemstat, obtaining the current CPU utilization data in Linux. A bit of math converts this into pointer values and LED colors. The data is then sent via USB-serial to the Arduino Mega. The software savvy will say it’s pretty easy to replicate, but the hardware-only hackers among us might need a bit of help.

This isn’t the first custom meter we’ve seen on Hackaday. Your author’s first project covered by Hackaday was for a meter created using an automotive gauge stepper motor. I didn’t include source code either – but only because [Guy Carpenter]’s Switec X25 library had me covered.

Continue reading “Mini Meters Monitor Microprocessor Maximization”

3D Printing Improves Passive Pixel Water Gauge

Here at Hackaday, we feature all kinds of projects, and we love them all the same. But some projects are a little easier to love than others, especially those that get the job done in as simple a way as possible, with nothing extra to get in the way. This completely electronics-free water gauge is a great example of doing exactly as much as needs to get done, and not a bit more.

If this project looks a bit familiar, it’s because we featured [Johan]’s previous version of “Pixel Pole” a few years back. Then as now, the goal of the build is to provide a highly visible level gauge for a large water tank that’s part of an irrigation system. The basic idea was to provide a way of switching a pump on when the tank needed filling, and off when full. [Johan] accomplished this with a magnetic float inside the tank and reed switches at the proper levels outside the tank, and then placed a series of magnetic flip dots along the path of the float to provide a visual gauge of the water level. The whole thing was pretty clever and worked well enough.

But the old metal flip dots were getting corroded, so improvements were in order. The new flip dots are 3D printed, high-visibility green on one side and black on the other. The only metal parts are the neodymium magnet pressed into a slot in the disc and a sewing pin for the axle. The housing for each flip dot is also printed, with each module snapping to the next so you can create displays of arbitrary height. The video below shows printing, assembly, and the display in action.

[Johan]’s improvements are pretty significant, especially in assembly; spot-welding was a pretty cool method to use in the first version, but printing and snapping parts together scales a lot better. And this version seems like it’ll be much happier out in the elements too. Continue reading “3D Printing Improves Passive Pixel Water Gauge”

Pressure Gauge Built In A Vacuum

Necessity might be the mother of all invention, but we often find that inventions around here are just as often driven by expensive off-the-shelf parts and a lack of willingness to spend top dollar for them. More often than not, we find people building their own tools or parts as if these high prices are a challenge instead of simply shrugging and ordering them from a supplier. The latest in those accepting the challenge of building their own parts is [Advanced Tinkering] who needed a specialty pressure gauge for a vacuum chamber.

In this specific case, the sensor itself is not too highly priced but the controller for it was the deal-breaker, so with a trusty Arduino in hand a custom gauge was fashioned once the sensor was acquired. This one uses an external analog-to-digital converter to interface with the sensor with 16-bit resolution, along with some circuitry to bring the ~8 V output of the sensor down to the 5 V required by the microcontroller. [Advanced Tinkering] wanted a custom live readout as well, so a 3D printed enclosure was built that includes both an LCD readout of the pressure and a screen with a graph of the pressure over time.

For anyone else making sensitive pressure measurements in a vacuum chamber, [Advanced Tinkering] made the project code available on a GitHub page. It’s a great solution to an otherwise overpriced part provided you have the time to build something custom. If you’re looking for something a little less delicate, though, take a look at this no-battery pressure sensor meant to ride along on a bicycle wheel.

Continue reading “Pressure Gauge Built In A Vacuum”

Classic Triumph Gets A Modern Digital Dash

Analog gauges gave way to all manner of fancy electroluminescent and LED gauges in the ’80s, but the trend didn’t last long. It’s only in the last decade or so that LCD digital gauges have really started to take off in premium cars. [Josh] is putting a modern engine and drivetrain into his classic Triumph GT6, and realised that he’d have to scrap the classic mechanical gauge setup. After not falling in love with anything off the shelf, he decided to whip up his own solution from scratch.

The heart of the build is a Raspberry Pi 4, which interfaces with the car’s modern aftermarket ECU via CANBUS thanks to the PiCAN3 add-on board. Analog sensors, such as those for oil pressure and coolant temperature, are interfaced with a Teensy 4.0 microcontroller which has the analog to digital converters necessary to do the job. Display is via a 12.3″ super-wide LCD sourced off Aliexpress, with the graphics generated by custom PixiJS code running in Chromium under X.

The result is comparable with digital displays in many other modern automobiles, speaking to [Josh]’s abilities not just as a programmer but a graphic designer, too. As a bonus, if he gets sick of the design, it’s trivial to change the graphics without having to dig into the car’s actual hardware.

Gauge upgrades are common on restomod projects; another route taken is to convert classical mechanical gauges to electronic drive. If you’re cooking up your own sweet set of gauges in the garage, be sure to drop us a line! Video after the break.

Continue reading “Classic Triumph Gets A Modern Digital Dash”

V12 Corvette Gets Electronic Gauge Mod

[Wesley Kagan] is building a Corvette with a V12 engine swap. Much of the driveline will be entirely replaced, which means the components to drive the mechanical speedometer and tachometer will no longer be present in the final car. Instead, [Wesley] came up with his own electronic gauge conversion to do the job.

It’s a build that respects the original aesthetic of the car, reusing the original gauges but driving them differently. In place of the original mechanical drives from the transmission and distributor respectively, the speedometer and tach instead get servos installed in the back with a 3D printed gear train. The odometer gets its own continuous rotation servo, too. An Arduino Nano is used to drive the servos, using data from a GPS module and the car’s ignition system.

Files are available for anyone wishing to 3D print parts to modify their own gauges. We can’t wait to see how the gauges look when finally installed. We can imagine some teething problems with slew rate or update speed, but we’re sure it’s nothing [Wesley] can’t engineer out with a few revisions. Custom gauges are something we’ve seen a few times around these parts; this digital setup is particularly useful for engine data. Video after the break.

Continue reading “V12 Corvette Gets Electronic Gauge Mod”

Turbo Subaru Gets DIY Gauges

For the average motorist, the speedometer and the fuel indicator are the primary gauges of interest. Owners of performance or modified cars tend to like having more information on the way the car is running. [JustinN1] is firmly in that camp, and built some WiFi-enabled gauges for his Subaru WRX STi.

The gauges run on the ESP32 platform, chosen for its WiFi hardware and its ease of use with the Arduino platform. This makes programming a snap, and interfacing to a smartphone easy. OLED displays were chosen for their good visibility in both day and night conditions, which is important for automotive applications.

[JustinN1] developed both a boost/vacuum gauge and an oil pressure gauge, both useful for keeping an eye on what the engine is doing. Measuring boost is as simple as using an off-the-shelf analog air pressure sensor. The oil pressure sensor is a resistive part, and must is hooked up through a resistor divider to create an analog voltage for the ESP32 to read.

Code is on Github, and there’s even a version that displays a grinning face when you get into higher boost levels. There are also a series of housings to suit various mounting choices, to help give the gauges a more finished look. We’ve seen other gauge builds too, like this gear indicator for a Suzuki motorcycle. Video after the break.

Continue reading “Turbo Subaru Gets DIY Gauges”