Adding Wireless Charging To The Switch Lite

The Nintendo Switch is a monstrously popular machine, and it’s had no difficulty raking in the bucks for the Japanese gaming giant, but there’s no denying that it’s technologically a bit behind the curve. Until the long-rumored “Pro” version of the Switch materializes, industrious gamers like [Robotanv] will simply have to make up for Nintendo’s Luddite ways by hacking in their own upgraded hardware.

In this case, [Robotanv] wanted to add Qi wireless charging to his Switch Lite. He figured that if all of his other mobile devices supported the convenient charging standard, why not his portable gaming system? Luckily, the system already supports the increasingly ubiquitous USB-C, so finding an aftermarket Qi receiver that would connect to it was no problem. He just needed to install it into the handheld’s case.
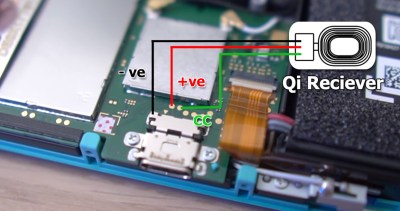
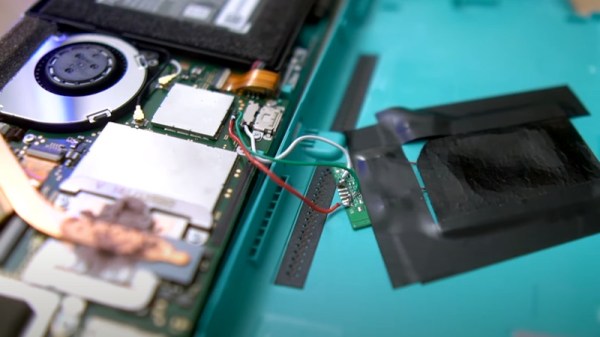
After liberating the Qi receiver from its protective pouch enclosure to get it a bit thinner, [Robotanv] taped it to the inside of the system’s case and ran thin wires to the rear of the USB-C port. As luck would have it, Nintendo was kind enough to put some test pads for the power pins right behind the port, which made for an ideal spot to connect the charger.

At first he only connected the positive and negative lines from the charger, but quickly realized he also had to connect the CC pin to get the juice flowing. After that, it was just a matter of buttoning the system back up. All told, it looks like a pretty simple modification for anyone who’s not bashful about taking a soldering iron to their $199 console.

We’ve seen these Qi receivers retrofitted into devices before, and it remains an excellent way to add the feature not only to commercial products, but to your own projects.

Continue reading “Adding Wireless Charging To The Switch Lite”

Gaming Headset Gets Simple Wireless Charging

Despite the technology itself being widely available and relatively cheap, devices that offer wireless charging as a feature still aren’t as common as many would like. Sure it can’t deliver as much power as something like USB-C, but for low-draw devices that don’t necessarily need to be recharged in a hurry, the convenience is undeniable.

Sick of having to plug it in after each session, [Taylor Burley] decided to take matters into his own hands and add wireless charging capability to his Turtle Beach Recon 200 headset. But ultimately, there’s nothing about this project that couldn’t be adapted to your own particular headset of choice. Or any other device that charges via USB, for that matter.

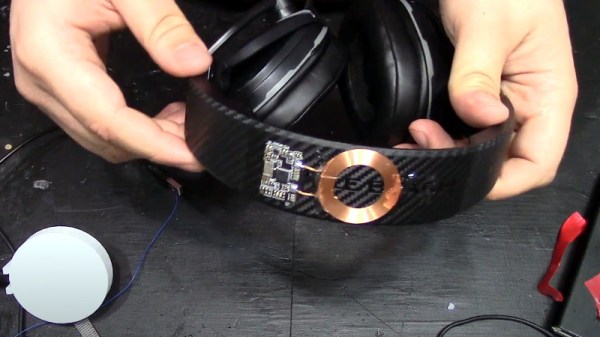
To keep things simple, [Taylor] used an off-the-shelf wireless charging transmitter and receiver pair. The transmitter is housed in a 3D printed mount that the headset hangs from, and the receiver was simply glued to the top of the headset. The receiver is covered with a thin 3D printed plate, but a couple turns of electrical tape would work just as well if you didn’t want to design a whole new part.

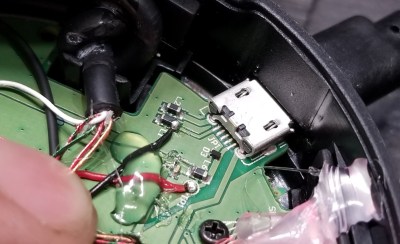
Once everything was in place, he then ran a wire down the side of the headset and tapped into the five volt trace coming from the USB port. So now long as [Taylor] remembers to hang the headset up after he’s done playing, the battery will always be topped off the next time he reaches for it.

Considering how many projects we’ve seen that add wireless charging to consumer devices, it’s honestly kind of surprising that it’s still not a standard feature in 2021. Until manufacturers figure out what they want to do with the technology, it seems like hackers will just have to keep doing it themselves.

Continue reading “Gaming Headset Gets Simple Wireless Charging”

Custom Coil Lets Mouse Charge Without Wires

It’s 2021, shouldn’t all of our devices be able to pull the power they need from the ether? [Sasa Karanovic] certainly thinks so, which is why he recently took it upon himself to add wireless charging capabilities to his desktop computer peripherals. The Qi transmitter and receiver modules are relatively cheap and easy to come by, the trick is in getting them installed.

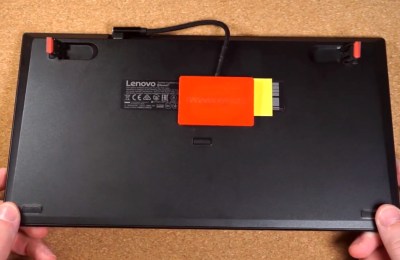
The keyboard gets non-invasive Qi charging.

For the keyboard, [Sasa] took the path of least resistance. The receiver coil lives inside a little 3D printed box attached to the back, and power is routed through a hacked up right-angle USB cable. It’s a simple addition that doesn’t make any permanent changes to the keyboard; perfect for those who don’t want to risk toasting their gear.

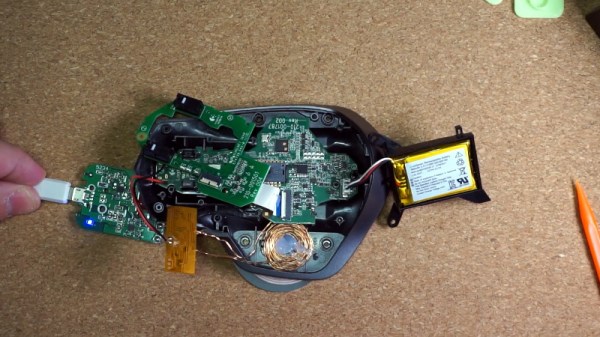
But that wasn’t really an option for the mouse. Obviously the Qi hardware would have to go on the inside, but at a glance it was clear there wasn’t enough room to mount the stock coil. So [Sasa] pulled the original coil apart and rewound it around a small 3D printed jig. This resulting coil was perfectly sized to fit inside the flat area on the left side of the mouse with no apparent degradation in charging ability. Wiring the module up to an unpopulated pad on the PCB allowed him to easily inject the 5 V output into the device’s existing charging circuitry.

We’ve seen plenty of aftermarket Qi charging coils take up permanent residence in various gadgets, but rewinding the coil is a neat trick that we’ve only seen pulled off a couple times in the past. Something to file away mentally should you ever want to wirelessly power up one of your projects.

Continue reading “Custom Coil Lets Mouse Charge Without Wires”

Laser Cutting Your Way To An RGB LED Table

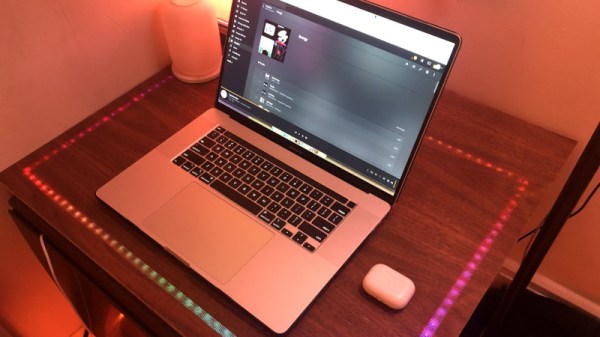
You’ve got the RGB keyboard, maybe even the RGB mouse. But can you really call yourself master of the technicolor LED if you don’t have an RGB table to game on? We think you already know the answer. Luckily, as [ItKindaWorks] shows in his latest project, it’s easy to build your own. Assuming you’ve got a big enough laser cutter anyway…

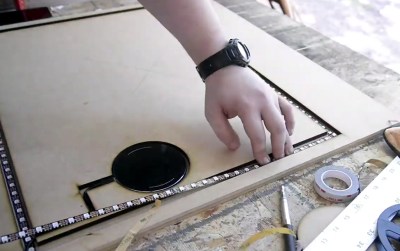
The construction of the table is quite straightforward. Using an 80 watt laser cutter, he puts a channel into a sheet of MDF to accept RGB LED strips, a pocket to hold a Qi wireless charger, and a hole to run all the wires out through. This is then backed with a second, solid, sheet of MDF.

Next, a piece of thin wood veneer goes into the laser cutter. In the video after the break you can see its natural tendency to roll up gave [ItKindaWorks] a little bit of trouble, but when strategically weighted down, it eventually lays out flat. He then uses the laser to blast an array of tiny holes in the veneer, through which the light from the LEDs will shine when it’s been glued over the MDF. A few strips of plastic laid over the strips serve both to diffuse the light and support the top surface.

The end result is truly gorgeous and has a very futuristic feel. Assuming you’ve got the equipment, it’s also a relatively simple concept to experiment with. It’s yet another example of the unique construction techniques possible when you add a high-powered laser to your arsenal.

Continue reading “Laser Cutting Your Way To An RGB LED Table”

Charging Pad Flips For Solar Power

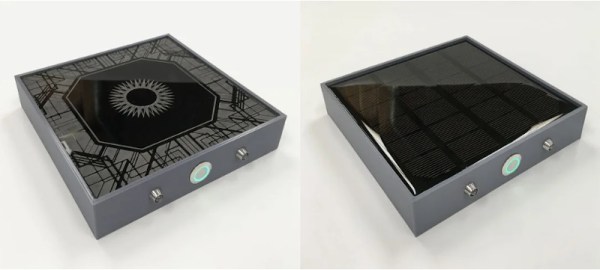
Charging pads are now a common, popular way to charge small devices. They have the benefit of reducing wear on connectors and being easier to use. [bcschmi6] decided to build a solar powered charging pad, which should come in handy when out and about.

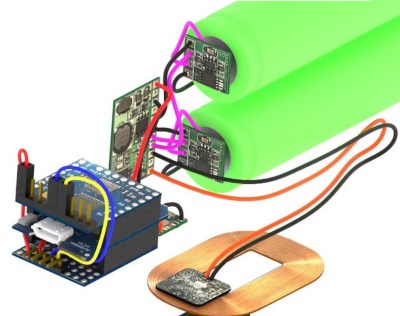
The build uses a 3 W square solar panel, hooked up to an Adafruit solar charging board. This charges a pair of 18650 lithium batteries. The batteries only put out a maximum of 4.2 V, so they’re hooked up to a boost converter to get the output a little higher, up to 5.2 V. The output of the boost converter is then hooked up to a charging pad harvested from an Anker charger, and it’s all wrapped up in a tidy 3D printed frame.

We imagine the device would be great for camping. It could be left charging in the sun during the day, before being flipped over and used as a charging pad at night. It would be easy to build a bigger version for charging several phones at once, too. If you want to build your own charging coils, that’s a thing, too. And if you’ve got your own solar project cooking up as we head into summer, be sure to let us know!

Motorized LEGO Train Gets Qi Charging In The Track

This project started, as many do, with a simple idea. [Ben Hoad] just wanted to take a static LEGO Hogwarts Express train kit and make it motorized. It was compatible with standard LEGO track pieces, so all he should have to do was figure out how to shoehorn a motor in there and be done with it. Right?

Well, you already know how things like this go. It started with adding the motor, which ended up being relatively straightforward once [Ben] used some community LEGO CAD tools to figure out which kits had the specific parts he needed to redesign the train in such a way that he’d have enough space inside for the motor without ruining the way it looked. But then the feature creep kicked in, and he found himself falling down that familiar rabbit hole.

A 3D representation of the train’s internal components.

The first problem was how to reliably power the train. It turns out the rear car was more or less empty already, so that became home for two 18650 batteries (the project details say “16850” but we believe that is merely a typo). [Ben] didn’t want to have to take the thing apart every time it ran down, so he wondered if it would be possible to add wireless charging.

A Qi coil in the bottom of the train car and one in a specially designed section of track got the power flowing, but getting them lined up proved a bit finicky. So he added a Hall effect sensor to the car and a strong magnet to the track, so the train would know when the coils were lined up and automatically pump the brakes.

So now he had a motorized train that could recharge itself, but how should he turn it on and off? Well, with an ESP8266 along for the ride, he figured it would be easy to add WiFi control. With a bit of code and the Homebridge project, he was able to get the train to appear as a smart switch to Apple’s HomeKit. That allows him to start and stop the train from his smartphone, complete with a routine that returns the train to the charging station once it’s finished making the rounds. [Ben] says the next steps are to put some sanity checks in, such as shutting the motors down if the train hasn’t passed the charging station in a few minutes; a sure sign that it’s not actually moving.

All [Ben] needs to do now is implement automatic LEGO train decoupling before the plastic Hogwarts students come back from spring break.

Make “Wireless” Earbuds Truly Wireless

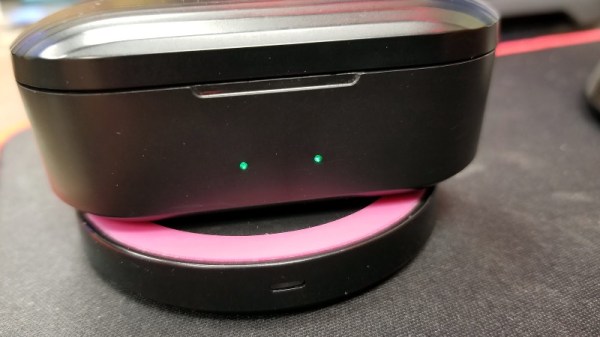
[Don] bought some off-brand Bluetooth earbuds online that actually sound pretty good. But while it’s true that they don’t require wires for listening to tunes, the little storage/charging box they sleep in definitely has a micro USB port around back. Ergo, they are not truly wireless. So [Don] took it upon himself to finish what the manufacturer started. Because it’s 2019, and words have meaning.

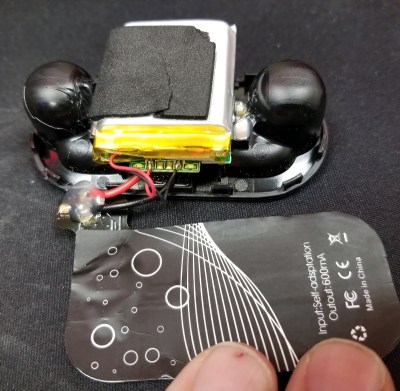
Finally, he had a use for that Qi charger he’s had lying around since the Galaxy S5 era. [Don] pried the earbud case open with a guitar pick and found a nicely laid-out charging circuit board without any black goop.

Once he located ground and Vcc pads, it was just a matter of performing a bit of surgery on the coil’s pins so he could solder wires there instead. Miraculously, the Qi coil fit perfectly inside the bottom of the case and the plastic is thin enough that it doesn’t interfere with the charging.

Want to try it for yourself? [Don]’s done an excellent job of documenting this hack, with clear pictures of every step. Soon you’ll be able to rid yourself of all those pesky USB cables.

Of course, [Don] still has to plug the charging base into the wall. If he ever wanted to add another level of wireless, he could always retrofit the base coil into his laptop.