Converting Film Camera To Digital The Hard Way

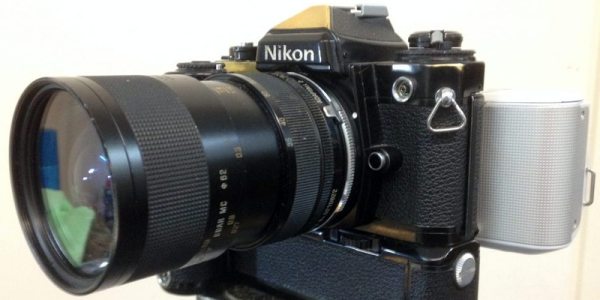
[Robin] is a hobby photographer with some very nice old film camera gear. But who has the money or patience for developing film these days? (Well, lots of people, especially artists, but that’s a different Hackaday article.) So to update his old gear without breaking the bank, he glommed a Sony Nex digital camera onto the back of a nice old Nikon, and documented the process for us.

A friend of mine once said, “never underestimate what a good engineer can do with a file and patience.” [Robin]’s hack essentially consists of grinding the Sony’s CMOS sensor to fit exactly where the film plane would be in the old Nikon. For him, this meant relocating the IR filter glass, because it wouldn’t fit with the shutter, and then slowly and accurately trimming down the edges of the CMOS sensor’s retaining frame until it was just right.

Continue reading “Converting Film Camera To Digital The Hard Way”

Enjoy The Last Throes Of Summer With A Nice Pool Automation Project

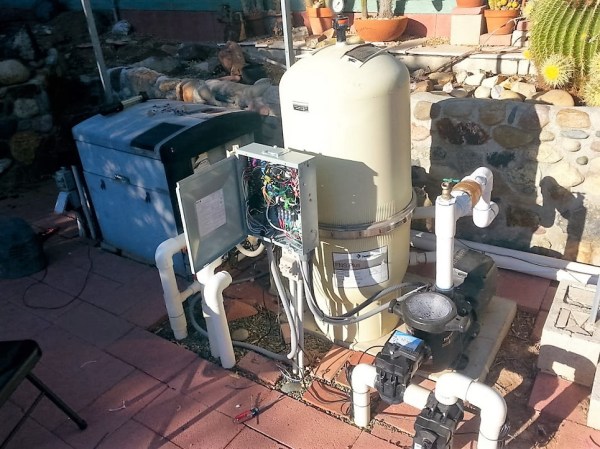
[Ken Rumer] bought a new house. It came with a troublingly complex pool system. It had solar heating. It had gas heating. Electricity was involved somehow. It had timers and gadgets. Sand could be fed into one end and clean water came out the other. There was even a spa thrown into the mix.

Needless to say, within the first few months of owning their very own chemical plant they ran into some near meltdowns. They managed to heat the pool with 250 dollars of gas in a day. They managed to drain the spa entirely into the pool, but thankfully never managed the reverse. [Ken] knew something had to change. It didn’t hurt that it seemed like a fun challenge.

The first step was to tear out as much of the old control system as could be spared. An old synchronous motor timer’s chlorine rusted guts were ripped out. The solar controler was next to be sent to its final resting place. The manual valves were all replaced with fancy new ones.

Rather than risk his fallible human state draining the pool into the downstairs toilet, he’d add a robot’s cold logical gatekeeping in order to protect house and home. It was a simple matter of involving the usual suspects. Raspberry Pi and Arduino Man collaborated on the controls. Import relay boards danced to their commands. A small suite of sensors lent their aid.

Now as the soon-to-be autumn sun sets, the pool begins to cool and the spa begins to heat automatically. The children are put to bed, tired from a fun day at the pool, and [Ken] gets to lounge in his spa; watching the distant twinkling of lights on his backyard industrial complex.

NES Controller

Turning A Classic NES Controller Into A Bluetooth Controller

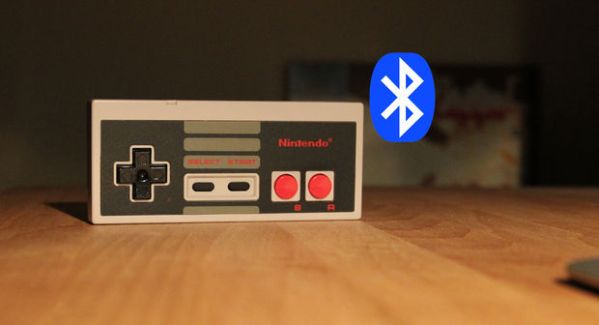
[Pietronet] is like many of us in that he enjoys playing some classic console video games from time to time. He usually plays them on his PC using a Wiimote as a controller. The Wiimote has most of the classic buttons in a comfortable configuration. Plus, it’s got Bluetooth built-in, which makes it easy to pair up to your PC. [Pietronet] decided to take it a step further, though. He managed to cram all of the guts from a Wiimote inside of the original NES controller for a more authentic feel.

The first step was to crack open the Wiimote and locate pads for each button. Once they were located, [Pietronet] used a Dremel to cut the board into a smaller size. He cut off part of the circuit board that contained the directional pad as well as the connector for the nunchuck. Next he had to solder very thin wires to each of the button pads he located earlier.

The original NES controller has a very limited number of buttons, and [Pietronet] wanted to modify the original controller as little as possible. Therefore, he attached a magnetic reed switch to the Wiimote’s sync button. This way if he ever needs to sync the Wiimote to a new console, he can do it by holding a magnet in the right place. This is a function that isn’t often used, so the inconvenience should be negligible.

The next step was to connect the buttons from the original NES controller up to the wires that were added to the Wiimote. [Pietronet] left the original circuit board mostly intact. He did have to cut a small chunk of it away in order to make room for two AAA batteries, but this didn’t affect the functionality of the controller.

The inside of the NES controller had to be cleaned out of various standoffs and plastic bits to make room for all of the extra components. The Wiimote has an LED to indicate that the controller is connected properly. [Pietronet] soldered a red SMD LED in its place on the end of two thin wires. This LED was then placed on the bottom left side of the directional pad. It’s visible through a translucent filter. This allows [Pietronet] to see when the NES controller is synced up properly.

The case fits back together and everything is held in place. The result is what looks and feels like a classic NES controller, only this one has Bluetooth connectivity and a vibration motor. Check out the video demonstration below to get an idea of what it looks like in use. Continue reading “Turning A Classic NES Controller Into A Bluetooth Controller”

Poor Audio Quality Made Great: Listen To Vintage Music Using An Antique Radio Without Removing The Insides

Sometimes it is not how good but how bad your equipment reproduces sound. In a previous hackaday post the circuitry of a vintage transistor radio was removed so that a blue tooth audio source could be installed and wired to the speaker. By contrast, this post will show how to use the existing circuitry of a vintage radio for playing your own audio sources while at the same time preserving the radio’s functionality. You will be able to play your music through the radio’s own audio signal chain then toggle back to AM mode and listen to the ball game. Make a statement – adapt and use vintage electronics.

Pre-1950’s recordings sound noisy when played on a high-fidelity system, but not when played through a Pre-War console radio. An old Bing Crosby tune sounds like he is broadcasting directly into your living room with a booming AM voice. You do not hear the higher frequency ‘pops’ and ‘hiss’ that would be reproduced by high-fidelity equipment when playing a vintage recording. This is likely due to the fact that the audio frequency signal chain and speaker of an antique radio are not capable of reproducing higher frequencies. Similarly, Sam Cooke sounds great playing out of an earlier transistor radio. These recordings were meant to be played on radios from the era in which they were recorded.

Choosing an Antique Radio

Vintage radios can be found at garage sales, estate sales, hamfests, antique shops, antique radio swap meets, and Ebay. Millions of radios have been manufactured. People often give them away. For this reason, antique radios are relatively inexpensive and the vast majority are not rare or valuable.

Generally speaking, tube radios must be serviced and may not even work. Transistor radios often work to some level. Try to find a radio that is clean and uses a power supply transformer or batteries.

Click past the break to learn how to restore these radios to working condition

Continue reading “Poor Audio Quality Made Great: Listen To Vintage Music Using An Antique Radio Without Removing The Insides”

LED Retrofit For Vintage Edge-lit Numeric Display Modules

edge-lit-led-retrofit

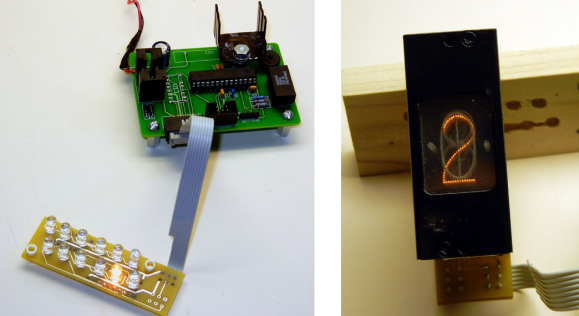
This single digit display is an old edge-lit module that [Ty_Eeberfest] has been working with. The modules were built for General Radio Company and have a really huge PCB to control just one digit. [Ty’s] modules didn’t come with that driver board, so he was left with the task of controlling an incandescent bulb for each digit. After a bit of thought he figured it would be much easier to just replace the edge-light bulbs with a set of LEDs.

We’ve seen these exact modules before, referenced in a project that created an edge-lit Nixie tube from scratch. Each digit in the display is made from a piece of acrylic with tiny drill holes which trace out the numerals. The acrylic is bent so that the edge exits out the back of the module where it picks up light from the bulb. [Ty] laid out his circuit board so that each LED was in the same position as the bulb it was replacing. As you can see, his retrofit works like a charm.

Continue reading “LED Retrofit For Vintage Edge-lit Numeric Display Modules”

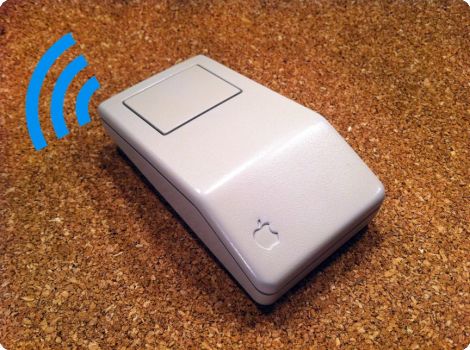
Making A Nostalgic Apple Mouse Wireless

If you’ve got an old mouse sitting around that has that perfect retro look why not start using it again? We’d bet there’s just enough room in there to turn the input device wireless.

The hack does away with everything but the case. The guts from a brand new wireless laser mouse are used as replacements. For the most part this is a simple process of making room for the new board and laying it in place. It involves cutting off a few plastic case nubs, enlarging the hole on the bottom so that the laser has a clear line of sight to the desktop, and hot gluing the thing in place. The button cover had a bit of plastic glued in place so that it lines up correctly with the replacement mouse’s switch.

The only thing that didn’t work out well is the battery situation. The AA cell that the mouse needs was too big for the retrofit so it was swapped with an AAA. These have a lower capacity which means more frequent replacement.

[via Make]

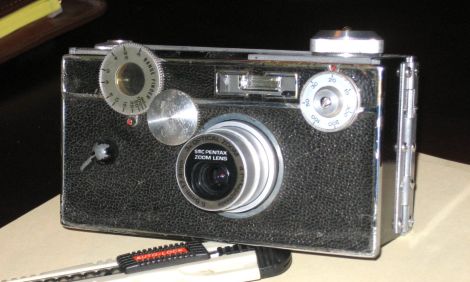
Vintage Camera Retrofit Perfect For Trolling Strangers

vintage_camera_retrofit

[John] likes making things out of unusual junk, and decided to build something for the sole purpose of trolling others. He thought it would be funny to stuff a new digital camera into the body of an old, obsolete camera, just to see how people would react to it.

He considered several different cameras, including a bulky old Polaroid, eventually settling on a far more manageable Argus C3. The camera wasn’t quite big enough to fit his new digicam inside, so he built a mock body using black micarta. He attached the Argus’ front and back to his plastic box, then spent some time fitting his digital camera inside. He transferred knobs from the original camera to his new false body, adding to the authenticity, before taking it out for some test shots.

You can see the final result above, and we think you would be hard pressed to notice that there’s something amiss with his camera unless you spent some time taking a closer look at it. He says that it works well for the most part, and it’s definitely a conversation starter. People are always puzzled by the fact that he is using such and old camera, and doubly so when he tells them it can take about 4,000 shots before he has to “develop” his pictures.