Cheap Sensors And An SDR Monitor Conditions In This Filament Drying Farm

We don’t know where [Scott M. Baker] calls home, but it must be a pretty humid place indeed. After all, he has invested quite a bit in fancy vacuum storage containers to keep his 3D-printer filament dry, with the result being this sensor-laden filament drying farm.

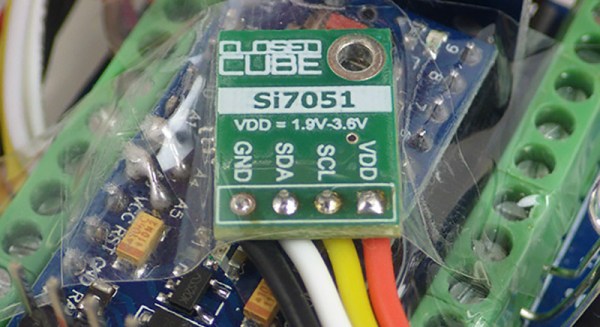
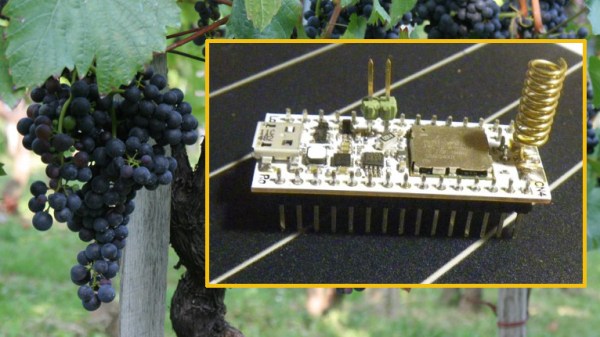
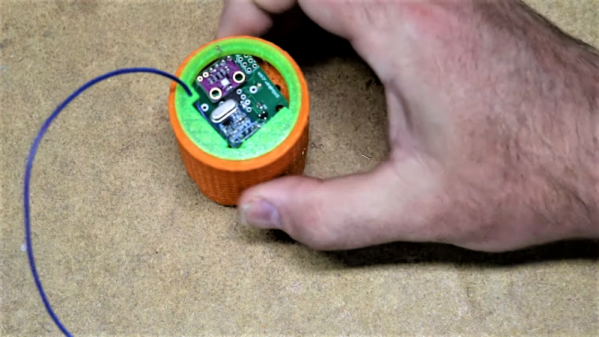
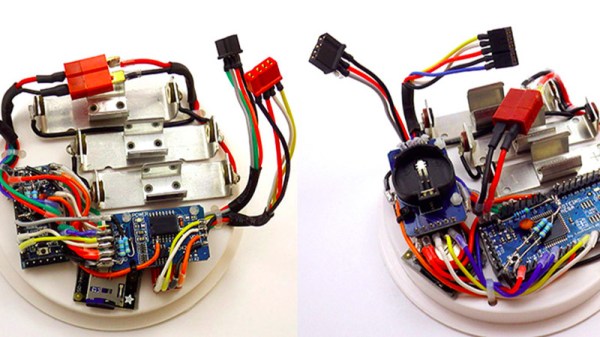
[Scott] wasn’t content to just use these PrintDry containers without knowing what’s going on inside. After a little cleaning and lube to get all the containers working, he set about building the sensors. He settled on a wireless system, with each container getting a BME280 temperature/humidity/pressure sensor and an SYN115 315-MHz ISM band transmitter module. These go with an ATtiny85 into a compact 3D-printed case holding a little silica desiccant. The transmitters are programmed to comply with ISM-band regulations – no need to run afoul of those rules – while the receiver is just an SDR dongle and a Raspberry Pi running rtl_433. The long-ish video below details design and construction.

The idea behind these vacuum containers would seem to be to pull out humid air and prevent it from coming back in. But as [Scott] quickly learned from his telemetry, following the instructions results in the equivalent atmospheric pressure of only about 2700′ (823 meters) elevation – not exactly a hard vacuum. But as [Scott] points out, it’s enough to get a nice, tight seal, and his numbers show a lowered and constant relative humidity over time.

Continue reading “Cheap Sensors And An SDR Monitor Conditions In This Filament Drying Farm”

Xpedit Is A Mood Ring For Mother Nature

Whether you’re in the woods or way up a mountain, basic knowledge of your environment can yield a lot of power. The more you know about the temperature, humidity, barometric pressure, and your altitude, the easier it is to predict future weather and stick to your height limits. Sure, you could buy some pre-fab doohickey that does all of this, but why? [DIYMechanics] shows how easy it is to build your own pocket-sized weather station for under $20.

Xpedit’s brain is an ATMega328 running on a 20MHz crystal heartbeat. The atmospheric readings come from a BME280, a nifty all-in-one module that’s available for pennies on Ali. The rotary encoder handles user inputs, and the simple interface displays on an OLED. There’s even a tiny compass embedded in the 3D printed case.

We really like the custom alarm feature, which can buzz you via vibe motor if you’ve climbed too high, or the pressure is dropping. [DIYMechanics] has Xpedit completely open-sourced, so trek on down to the GitHub for the latest Eagles, Gerbers, and INOs. Don’t have a USBtiny ISP yet? He’s got the plans for that, too.

Maybe you’re the indoorsy type who’d rather read about mountainous jungle adventures than experience them firsthand. Add some weather-driven ambiance to your book nook by hacking an IKEA cloud lamp.

High Precision Analog IO With Digital Pins

Reading the temperature of your environment is pretty easy right? A quick search suggests the utterly ubiquitous DHT11, which speaks a well documented protocol and has libraries for every conceivable microcontroller and platform. Plug that into your Arduino and boom, temperature (and humidity!) readings. But the simple solution doesn’t hit every need, sometimes things need to get more esoteric.

The technique summarized by an image from Microchip Appnote AN685

For years we’ve been watching [Edward]’s heroic efforts to build accessible underwater sensing hardware. When we last heard from him he was working on improving the accuracy of his Arduino’s measurements of the humble NTC thermistor. Now the goal is the same but he has an even more surprising plan, throw the ADC out entirely and sample an analog thermistor using digital IO. It’s actually a pretty simple trick based on an intuitive observation, that microcontrollers are better at measuring time than voltage. 

The basic circuit

The circuit has a minimum of four components: a reference resistor, the thermistor, and a small capacitor with discharge resistor. To sense you configure a timer to count, and an edge interrupt to capture the value in the timer when its input toggles. One sensing cycle consists of discharging the cap through the discharge resistor, enabling the timer and interrupt, then charging it through the value to measure. The value captured from the timer will be correlated to how long it took the cap to charge above the logic-high threshold when the interrupt triggers. By comparing the time to charge through the reference against the time to charge through the thermistor you can calculate their relative resistance. And by performing a few calibration cycles at different temperatures ([Edward] suggests at least 10 degrees apart) you can anchor the measurement system to real temperature.

For all the gory details, including tips for how to save every last joule of energy, check out [Edward]’s post and the Microchip appnote AN685 he references. Besides this series [Edward]’s Cave Pearl Project has already yielded an impressive number of Hackday posts. For more great hardware writeups check out a general hardware build for a single sensing node, or the “temperature sensor” [Edward] made with no external parts at all!

Torturing An Instrumented Dive Watch, For Science

The Internet is a wild and wooly place where people can spout off about anything with impunity. If you sound like you know what you’re talking about and throw around a few bits of the appropriate jargon, chances are good that somebody out there will believe whatever you’re selling.

Case in point: those that purport that watches rated for 300-meter dives will leak if you wiggle them around too much in the shower. Seems preposterous, but rather than just dismiss the claim, [Kristopher Marciniak] chose to disprove it with a tiny wireless pressure sensor stuffed into a dive watch case. The idea occurred to him when his gaze fell across an ESP-01 module next to a watch on his bench. Figuring the two needed to get together, he ordered a BMP280 pressure sensor board, tiny enough itself to fit anywhere. Teamed up with a small LiPo pack, everything was stuffed into an Invicta dive watch case. A little code was added to log the temperature and pressure and transmit the results over WiFi, and [Kristopher] was off to torture test his setup.

The first interesting result is how exquisitely sensitive the sensor is, and how much a small change in temperature can affect the pressure inside the case. The watch took a simulated dive to 70 meters in a pressure vessel, which only increased the internal pressure marginally, and took a skin-flaying shower with a 2300-PSI (16 MPa) pressure washer, also with minimal impact. The video below shows the results, but the take-home message is that a dive watch that leaks in the shower isn’t much of a dive watch.

Hats off to [Kristopher] for doing the work here. We always love citizen science efforts such as this, whether it’s hardware-free radio astronomy or sampling whale snot with a drone.

Continue reading “Torturing An Instrumented Dive Watch, For Science”

Tiny Two-Digit Thermometer Has Long Battery Life

Like most of his work, this tiny two-digit thermometer shows that [David Johnson-Davies] has a knack for projects that make efficient use of hardware. No pin is left unused between the DS18B20 temperature sensor, the surface mount seven-segment LED displays, and the ATtiny84 driving it all. With the temperature flashing every 24 seconds and the unit spending the rest of the time in a deep sleep, a good CR2032 coin cell should power the device for nearly a year. The board itself measures only about an inch square.

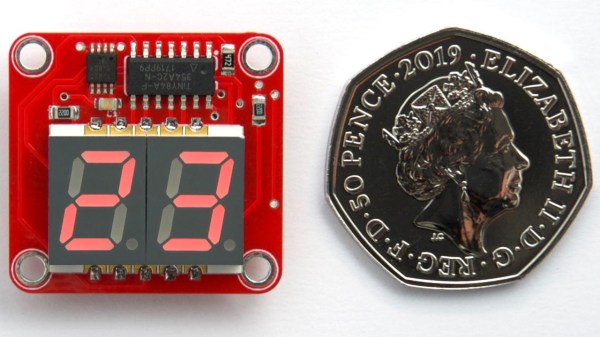
You may think that a display that flashes only once every 24 seconds might be difficult to actually read in practice, and you’d be right. [David] found that it was indeed impractical to watch the display, waiting an unknown amount of time to read some briefly-flashed surprise numbers. To solve this problem, the decimal points flash shortly before the temperature appears. This countdown alerts the viewer to an incoming display, at the cost of a virtually negligible increase to the current consumption.

[David]’s project write-up explains how everything functions. He also steps through the different parts of the source code to explain how everything works, including the low power mode. The GitHub repository holds all the source files, and the board can also be ordered direct from OSH Park via their handy shared projects feature.

Low power consumption adds complexity to projects, but the payoffs can easily be worth the time spent implementing them. We covered a detailed look into low power WiFi microcontrollers that is still relevant, and projects like this weather station demonstrate practical low power design work.

The No-Parts Temperature Sensor In Your Arduino

[Edward], creator of the Cave Pearl project, an underwater data logger, needed a way to measure temperature with a microcontroller. Normally, this problem is most easily solved by throwing a temperature sensor on the I2C bus — these sensors are cheap and readily available. This isn’t about connecting a temperature sensor in your Arduino. This build is about using the temperature sensor in your clock.

The ATMega328p, the chip at the heart of all your Arduino Uno clones, has within it a watchdog timer that clicks over at a rate of 110 kHz. This watchdog timer is somewhat sensitive to temperature, and by measuring this temperature sensor you can get some idea of the temperature of the epoxy blob that is a modern microcontroller. The trick is calibrating the watchdog timer, which was done with a homemade ‘calibration box’ in a freezer consisting of two very heavy ceramic pots with a bag of rice between them to add thermal mass (you can’t do this with water because you’re putting it in a freezer and antique crocks are somewhat valuable).

By repeatedly taking the microcontroller through a couple of freeze-thaw cycles, [Edward] was able to calibrate this watchdog timer to a resolution of about 0.0025°C, which is more than enough for just about any sensor application. Discussions of accuracy and precision notwithstanding, it’s pretty good.

This technique measures the temperature of the microcontroller with an accuracy of 0.005°C or better, and it’s using it with just the interrupt timer. That’s not to say this is the only way to measure the temperature of an ATMega; some of these chips have temperature sensors built right into them, and we’ve seen projects that use this before. However, this documented feature that’s clearly in the datasheet seems not to be used by many people.

Thanks [jan] for sending this in.

Solar-Powered IoT Sensor Saves Wine Batch From Overheating

Making wine isn’t just about following a recipe, it’s a chemical process that needs to be monitored and managed for best results. The larger the batch, the more painful it is to have something go wrong. This means that the stakes are high for small vineyards such as the family one [Mare] works with, which have insufficient resources to afford high-end equipment yet have the same needs as larger winemakers. The most useful thing to monitor is the temperature profile of the fermentation process, and [Mare] created an exceptional IoT system to do that using LoRa wireless and solar power.

It’s not enough just to measure temperature of the fermenting liquid; viewing how the temperature changes over time is critical to understanding the process and spotting any trouble. [Mare] originally used a Raspberry Pi, I2C temperature sensor, and a Wi-Fi connection to a database to do the monitoring. This was a success, but it was also overkill. To improve the system, the Raspberry Pi was replaced with a LoRaDunchy board, an STM-based module of [Mare]’s own design which is pin-compatible with the Arduino Nano. It includes a battery charger, power management, and LoRa wireless communication. Adding a solar cell and lithium-polymer battery was all it took to figuratively cut the power cord.

Sensing the temperature of fermentation is done by sealing the temperature sensor into a thin aluminum tube, and lowering that into the vat. There it remains, with the LoRaDunchy board periodically waking up to read the sensor and report the tempurature over LoRa before going back to sleep, all the while sipping power from the battery which in turn gets recharged with solar power.

It’s an elegant system that has already paid off. A 500 litre vat of wine generated an alarm when the temperature rose above 24 Celsius for 10 minutes. An email alert allowed the owner to begin mixing the solution and add ice water to put the brakes on the runaway reaction. The temperature dropped and slow fermentation resumed, thanks to the twin powers of gathering the right data, then doing something meaningful with it.

Vineyards and LoRa have joined forces before, for example in the Vinduino project which aims to enable water-smart farming. If you’re unfamiliar with LoRa in general, the LoRa on the ESP32 project page contains a good primer, and if the antenna on the module shown here looks familiar to you it’s because we recently featured [Mare]’s guide on making DIY LoRa antennas from salvaged wire.