Tiptoe Through The Tulips In No Time With Ukule-LED

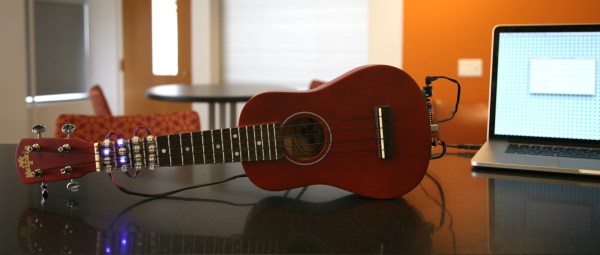
Take it from someone who has played at the guitar for over 20 years: reading sheet music can be a big stumbling block to musical enjoyment. Playing by ear is somewhat unreliable, tablature only works well if you’re already familiar with the tune and tempo, and pulling melody from chord charts is like weaving fiction from the dictionary. A lot can be said for knowing basic chord formations, but it can be difficult get your fingers to mimic what you see on the page, the screen, or someone else’s fretboard. Enter Ukule-LED, a learning tool and all-around cool project by [Raghav and Jeff] at Cornell.

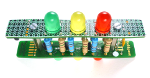
Ukule-LED uses 16 NeoPixels across the first four positions of the fretboard to teach chord positions. All 16 NeoPixels are connected in series to a single pin on an ATMega1284P, which sits on a board mounted to the bottom of the uke along with power and serial. [Raghav and Jeff] set the NeoPixels below the surface so as not to interrupt playability. The uke can operate in either of two modes, ‘play’, and ‘practice’. In ‘play’ mode, the user feeds it a text file representing a song’s chords, tempo, and time signature. The LEDs show the chord changes in real-time, like a karaoke teleprompter for fingers. In ‘practice’ mode, the user enters a chord through the CLI, and the lights hold steady until they get a new assignment. Knowing which fingers to use where is up to the user.

To add another layer of learning, major chords alight in green, minor chords in red, and 7th chords in blue. These are the currently supported chord types, but the project was built with open, highly extendable Python sorcery available for download and subsequent tinkering. Go on tour after the break.

Continue reading “Tiptoe Through The Tulips In No Time With Ukule-LED”

ESP Gets FCC And CE

The ESP8266 Internet of Things module is the latest and greatest thing to come out of China. It’s ideal for turning plastic Minecraft blocks into Minecraft servers, making your toilet tweet, or for some bizarre home automation scheme. This WiFi module is not, however, certified by the FCC. The chipset, on the other hand, is.

Having a single module that’s able to run code, act as a UART to WiFi transceiver, peek and poke a few GPIOs, all priced at about $4 is a game changer, and all your favorite silicon companies are freaking out wondering how they’re going to beat the ESP8266. Now the chipset is FCC certified, the first step to turning these modules into products.

This announcement does come with a few caveats: the chipset is certified, not the module. Each version of the module must be certified by itself, and there are versions that will never be certified by the FCC. Right now, we’re looking at the ESP8266-06, -07, -08, and -12 modules – the ones with a metal shield – as being the only ones that could potentially pass an FCC cert. Yes, those modules already have an FCC logo on them, but you’re looking at something sold for under $5 in China, here.

Anyone wanting to build a product with the ESP will, of course, also need to certify it with the FCC. This announcement hasn’t broken down any walls, but it has cracked a window.

Trinket EDC Contest Drawing #3 Results

We’ve held our third drawing for the Trinket Everyday Carry Contest. Once again we’ve used a Pro Trinket to pick the random winner. This week’s winner is [Scissorfeind] with his project Stylin’ safety jacket

jacket3
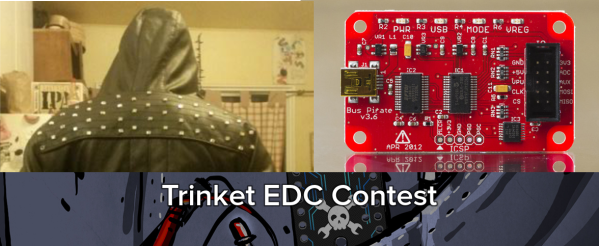
In true hack style, [Scissorfeind] went into this project with two goals: A jacket that will be visible at night, and keep him “looking f*cking sick”. The jacket itself is a faux leather affair from a thrift store. [Scissorfeind] added some studs for bling, and he’s working on adding a ton of electronics for light.

The Pro Trinket will be driving a series of LED matrices, which [Scissorfeind] is working on turning into POV displays. The matrices come from an LED clock which [Scissorfeind] saved from the landfill. In fact, most of the parts in the jacket are upcycled from e-waste. The jacket is just starting to come together. We can’t wait to see the final results!

buspirate2

We hope that [Scissorfeind] enjoys his Bus Pirate V3.6  from The Hackaday Store. The Bus Pirate was designed by former Hackaday writer [Ian Lesnet] as a Swiss Army knife of electronic communications. If you’re trying to connect to a circuit with  SPI, I²C, JTAG, or UART, the Bus Pirate has you covered. It can do plenty more though – from reading analog data to programming components. Check out [Brian Benchoff’s] full review on the Bus Pirate V3.6 product page!

trinket-prize-cordwood
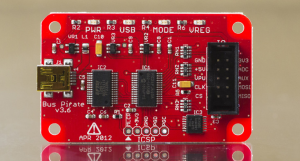
If the pseudo random number gods didn’t smile on you this week, don’t worry, there are still two more chances to win a random drawing! Our next drawing will be on 12/23/2014 at 9pm EST. The prize will once again be a Cordwood Puzzle! To be eligible you need to submit your project as an official entry and publish at least one project log during the week.

The main contest entry window closes on January 2, 2015 – but don’t wait for the last minute! Hit the contest page and build some awesome wearable or pocketable electronics!

DRM Protection Removed For… Coffee?

Keurig, the manufacturer of a single-serve coffee brewing system, has a very wide following amongst coffee drinkers. Their K-cup (pre-packaged coffee grounds with a coffee filter, all in a plastic container) is an interesting concept and makes brewing a single cup of coffee much more efficient over making a whole pot. Their newer line of coffee makers, the Keurig 2.0, has some interesting (and annoying) security features though, which [Kate Gray] has found an interesting and simple way around.

The DRM security in these coffee makers is intended to keep third-party “cups” from being used in the Keurig. It can recognize an authentic Keurig cup, and can stop the operation of the coffee pot if a knockoff is placed in the machine. We can only assume that this is because Keurig makes a heap of cash by selling its canisters of coffee. One simple solution was already covered a few days ago by taping an authentic lid to the machine. This one doesn’t require any authentic pods but just removes one wire from a wiring harness inside of the case.

There are other ways around the security on these devices, but when [Kate Gray] actually investigated, she found the security decidedly lacking. With something this simple, one can only speculate how much Keurig has really invested in making sure users don’t use third-party cups of coffee in their machines, but it also brings up the classic question of who really owns hardware if we can’t use it in the way we want, rather than the way the manufacturer wants.

You can read more about the project on its Reddit page. Thanks to [MyOwnDemon] for the tip!

Battery Basics – Choosing A Battery For Your Project

If choosing a rechargeable battery for your project intimidates you, [Afroman] has prepared a primer video that should put you at ease. In this tutorial for battery basics he not only walks you through a choice of 5 rechargeable chemistries and their respective tradeoffs, but gives a procedure that will allow you to navigate through the specs of real-world batteries for sale – something that can be the most intimidating part of the process.

You cannot learn everything about batteries in 9 minutes, but watching this should get you from zero to the important 80% of the way there. Even if your project does not give you the specs you need to begin buying, [Afroman] tells you what to measure and how to shop for it. In particular, the information he gives is framed in the context you care about, hopefully ensuring you are not waylaid by all the details that were safe to ignore. If this is not enough, [Afroman]’s prequel video on battery terminology has more detail.

Much like your high school English teacher told you, you need to know the rules before you can choose to break them. Many of battery absolute Dos or Don’ts are written for the manufacturer, who provides for the consumer, not the hacker. Hackaday has published hundreds of battery articles over the years; search our archives when you are ready for more.

Continue reading “Battery Basics – Choosing A Battery For Your Project”

Copter rotor hub

UAV Coaxial Copter Uses Unique Drive Mechanism

Personal UAV’s are becoming ubiquitous these days, but there is still much room for improvement. Researchers at [Modlab] understand this, and they’ve come up with a very unique method of controlling pitch, yaw, and roll for a coaxial ‘copter using only the two drive motors.

In order to control all of these variables with only two motors, you generally need a mechanism that adjusts the pitch of the propeller blades. Usually this is done by mounting a couple of tiny servos to the ‘copter. The servos are hooked up to the propellers with mechanical linkages so the pitch of the propellers can be adjusted on the fly. This works fine but it’s costly, complicated, and adds weight to the vehicle.

[Modlab’s] system does away with the linkages and extra servos. They are able to control the pitch of their propellers using just the two drive motors. The propellers are connected to the motors using a custom 3D printed rotor hub. This hub is specifically designed to couple blade lead-and-lag oscillations to a change in blade pitch. Rather than drive the motors with a constant amount of torque, [Modlab] adds a sinusoidal component in phase with the current speed of the motor. This allows the system to adjust the pitch of the blades multiple times per rotation, even at these high speeds.

Be sure to watch the demonstration video below. Continue reading “UAV Coaxial Copter Uses Unique Drive Mechanism”

Retrotechtacular: Pipeline To The Arctic

They said it couldn’t be done, and perhaps it shouldn’t have been attempted. Shouldas and couldas aside, the oil crisis of the 1970s paved the legislative way for an 800-mile pipeline across the Alaskan frontier, and so the project began. The 48-inch diameter pipe sections would be milled in Japan and shipped to Alaska. Sounds simple enough. But of course, it wasn’t, since the black gold was under Prudhoe Bay in Alaska’s North Slope, far away from her balmy southern climes.

The Trans-Alaska Pipeline System was constructed in three sections: from Valdez to Fairbanks, Fairbanks to a point in the Brooks Pass, and south from Prudhoe Bay to the mountain handoff. Getting pipe to the Valdez and Fairbanks is no big deal, but there is no rail, no highway, and no standard maritime passage to Prudhoe Bay. How on earth would they get 157 miles worth of 58-foot sections of pipe weighing over 8 tons each up to the bubblin’ crude?

Continue reading “Retrotechtacular: Pipeline To The Arctic”