Hack Your Phone: Turn Your Volume Buttons Into GPIO Ports

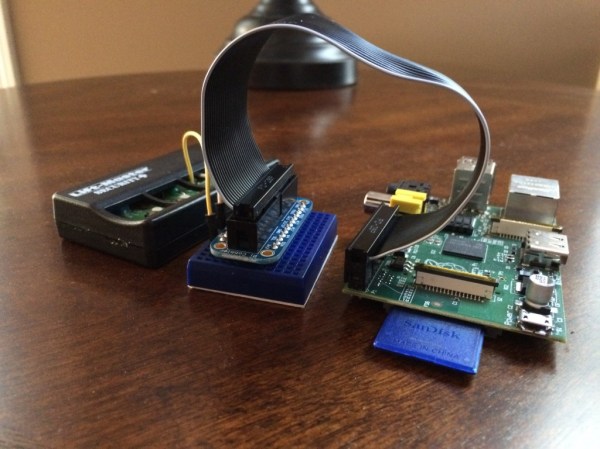
Internet connected cameras are mighty useful, specially in situations requiring some form of remote monitoring. An always-on camera that is available over an internet connection, is cheap, and uses re-purposed  hardware – that’s what the Gonzo project hopes to achieve. To accommodate these requirements, the Exploratory Engineering program team in Telenor Digital are using off-the-shelf phone hardware running on top of a fork of Firefox OS. You hang the Gonzo where you want to monitor a situation, after which it will function for up to one month before needing a recharge, sending data to a designated public URL over the 2G network.

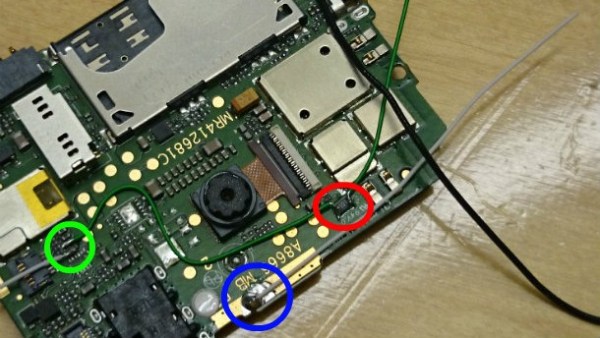
A big downside with using such hardware is that it is not designed for the task at hand, and offers no expansion ports that may be needed for certain functions. In this particular case, the designers needed a couple of output ports to drive some LED’s. The hardware guys got a bit creative,  and re-mapped the volume buttons of the phone into generic GPIO ports. On the software side, they looked at where the button GPIO’s were referenced, and located how they are mapped to a keymap. They then added a device driver that maps the GPIO ports to be generic ports instead. Modding the hardware needed a little bit more hard work, figuring out which traces connected to the two volume buttons, adding series resistors, and then wiring the LED’s in place. The project itself is still a work in progress, and you can read more about it at the Gonzo website.

If you’re like one of us and have a box full of old phones lying around, take a look at some creative suggestions here for some Arduino controlled robots.

Thanks for the tip [pb] !

RasPi Garage Door

A Raspberry Pi Garage Door Opener

We can never seem to get enough garage door hacks around here. [Tanner’s] project is the most recent entry into this category. He’s managed to hook up a Raspberry Pi to his garage door opener. This greatly extends his range to… well anywhere with an Internet connection.

His hack is relatively simple. He started with the garage door opener remote. He removed the momentary switch that was normally used to active the door. He bridged the electrical connection to create a circuit that was always closed. This meant that as long as the remote had power, the switch would be activated. Now all [Tanner] had to do was remove the battery and hook up the power connectors to his Raspberry Pi. Since the remote works on 3.3V and draws little current, he is able to power the remote directly from the Pi. The Pi just has to turn its pin high momentarily to activate the remote.

The ability to toggle the state of your garage door from anywhere in the world also comes with paranoia. [Tanner] wanted to be able to tell if the door is up, down, or stopped somewhere in the middle while he was away from home. He also wanted to use as little equipment as possible. Since he already had an IP camera in the garage, he decided to use computer vision to do the detection.

He printed off two large, black shapes onto ordinary white computer paper. One was taped to the top of the door and one to the bottom. A custom script runs on the Pi that grabs the latest image from the camera and uses OpenCV to detect the shapes. If both shapes are visible, then the script can assume the door is closed. Otherwise, it’s likely open. This makes it easier for [Tanner] to know if the door is opened or closed without having to check the camera himself.

Can’t get enough garage door hacks? Try these on for size. Continue reading “A Raspberry Pi Garage Door Opener”

Hackaday Links Column Banner

Hackaday Links: February 15, 2015

[Matthias Wandel], also known as the genius/demigod that can make anything out of wood, put together a mount for a Raspberry Pi and a camera. Yes, it’s just a holder for a Raspi, but some of our readers who aren’t up to speed with [Matthias] might want to check out his Youtube channel. There are hundreds of awesome videos. Report back in a month.

[Evan], the guy working his butt off for the MidAtlantic Retro Computing Hobbyists, and the organizer for the Vintage Computer Festival East (we’re going, April 17-19, Wall, NJ) has been working on a book. It’s about mobile computing, and he’s crowdfunding it.

Your keyboard has buttons, and so does and Akai MPC. Daft PunKonsole! Press the space bar for  instrumental part. There is, as yet, no video of someone doing this correctly.

Valentine’s Day was yesterday, and that means Valentine’s Day builds started rolling in on the tip line. Here’s something that’s actually a very simple circuit that’s inspired from an old ‘Electronic Games and Toys’ book by [Len Buckwalter]. Here’s a video of it in action.

A few years ago the name of the game was tiny, credit card-sized ARM boards. It had to come to this: a 64-bit board. ARM Cortex A53 running at 1.2GHz. It also costs $120 and only has a gig of RAM, but there you go.

drone on ground

Quadcopter Plane Transformer Is Awesome

Is it a quadcopter? A plane?  No, it’s both! [Daniel Lubrich] is at it again with a vertical take off and landing transformer he calls the SkyProwler.

The SkyProwler uses a switch blade type mechanism to move from quadcopter mode to plane mode. The wings can be detached to make it a normal quad that has all the typical bells and whistles. It can follow you around with GPS, fly autonomously via way points, and has this cool gimbal mechanism that keeps the GoPro stable as the drone pitches in flight, allowing for a better video experience.

[Dan’s] ultimate goal is a full size passenger model called the SkyCruiser, which uses the same switchblade transformation mechanism as his much smaller SkyProwler. Be sure to check out the video below if you haven’t already, and let us know of any quadcopter / plane hybrids of your own.

Correction: We previously associated [Daniel Lubrich] with the ATMOS program. This was in error and has been removed from the article. The ATMOS UAV is a separate project which we previously covered.

Continue reading “Quadcopter Plane Transformer Is Awesome”

Facebook Bounty

Deleting Facebook Albums Without Permission

[Laxman] was poking around Facebook looking for security vulnerabilities. Facebook runs a bug bounty program which means if you can find a vulnerability that’s serious enough, it can earn you cold hard cash. It didn’t take much for [Laxman] to find one worthy of a bounty.

The graph API is the primary way for Facebook apps to read and write to the Facebook social graph. Many apps use this API, but there are limitations to what it can do. For example, the API is unable to delete users’ photo albums. At least, it’s not supposed to be able too. [Laxman] decided to test this claim himself.

He started by sending a command to delete one of his own albums using a graph explorer access token. His request was denied. The application didn’t have the correct permissions to be able to perform that action. It seemed that Facebook was correct and the API was unable to delete photos. [Laxman] had another trick up his sleeve, though. He noticed that the wording of the response suggested that other apps would have the ability to delete the albums, so he decided to check the Facebook mobile application.

He decided to send the same request with a different token. This time he used a token from the Facebook for Mobile application. This actually worked, and resulted in his photo album being deleted. To take things a step further, [Laxman] sent the same requests, but changed the user’s ID to a victim account he had set up. The request was accepted and processed without a problem. This meant that [Laxman] could effectively delete photo albums from any other user without that user’s consent. The vulnerability did require that [Laxman] had permission to view the album in the first place.

Since [Laxman] is one of the good guys, he sent this bug in to the Facebook team. It took them less than a day to fix the issue and they rewarded [Laxman] $12,500 for his trouble. It’s always nice to be appreciated. The video below shows [Laxman] walking through how he pulled off this hack using Burp Suite. Continue reading “Deleting Facebook Albums Without Permission”

Home-brew Vibration Cleaner Leaves Your SLA Prints Squeaky-Clean

If you’ve had the chance to add a Form 1+ 3D printer to your basement, you might find the post-print cleaning step a bit tedious. (A 20-minute alcohol bath? Outrageous!) Fortunately, for the impatient, [ChristopherBarr] has developed the perfect solution: a post-print agitator that cuts the time in-and-out-of the bath from 20 minutes to about two.

[ChristopherBarr’s] build is the right conglomerate of parts we’d expect when keeping the price down for this hack. He’s combined a palm sander, a couple pints of urethane expanding foam, and two loaf pans into one agitating mechanism that he’s dubbed “the Loafinator.” With the urethane expanding foam, [ChristopherBarr] achieved a near-perfect fit of the sander inside the loaf pan, now that the foam has filled in the remaining contours to hold the sander in place. Best of all, the sander hasn’t been sacrificed for this build; instead, the foam holder was assembled in three stages and isolated from the sander with a layer of plastic wrap to enable later extraction.

[ChristopherBarr’s] simple, yet practical, hack serves as an excellent solution to a number of hobbyists looking to “get things agitated.” While his device is able to polish off the uncured resin from his resin prints much faster than the conventional approach, we’d imagine that a similar build could greatly expedite the PCB etching process in a muriatic-acid or ferric-chloride based PCB etching procedure–far more quickly than our previous automated solution. The time-saving comes at a price; however. Once you’ve installed your very own Loafinator alongside your printer, expect a few nosy neighbors to start asking for visits to check out your new motorboat.

Continue reading “Home-brew Vibration Cleaner Leaves Your SLA Prints Squeaky-Clean”

IOT Lightbulb hack

Repurposing IOT Lightbulb Chip For Anything

Home automation products have hit critical mass in the world of consumerism, and now suddenly everyone has a product you can control using some protocol or other. Cree (the maker of LEDs) has a rather cheap IOT-enabled bulb available in Canada and the US for the low price of $15 — not bad considering regular LED bulbs can run you that much, without wireless connectivity!

So if you want to outfit your house in smart lights — great. But what about other things? Well, [Mac Alpine] decided to crack open one of the bulbs to see if he could re-purpose the IOT board. Turns out, you can.

In fact it’s almost too convenient. It’s a remarkably small chip, about half the size of a silver dollar. And it features a small ZigBee radio module. All you need is a 3V power supply, and boom — you have an IOT module that is capable of PWM output. It features an Atmel ATSAMR21E microprocessor which communicates over the radio to a Quirky Wink hub — it can also be triggered using IFTTT.

Continue reading “Repurposing IOT Lightbulb Chip For Anything”