Police Baffled? Send For The Radio Amateurs!

The police force in Evanston, Illinois had a problem on their hands. A mystery transmitter was blocking legal use of radio devices, car key fobs, cellphones, and other transmitters in an area of their city, and since it was also blocking 911 calls they decided to investigate it. Their first call for help went to the FCC who weren’t much use, telling them to talk to the manufacturers of the devices affected.

Eventually they approached the ARRL, the USA’s national amateur radio organisation, who sent along [Kermit Carlson, W9XA] to investigate. He fairly quickly identified the frequencies with the strongest interference and the likely spot from which it originated, and after some investigation it was traced to a recently replaced neon sign power supply. Surprisingly the supply was not replaced with a fault-free unit, its owner merely agreeing to turn it off should any further interference be reported.

The ARRL are highlighting this otherwise fairly unremarkable case to draw attention to the problem of devices appearing on the market with little or no pretence of electromagnetic compatibility compliance. In particular they are critical of the FCC’s lacklustre enforcement response in cases like this one. It’s a significant problem worldwide as huge numbers of very cheap switch-mode mains power supplies have replaced transformers in mains power applications, and in any center of population its effects can be readily seen with an HF radio in the form of a significantly raised RF noise floor. Though we have reported before on the FCC’s investigation of the noise floor problem we’d be inclined to agree with the ARRL that it is effective enforcement of EMC regulations that is key to the solution.

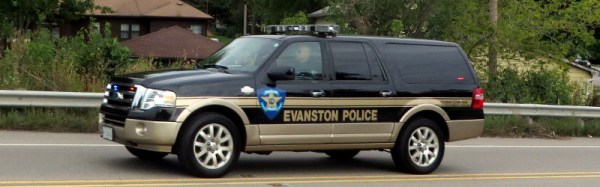
City of Evanston police vehicle picture, [Inventorchris] (CC BY-NC 2.0) via Flickr.

Hackaday Prize Entry: A CNC Scribe For Making Circuit Boards

We’re interested in any device that can make a PCB out of a copper-clad board, and this entry for the Hackaday Prize might be the simplest machine for PCB fabrication yet. It’s called the Projecta, and it’s a simple way to turn Eagle and KiCad files into a real circuit board.

For the home PCB fabricator, there are two ways to go about the process of turning a copper clad board into a real circuit board. The first is a CNC machine. Drop a piece of FR4 under a cutter, and you’ll get a circuit board and a lot of fiberglass dust. The Othermill is great for this, but it is a bit pricey for all but the most ambitious weekend warrior.

The second method of home PCB fabrication chemically etches the copper away. The etch resist mask can be laid down with dry film resist, or with the ever-popular laser printer, magazine, and laminator trick. Either way, the result is an acid-proof covering over the copper you don’t want to get rid of.

While the Projecta looks and sounds like a miniature CNC machine, it doesn’t chew through copper and produce a ton of fiberglass dust. The Projecta scribes the pattern of a circuit board after the copper has been masked off with a sharpie, marker, or other ink-based resist. When the board comes out of the Projecta, there’s a perfect pattern of circuits on a board, ready for the etch tank.

This technique of putting a copper clad board into a CNC machine and etching it later is something we haven’t seen before. There’s a good reason for that – if you’re putting a board under a cutter already, you might as well just chew away the copper while you’re at it.

Just because we haven’t seen this technique before doesn’t mean it’s a bad idea. Because the Projecta is only scribing a bit of ink off a board, the CNC mechanism doesn’t need to be that complex. It doesn’t need to throw a spindle around, and the Projecta can be built down to a price rather easily.

The Projecta is on Kickstarter right now, with the Kickstarter non-early bird price of $600. You can check out the video demo of the Projecta in action below.

Continue reading “Hackaday Prize Entry: A CNC Scribe For Making Circuit Boards”

Exoskeleton Designed For Children

Exoskeletons are demonstrably awesome, allowing humans to accomplish feats of strength beyond their normal capacity. The future is bright for the technology — not just for industrial and military applications, but especially in therapy and rehabilitation. Normally, one thinks of adults who have lost function in their limbs, but in the case of this exoskeleton, developed by The Spanish National Research Council (CSIC), children with spinal muscular atrophy are given a chance to lead an active life.

Designing prosthetics for children can be difficult since they are constantly growing, and CSIC’s is designed to be telescopic to accommodate patients between the ages 3-14. Five motors in each leg adapt to the individual symptoms of the patient through sensors which detect the child’s intent to move and simulates what would be their natural walking gait.

Continue reading “Exoskeleton Designed For Children”

The Mystery Behind The Globs Of Epoxy

When Sparkfun visited the factory that makes their multimeters and photographed a mysterious industrial process.

We all know that the little black globs on electronics has a semiconductor of some sort hiding beneath, but the process is one that’s not really explored much in the home shop.  The basic story being that, for various reasons , there is no cheaper way to get a chip on a board than to use the aptly named chip-on-board or COB process. Without the expense of encapsulating  the raw chunk of etched and plated silicon, the semiconductor retailer can sell the chip for pennies. It’s also a great way to accept delivery of custom silicon or place a grouping of chips closely together while maintaining a cheap, reliable, and low-profile package.

As SparkFun reveals, the story begins with a tray of silicon wafers. A person epoxies the wafer with some conductive glue to its place on the board. Surprisingly, alignment isn’t critical. The epoxy dries and then the circuit board is taken to a, “semi-automatic thermosonic wire bonding machine,” and slotted into a fixture at its base. The awesomely named machine needs the operator to find the center of the first two pads to be bonded with wire. Using this information it quickly bonds the pads on the silicon wafer to the  board — a process you’ll find satisfying in the clip below.

The final step is to place the familiar black blob of epoxy over the assembly and bake the board at the temperature the recipe in the datasheet demands. It’s a common manufacturing process that saves more money than coloring a multimeter anything other than yellow.

Continue reading “The Mystery Behind The Globs Of Epoxy”

A Refrigerator Cooled By Rubber Bands

Ever noticed that a rubber band gets warmer when it’s stretched? The bands also get cooler when allowed to snap back to relaxed length? [Ben Krasnow] noticed, and he built a rubber band cooled refrigerator to demonstrate the concept. The idea of stretching a rubber band to make it hotter, then releasing it to make it cooler seems a bit counter intuitive. Normally when things get smaller (like a gas being compressed) they get hotter. When pressure is released the gas gets cooler. Rubber bands do the exact opposite. Stretching a rubber band makes it hot. Releasing the stretched band causes it to get cooler.

No, the second law of thermodynamics isn’t in jeopardy. The secret is in the molecular structure of rubber bands. The bands are made of long polymer chains. A relaxed rubber band’s chains are a tangled mess. Stretching the band causes the chains to untangle and line up in an orderly fashion. By stretching the band you are decreasing its entropy. The energy of the molecules in the band don’t change, but entropy does. All the work one does to stheatwheelretch the band has to go somewhere, and that somewhere is heat. This is all an example of entropic force. For a physics model of what’s going on, check out ideal chains. If you’re confused, watch the video. [Ben] does a better job of explaining entropic force visually than we can with text.

To test this phenomenon out, [Ben] first built a wheel with rubber bands as spokes. Placing the wheel in front of a heater caused it to slowly rotate. [Ben] then reversed the process by building a refrigerator. He modeled his parts in solidworks, then cut parts with his Shaper handheld CNC. The fridge itself consists of an offset wheel of rubber bands. The bands are stretched outside the fridge, and released inside. Two fans help transfer the thermal energy from the bands to the air. The whole thing is hand cranked, so this would make a perfect museum or educational demonstration. Cranking the fridge for 5 minutes did get the air inside a couple of degrees cooler. Rubber is never going to displace standard refrigerants, but this is a great demo of the principles of entropic force.

For more thermodynamic fun, check out [Al Williams] recent article about building a DIY heat pipe.

Continue reading “A Refrigerator Cooled By Rubber Bands”

Arduino Versus Logic: The Coil Gun War Continues

Looks like another shot has been fired in the simmering Coil Gun Control War. This time, [Great Scott] is taken to the discrete woodshed with a simplified and improved control circuit using a single CMOS chip and a few transistors. Where will it end? Won’t somebody think of the children?

The latest salvo is in response to [GreatScott]’s attempt to control a DIY coil gun with discrete logic, which in turn was a response to comments that he took the easy way out and used an Arduino in the original build. [Great Scott]’s second build was intended to justify the original design choice, and seemed to do a good job of explaining how much easier and better the build was with a microcontroller. Case closed, right?

Nope. Embedded designer [fede.tft] wasn’t sure the design was even close to optimized, so he got to work — on his vacation, no less!’ He trimmed the component count down to a single CMOS chip (a quad Schmitt trigger NAND), a couple of switching transistors, the MOSFETs that drive the coils, and a few passives. The NANDs are set up as flip-flops that are triggered and reset by the projectile sensors, which are implemented as hardwired AND gates. The total component count is actually less than the support components on the original Arduino build, and [fede.tft] goes so far as to offer ideas for an alternative that does away with the switching transistors.

Even though [fede.tft] admits that [GreatScott] has him beat since he actually built both his circuits, hats off to him for showing us what can likely be accomplished with just a few components. We’d like to see someone implement this design, and see just how simple it can get.

Fine Business, Good Buddy: Amateur Radio For Truckers

Summer is the season for family road trips here in the US, and my family took to the open road in a big way this year. We pulled off a cross-country relocation, from Connecticut to Idaho. Five days on the road means a lot of pit stops, and we got to see a lot of truck stops and consequently, a lot of long-haul truckers. I got to thinking about their unique lifestyle and tried to imagine myself doing that job. I wondered what I’d do hour after long hour, alone in the cab of my truck. I figured that I’d probably just end up listening to a lot of audio books, but then I realized that there’s a perfect hobby for the road — ham radio. So I decided to see how ham radio is used by truckers, and mull over how a truck driver version of me might practice The World’s Best Hobby.

Continue reading “Fine Business, Good Buddy: Amateur Radio For Truckers”