The Enigma Enigma: How The Enigma Machine Worked

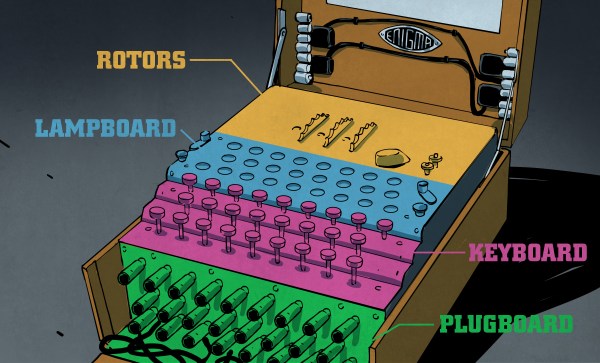
To many, the Enigma machine is an enigma. But it’s really quite simple. The following is a step-by-step explanation of how it works, from the basics to the full machine.

Possibly the greatest dedicated cipher machine in human history the Enigma machine is a typewriter-sized machine, with keyboard included, that the Germans used to encrypt and decrypt messages during World War II. It’s also one of the machines that the Polish Cipher Bureau and those at Britain’s Bletchley Park figured out how to decipher, or break. Most recently the story of how it was broken was the topic of the movie The Imitation Game.

Let’s start with the basics.

Continue reading “The Enigma Enigma: How The Enigma Machine Worked”

Self playing violin - Phonoliszt Violina

Self-Playing Violin: Eighth Wonder Of The World

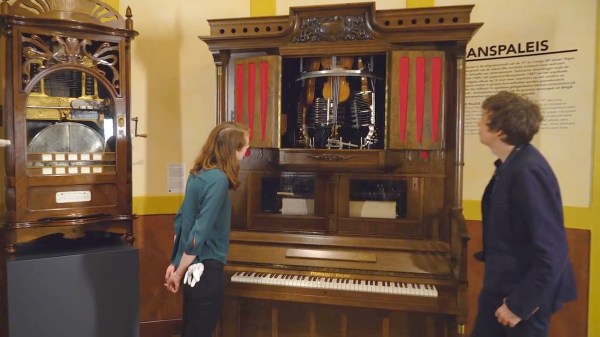
[Martin], of the YouTube channel [WinterGatan], recently uploaded a video tour of the Phonoliszt Violina, an orchestrion, or a machine that plays music that sounds as though an orchestra is playing. The interesting thing about this one is that it plays the violin. At the time of its construction, people weren’t even certain such a thing would be possible and so when [Ludwig Hupfeld] first built one around 1910, it was considered the eighth wonder of the world.

The particular one shown in the video is at the Speelklok Museum in Utrecht, the Netherlands. The bow is a rotating cylinder with 1300 horsehairs. To get the sound of a single violin, it actually uses three of them. Rather than the bow being moved to press against the strings, the violins tilt forward to make their strings contact the rotating bow. Only one string is used per violin, hence the reason that three violins are needed. The volume is controlled by making the bow rotate faster for more volume, and slower for less. Mechanical fingers press against the strings with cork to more closely imitate the human fingertip.

The machine consists of both the mechanical violin and piano under the guidance of two paper rolls, with one roll playing at a time. See and hear it in action in the video below.

Continue reading “Self-Playing Violin: Eighth Wonder Of The World”

Laser Etching PCBs

A while ago, [Marco] mounted a powerful laser diode to a CNC machine in an attempt to etch copper clad board and create a few PCBs. The results weren’t that great, but the technique was promising. In a new experiment, [Marco] purchased a very cheap laser engraver kit from China, and now this technique looks like it might be a winner.

[Marco] sourced his laser engraver from Banggood, and it’s pretty much exactly what you would expect for a CNC machine that costs under $200. The frame is aluminum extrusion, the motors are off-the-shelf steppers, the electronics are just Pololu-like drivers, and the software is somewhere between abysmal and terrible. Nevertheless, this machine can cut wood, leather, fabric, and can remove spray paint with a big blue laser diode.

To create his PCBs, [Marco] is first cleaning a piece of copper clad board, coating it with spray paint, then blasting it with a laser. The preferred software for this is LaserWeb, and the results are pretty good for a cheap machine.

There are a few extra steps to creating the PCB once the board has been coated with paint and blasted with a laser. This process still requires etching in either ferric chloride or some other mess of acid, but the results are good. So good, in fact, that [Marco] is experimenting with copper foil and Kapton to create flexible circuit boards. You can check out the video of these experiments below.

Continue reading “Laser Etching PCBs”

Electric Longboard With All-New Everything

We love [lolomolo]’s Open Source electric longboard project. Why? Because he completely re-engineered everything while working on the project all through college. He tackled each challenge, be it electronic or mechanical as it came, and ended up making everything himself.

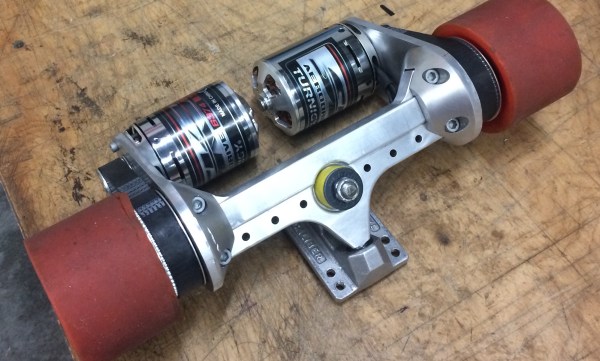
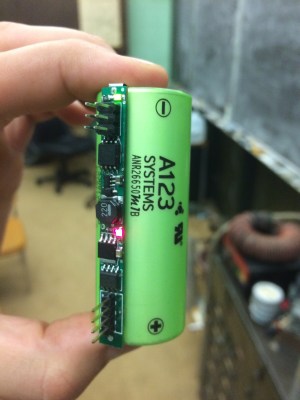
The 48″ x 13″ deck is a rather unique construction utilizing carbon fiber and Baltic birch. In testing the deck, [lolomol] found the deflection was less than an inch with 500 lbs. on the other end. He modified the Caliber II trucks to add four 2250W Turnigy Aerodrive brushless outrunners driving the wheels with the help of belts. The motors are controlled by VESC, an Open Source speed controller. There are a lot of fun details, like the A123 lithium cells equipped with custom battery management system PCBs.

The board sports 5W RGBW headlights that are so bright he can only run them at 10% PWM, plus RGB LED underlighting. All of it is controlled by an onboard Linux box. You can check out [lolomolo]’s GitHub repository for code, schematics, and CAD files. His Instructable for this project also has more design notes and thoughts.

If sweet longboards are your bag, check out the 3D-printed longboard and the long-distance electric longboard we published previously.

A Detailed Guide For 3D Printing Enclosures

We’ve all have projects that are done, but not complete. They work, but they’re just a few PCBs wired together precariously on our desks. But fear not! A true maker’s blog has gifted us with a detailed step-by-step guide on how to make a project enclosure.

Having purchased an MP Select Mini 3D Printer, there was little to do but find something practical to print. What better than an enclosure for a recently finished Time/Date/Temperature display Arduino based device?

The enclosure in this guide, while quite nice, isn’t the main attraction here. The real feature is the incredibly detailed instructions for how to design, model and print an enclosure for any project. For the veterans out there, it seems simple. Sketch something on the back of a napkin and take a nap on your keyboard with OpenSCAD open. When you wake, BAM: perfect 3D model. However, for newcomers, the process can seem daunting. With incredibly specific instructions (an example is “Open up a new workspace by clicking CREATE NEW DESIGN,” notice the accurate capitalization!), it should ease the barrier of the first enclosure, turning the inexperienced into the kind-of-experienced.

If you’ve been printing enclosures since the dawn of time or plastic simply isn’t your style, boy, do we have you covered. Why not check out FR4 (aka PCB) enclosures? Or what about laser cut enclosures from eagle files? Maybe two-piece boxes are more your thing.

Open Source Modular Rocket Avionics Package

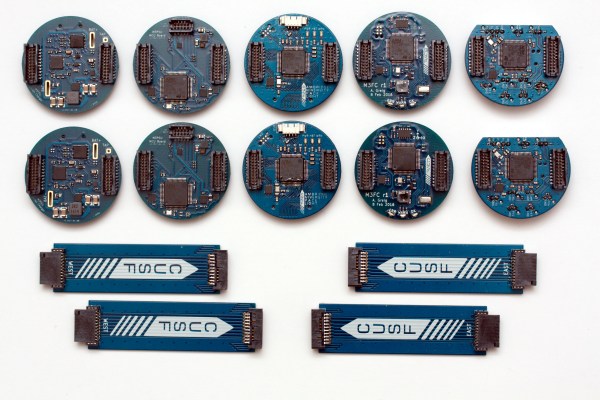
Cambridge postgraduate student [Adam Greig] helped design a rocket avionics system consisting of a series of disc-shaped PCBs arranged in a stack. There’s a lot that went into the system and you can get a good look at it all through the flickr album.

Built with the help of Cambridge University Spaceflight, the Martlet is a 3-staging sounding rocket that lifts to 15km/50K feet on Cesaroni Pro98 engines. [Adam]’s control system uses several Arm Cortex M4s on various boards rather than having just one brain controlling everything.

Each disc is a module that plays a specific role in the system. There are a couple of power supply boards sporting twin LTC2975 able to supply custom power to a dozen different circuits. The power system has a master control board also sporting an M4. There’s an IMU board with the guidance system — accelerometer, magnetometer, gyroscope, and barometer, all monitored by an algorithm that computes the rocket’s position and attitude in-flight. There’s a radio board with a GPS receiver and an ISM band radio transceiver for telemetry, as well as a datalogger with 10 thermocouple measurement channels. Engines are controlled by the pyro board which controls firing currents on four different channels. The vertical spacers also serve to transmit power and data to neighboring boards.

If you’re interested in learning more, check out the project’s code and schematics on [Adam]’s GitHub repository.

[Adam] is no stranger to these pages, with his Nerf Vulcan turret published a few years back, as well as his balloon tracking rig published more recently. Photos are CC-SA and can be found in [Adam]’s Flickr feed.

Horizontal Magnetic Levitation Experiments

Levitating chairs from the Jetsons still have a few years of becoming a commercial product though they are fun to think about. One such curious inventor, [Conor Patrick], took a deep dive into the world of maglev and came up with a plan to create a clock with levitating hands. He shares the first part of his journey to horizontal levitational control.

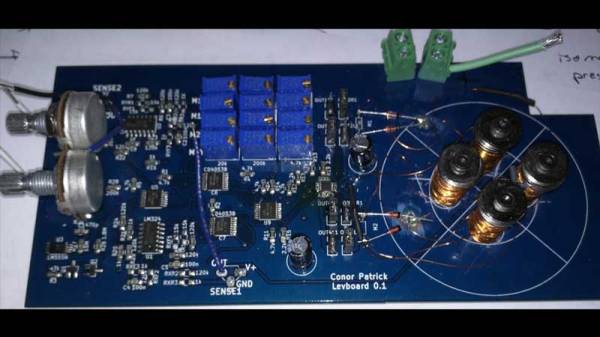
[Conor Patrick] bought an off-the-shelf levitation product that was capable of horizontal levitation. Upon dissecting it he found a large magnet, four electromagnet coils, and a hall effect sensor. These parts collectively form a closed-loop control to hold an object at a specific distance. He soon discovered that in fact, there were just two coils energized by H-bridges. His first attempt at replicating the circuit, he employed a breadboard which worked fine for a single axis model. Unfortunately, it did not work as expected with multiple coils.

After a few iteration and experiments with the PID control loop, he was able to remove unwanted sensor feedback as well as overshoot in control current. He finally moved to a Teensy with a digital PD loop. The system works, but only marginally. [Conor Patrick] is seeking help from the control loop experts out there and that is the essence of the OSHW world. The best part of this project is that it is a journey that involves solving one problem at a time. We hope to see some unique results in the future.

We have covered Acoustic Levitation in the past and the Levitating Clock on a similar beat. We’re certain a more refined approach is on the horizon since many of us are now looking at making one to experiment with on our workbench.