The Best Pi Emulation Console You Can Build

By far the most popular use for a Raspberry Pi is an emulation console. For an educational device, that’s fine – someone needs to teach kids how to plug a USB cable into a device and follow RetroPi tutorials on the Internet. These emulation consoles usually have one significant drawback: they’re ugly, with wires spilling everywhere. Instead of downloading a 3D printed Pi enclosure shaped like a Super Nintendo, [depthperfection] designed his own. It looks great, and doesn’t have a donglepocalypse hanging out the back.

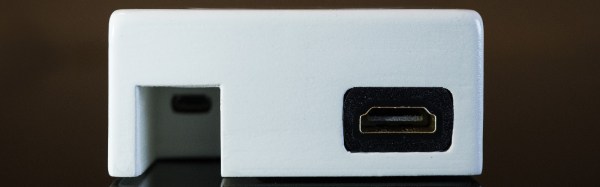
The biggest factor in building an enclosure for a Pi Zero is how to add a few USB ports. There’s only one USB port on the Pi Zero, although if you’re exceptionally skilled, you can solder a hub onto the test points on the bottom of the board. This stackable USB hub solves the problem with the help of pogo pins for the power and USB pair. It’s only $17 USD, too.

With the USB and power sorted, [depthperfection] set out to design an enclosure. This was modeled in Fusion360, with proper vent holes, screw bosses, and cutouts for all the ports. It’s designed to be 3D printable, and with a little ABS smoothing, this enclosure looks great.

For software, [depthperfection] turned to Recallbox, a retrogaming platform that also doubles as a media player. It’s simpler than a RetroPi installation, but for playing Super Mario 3, you don’t really need many configuration options. This is a great project that just works and looks good doing it. The world — and the Raspberry Pi community — needs more projects like this, and we’re glad [depthperfection] sent this one in.

Do You Know The CR816?

Hackaday readers (and writers) are an odd bunch. While the rest of the tech press falls over for the newest, shiniest CPU on the market, we’re the type who’s more interested the unexplored dark corners of metaphorical Silicon Alley. So when someone comes to us with a good writeup of a chip that we’d never heard about, we’re all ears.

[Remy]’s writeup of the CoolRISC 816 microcontroller CPU makes it obvious that he shares our taste for the esoteric. It has a 22-bit “RISC” instruction set. It has a dedicated 8-to-16 bit multiplier. Some of the instructions are so un-reduced that [Remy] calls bunk on its RISC claims. All of the operations, including the un-RISC ones, run in a single cycle. And the CoolRISC does this by cheating — the last stages of the pipeline run not on every clock tick, but on the rising and falling flanks of the clock respectively.

Why all these odd bits? They make the job of the assembly programmer, or compiler designer, a lot easier. With all single-cycle instructions, counting cycles is the same as counting lines of code. The not-really-RISC instructions are great for compiling C into. So what happened? [Remy] speculates that the MSP430, another not-really-RISC microcontroller that came out about the same time, ate the CoolRISC’s lunch. The MSP430 is a 16-bit machine, and chances are good that you’ve heard of TI. The same may not be true of Xemics, maker of the CoolRISC.

But still it’s nice to have someone saying the eulogy for this strange little chip. Or maybe the reports of the CR816’s death are premature — it seems to be inside TI’s bq20x80 chip that’s used in a number of battery power monitors. Oh, the irony! Indeed, watch [Charlie Miller] tear into a battery and find a CR816.

Have any of you used a CR816? What’s the strangest microcontroller architecture that you’ve ever seen?

Morbid Battery Uses Blood Electrolyte

Building a battery out of common household products is actually pretty simple. All that is required is two dissimilar metals and some sort of electrolyte to facility the transfer of charge. A popular grade school science experiment demonstrates this fairly well by using copper and zinc plates set inside a potato or a lemon. Almost anything can be used as the charge transfer medium, as [dmitry] demonstrates by creating a rather macabre battery using his own blood.

The battery was part of an art and science exhibition but it probably wouldn’t be sustainable on a large scale, as it took [dmitry] around 18 months to bank enough blood to make a useful battery. Blood contains a lot of electrolytes that make it perfect for this application though, and with the addition of the copper anode and aluminum cathode [dmitry] can power a small speaker which plays a sound-generating algorithm that frankly adds a very surreal element to the art installation.

While we can’t recommend that you try to build one of these batteries on your own without proper medical supervision, the video of the art piece is worth checking out. We’ve seen a few other hacks that involve blood, but usually they are attempting to use it for its intended purpose rather than as an alternative energy source.

You Will Want To Build This Canoe

There is something about a wooden boat that should be facsinating to most makers, the craftsmanship and level of work that goes into creating a sea-, lake-, or river-worthy craft with smooth lines, from little more than thin pieces of wood. Master boatbuilders have apprenticeships that last years, and spend entire careers refining their art.

[Adam], also known as [A Guy Doing Stuff], is not a master boatbuilder. In his words, he’s just a guy with some basic woodworking knowledge, who builds canoes from cedar strips. But you wouldn’t know that he has no training as a boatbuilder from looking at his work, which you can do because he’s posted some beauthiful videos.

We see the creation of a skeleton to produce the basic shape of the boat, followed by the creation of prow and stern. Then there is a painstaking application of carefully shaped cedar strips to make the hull, and a single layer of glass fibre on either side. With the gel coat applied though you wouldn’t know the fibre was there. Finally we have the creation of the seats and interior fittings, followed by the canoe being paddled across a lake.

Few of us may ever make a canoe. But if we did, we’d want it to be one like this one.

Continue reading “You Will Want To Build This Canoe”

Micro Wind Turbine For Hikers

[Nils Ferber] is a product designer from Germany. His portfolio includes everything from kitchen appliances to backpacks. One project, though, has generated a bit of attention. It’s a micro wind turbine aimed at long distance hikers.

Even on the trail, electronics have become a necessity. From GPS units to satellite phones, to ebook readers. Carrying extra batteries means more pack weight, so many hikers utilize solar panels. The problem is that when the sun is up, hikers are on the move – not very conducive to deploying a solar array. The Wind, however, blows all through the night.

[Nils] used carbon fiber tube, ripstop nylon, and techniques more often found in kite building to create his device. The turbine starts as a small cylindrical pack. Deploying it takes only a few minutes of opening panels and rigging guy wires. Once deployed, the turbine is ready to go.

While this is just a prototype, [Nils] claims it generates 5 Watts at a wind speed of 18 km/h, which can be used to charge internal batteries, or sent directly to any USB device. That seems a bit low for such a stiff wind, but again, this is just a prototype. Could you do better? Tell us in the comments! If you’re looking for a DIY wind generator on a slightly larger scale, you could just build one from bike parts.

Continue reading “Micro Wind Turbine For Hikers”

Flexible Quadcopter Is Nearly Indestructible

We’ve all crashed quadcopters. It’s almost inevitable. Everything is going along fine and dandy ’till mother nature opens her big mouth a blows a nasty gust of wind right at you, pushing your quad into the side of a wall. A wall that happens to be composed of a material that is quite a bit harder than your quadcopter. “What if…” you 
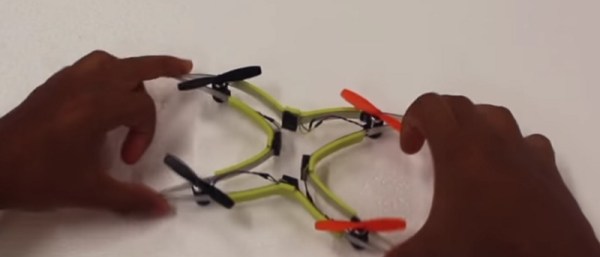
ask yourself while picking up the pieces of you shiny new quad off the ground… “they made these things out of flexible material?”
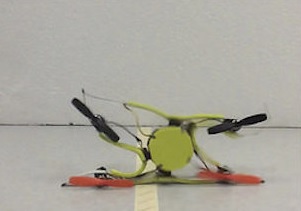
Well, it would appear someone has done just that. The crash resistant quadcopter is composed of a flexible frame (obviously) which is held rigid with magnets. So the frame works just like the frame of your average quad. Until you crash it, of course. Then it becomes flexible.

The idea came from the wing of a wasp, which you can apparently crumple without damaging it. Be sure to check out the video below of the drone showing off its flexible frame, and let us know if you’ve seen any other types of flexible frame drones in the wild.

Thanks to [JDHE] for the tip!

Continue reading “Flexible Quadcopter Is Nearly Indestructible”

Dumpster Dive Speaker Results In Tube Amplifier

[Michael Wiebusch] found the leftovers of a wrecked vintage tube radio in a pile of electronics junk. Unfortunately, he could not recover any vacuum tubes in it. And to his dismay, it didn’t even have the output transformer, which he figured would have been useful in a guitar amplifier project. The output transformer is not easy to come by nowadays, so he was hoping to at least score that item for his future build. All he could dig out from his dumpster find was a pair of speakers and he ended up building nice Output-Transformer-Less Tube Guitar Amplifier around them.

Valve output stages are generally high-impedance which means they cannot be directly interfaced to low impedance speakers. An impedance matching output transformer is thus used to interface the two. Back in the day when valves were still the mainstay of audio electronics, many cheap amplifier designs would skimp on the output transformer to save cost, and instead use high impedance speakers connected directly to the amplifier output.

[Michael] found a nice reference design of an OTL amplifier for a 620 ohm single speaker. He decided to use the same design but because these speakers were about 300 ohm each, he would have to wire his two speakers in series. At this point, he decided to make his build useful as a proper guitar amplifier by adding a preamplifier stage replicated from another design that he came across. A regular halogen lamp 12V transformer takes care of the heater power supply for all the tubes, and a second, smaller 12V transformer is wired backwards to provide the 300V needed for the plate supply.

The final result is pretty satisfactory, considering that it all started with just a pair of junked speakers. Check out the result in the video after the break.

Continue reading “Dumpster Dive Speaker Results In Tube Amplifier”