Hand-Made Drum Carder Gets Wool Ready For Spinning

Making a natural fiber like wool into something useful like a sweater involves a lot of steps. We might be familiar with shearing the sheep, spinning the wool into yarn, or knitting and weaving, but between shearing and spinning there’s another unfamiliar process you’ll have to go through. Known as carding, it helps align the fibers so they are able to be spun, and of course it requires either an expensive tool, or one you build on your own.

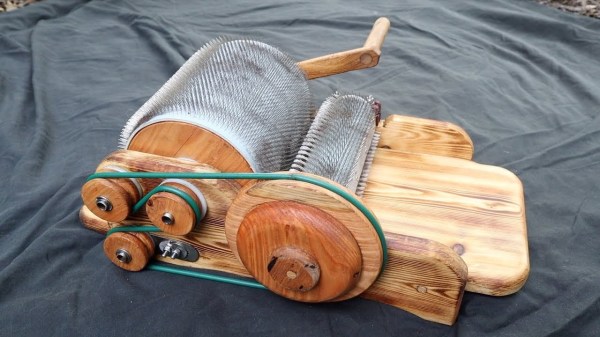
This drum carder is exactly what it sounds like. It uses two drums covered in a metal mesh, spinning at different speeds, which pull the fibers into an orderly shape. Small drum carders like this can run around $600 but with some quality wood and a lathe you can easily make one for a fraction. Making the series of drums is fairly straightforward with a lathe, and from there you need to make sure they are connected with a quality belt or chain and then covered in the appropriate metal mesh.

[kris] notes in the reddit comments section that he’d like for a second version to spin a little faster and be a little more durable, but this is a great working carder nonetheless. From there you’ll want to move on to spinning the wool into yarn, which you can do with either a wheel or an electric motor.

Continue reading “Hand-Made Drum Carder Gets Wool Ready For Spinning”

Building The World’s Best DML Speakers For Under $115

Flat panel speakers are heavily reliant on the material they’re mounted on for the best acoustic quality. In particular, for DML (distributed mode loudspeaker) speakers, sound is produced through the distribution of vibration modes in the panel. You can easily spend far too much on special exciter foam or optimized materials for producing the best quality sound.

[Tech Ingredients] does a deep dive into how to build high-quality and low-cost DML speakers using some interesting materials, such as acoustic ceiling tiles and styrofoam. He analyzes their frequency based on the material and shape used and demonstrates how a full setup sounds with studio microphones and stereo speakers installed. The shapes can allow the resonances for different speakers to be translated so that they don’t overlap – peaks can be matched with troughs to produce a more even sound. Squares with rounded edges work the best for translating the resonance.

Balsa wood is mainly used for low frequencies and styrofoam for high frequencies, although the ceiling tiles work as well as either material and are significantly cheaper. Rather than retrofitting into drop ceiling metal frames, he instead installs his panels vertically. He shows the process for preparing the styrofoam and ceiling tiles for hanging, including tips for creating a makeshift circular saw for punching out holes and securing cotter pins with epoxy.

[Tech Ingredients] goes through experimenting with unusual shape and material combinations in order to produce the best possible speakers. It’s a fascinating video that walks through the ins and outs of DIYing your own set of speakers, and it’s worth a watch even just to hear about the acoustic properties of materials.

[Ed Note: Yes, this video is a bit long in the tooth, but we keep getting tips for it, so it’s news to someone! And it’s cool regardless. But feel free to skip on if you’ve seen this one before.]
Continue reading “Building The World’s Best DML Speakers For Under $115”

Pelican Case Becomes Thumping Bluetooth Speaker

Pelican cases are great if you need a rugged enclosure to protect some sensitive gear. They’re also highly moddable, and can make a great base for a Bluetooth speaker build.

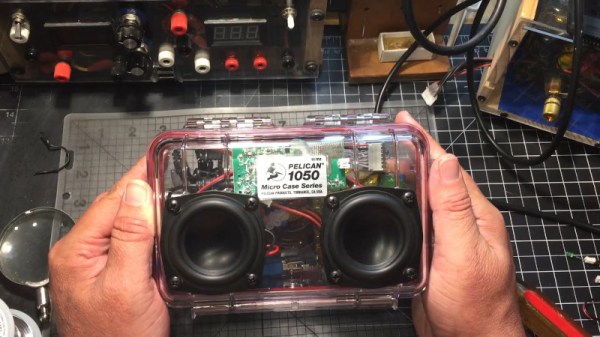
Like many modern builds, this is very much a case of wiring together a series of off-the-shelf modules into a larger whole. A Tinyshine Bluetooth audio board is hooked up to a Dayton Audio Class D amplifier. Class D amplifiers are a great choice for any portable audio application for their compact size and good power efficiency. Power is supplied by a hand-built 3-cell 18650 pack, while a standard buck converter and battery protection board are subbed in to make sure the batteries stay happy.

Not wanting to skimp on audio quality, a pair of Dayton Audio full-range drivers are installed, negating the need for a crossover install, or multiple drivers per channel. There’s a third passive driver on the back side as well, though we’re not 100% clear on its purpose. If you’re clued in, let us know in the comments.

It’s a project that serves as a great blueprint for anyone wanting to build their own high-fidelity Bluetooth speaker. The relevant modules are all readily available – it’s just a case of hooking them up to a nice amp and a decent set of speakers. The design is all up to you – whether you go for a pipe, a bag, or something altogether entirely. Happy hacking!

Continue reading “Pelican Case Becomes Thumping Bluetooth Speaker”

Haptic Glove Controls Robot Hand Wirelessly

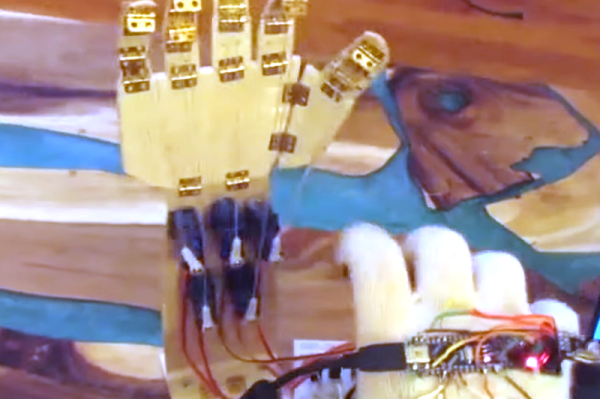
[Miller] wanted to practice a bit with some wireless modules and wound up creating a robotic hand he could teleoperate with the help of a haptic glove. It lookes highly reproducible, as you can see the video, below the break.

The glove uses an Arduino’s analog to digital converter to read some flex sensors. Commercial flex sensors are pretty expensive, so he experimented with some homemade sensors. The ones with tin foil and graphite didn’t work well, but using some bent can metal worked better despite not having good resolution.

Continue reading “Haptic Glove Controls Robot Hand Wirelessly”

Beat The Streets With This Text Spraying Robot

In the midst of striking for climate change awareness, you may need some extra hands. That’s what [Anred Zynch] thought when they built Strettexter, the text-spraying writing robot that sprays onto streets.

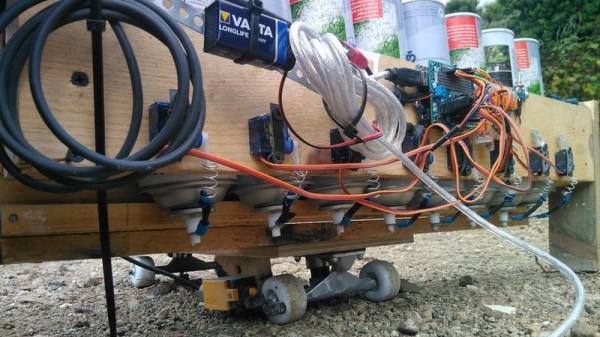
The machine is loaded with 8 spray cans placed into a wooden box (a stop line with a wooden ledge to prevent the cans from falling out) and is fixed on top of a skateboard. It uses a PWN/Servo shield soldered onto an Arduino Uno connected to 8 servo motors (TowerPro SG90s) to control each of the spray bottles. A table converts every character into 5×8 bit fonts to fit the size of the spraying module. The device also includes a safety switch, as well as an encoder for measuring the horizontal distance traveled.

The Strettexter is activated by pulling on the skateboard once it’s been set up and connected to power (for portability, it uses a 8000mAh power bank). In its current configuration, the words stretch out pretty long, but some additional testing will probably lead to better results depending on the constraints of your canvas. The shorter the words, the more difficult it is for the white text to be legible, since there is significant spacing between printed bits.

We don’t condone public vandalism, so use this hack at your own discretion.

Continue reading “Beat The Streets With This Text Spraying Robot”

24 Hours Of Temperature Data At A Glance

In an era where we can see the current temperature with just a glance at our smartphones, the classic “Time and Temp” gadget sitting on the desk doesn’t have quite the same appeal. The modern weather fanatic demands more data, which is where this gorgeous full-day temperature display from [Richard] comes in.

The display, built inside of a picture frame, shows the temperature recorded for every hour of the day. If the LED next to the corresponding hour is lit that means the value displayed is from the current day, otherwise it’s a holdover from the previous day’s recordings. This not only makes sure all 24 LED displays have something to show, but gives you an idea of where the temperature might be trending for the rest of the day. Naturally there’s also a display of the instantaneous temperature (indoor and outdoor), plus [Richard] even threw in the current wind speed for good measure.

In the video after the break, [Richard] briefly walks us through the construction of his “Thermo Logger”, which reveals among other things that the beautiful panel art is nothing more exotic than a printed piece of A4 paper. The video also features a 3D model of the inside of the device which appears to have been created through photogrammetry; perhaps one of the coolest pieces of project documentation we’ve ever seen. We’ll just throw this out there: if you want to ensure that your latest build makes the front page of Hackaday, pop off that back panel and make some decent quality 3D scans.

Given the final result, it should come as no surprise to find that this isn’t the first incredible weather display that [Richard] has built. We previously covered another weather monitoring creation of his that needed two seperate display devices to adequately display all the data it was collecting.

Continue reading “24 Hours Of Temperature Data At A Glance”

Build Your Own Plasma Ball

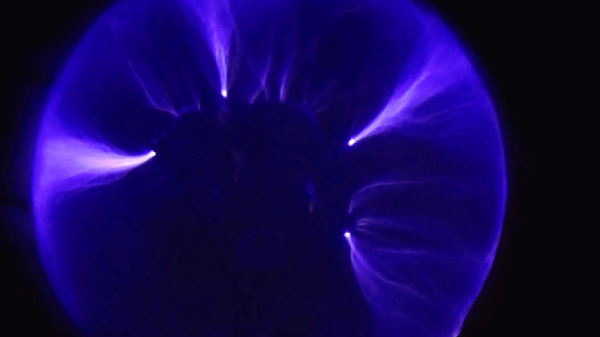
The simple plasma ball – it graces science museums and classrooms all around the world. It shares a place with the Van de Graaf generator, with the convenient addition of spectacular plasma rays that grace its spherical surface. High voltage, aesthetically pleasing, mad science tropes – what would make a better DIY project?

For some background, plasma is the fourth state of matter, often created by heating a neutral gas or ionizing the gas in a strong electromagnetic field. The availability of free electrons allows plasma to conduct electricity and exhibit different properties from ordinary gases. It is also influenced by magnetic fields in this state and can often be found in electric arcs.

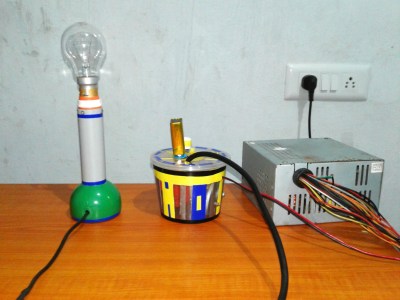
[Discrete Electronics Guy] built a plasma bulb using the casing from an old filament bulb and an ignition coil connected to a high voltage power supply. The power supply is based on the 555 timer IC. It uses a step-up transformer (the ignition coil) driven by a square wave oscillator circuit at a high frequency working as AC voltage. The square wave signal boosts the current into the power transistor, increasing its power.

The plasma is produced inside the bulb, which contains inactive noble gases. When touching the surface of the bulb, the electric arc flows to the point of contact. The glass medium protects the skin from burning, but the transparency allows the plasma to be seen. Pretty cool!

Continue reading “Build Your Own Plasma Ball”