Soon… Inkjet Your Circuit Boards

Printed circuit board fabrication — especially in basements and garages — have been transformed by the computer revolution. Before that, people would use a permanent marker or little decals to layout circuit boards prior to etching. Sometimes, they’d do it on film and use a photo process, but they did make decals that you applied directly to the board to resist the etch. Now a team from Georgia Tech, University of Tokyo, Carnegie Mellon, and the University of Nebraska has brought things full circle. Their process inkjet prints silver traces on a substrate that they can then transfer to a circuit board — no etching required.

They start with a standard Epson inkjet with cartridges that have silver-bearing ink. The patterns print on a transfer paper that ensures the particles fuse so there’s no sintering step required to make sure the traces are all conductive. A sticky backing is applied and peels the pattern off the transfer paper. You can see more in the video below.

Continue reading “Soon… Inkjet Your Circuit Boards”

Dremel Workstation’s New Job: Applying Threaded Inserts With Cheap Soldering Iron

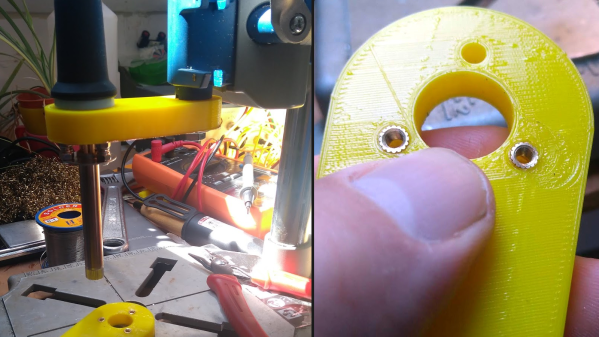
Dremel has been helping people fit square pegs into round holes for years, and [concretedog] saw that the Dremel 220 Workstation — a piece of hardware similar to a drill press — could be convinced to hold a cheap soldering iron just as easily as it holds a rotary tool. A soldering iron makes an effective thermal insert tool, and the job of heating and pressing the threaded metal rings into plastic is made much easier when it can be done similar to operating a drill press. With a few modifications and a 3D-printed adapter, the thermal insert rig was born.

Whenever one is working around a design that already exists, it pays to be flexible and adjust to the unexpected. The Dremel 220 has a holder intended to clamp a rotary tool, and the original plan was to simply design and print an adapter so a soldering iron could sit in place of the rotary tool. That plan changed upon realizing that the entire rotary tool holder disconnected from the tool’s frame with a single bolt. It made much more sense to make the soldering iron replace the rotary tool holder, instead.

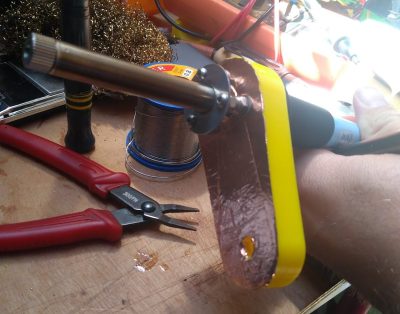
The resulting modified soldering iron is mounted via standoffs to a 3D-printed adapter with a copper foil heat shield. [concretedog] admits it’s not ideal from a heat management perspective, but it makes a fine prototype that seems to work well for light duty. The next step would be a metal version.

If you’re intrigued by threaded heat-set inserts, you can learn all about how to use them from Joshua Vasquez’s guide to the handy things. And should you prefer to make your own DIY press from 3D printed parts and off-the-shelf hardware, we have that covered as well.

Light Up The Night With A Tetrahedral LED Hat

People get into electronics for all kinds of reasons, but we would guess that the ability to blink the blinkenlights is probably pretty high on the survey results. [Kuchbert] has been going to Deichkind shows for the last decade and has wanted to build one of the German techno-rap band’s signature tetrahedral LED hats for about as long.

Up inside the hat is an Arduino Nano driving WS2812B LEDs and a portable battery to power everything. Thanks to an HC-05 Bluetooth module, the show can be controlled with an Android app. The many, many holes in the acrylic panels were milled out, but they could just as easily be laser-cut, or if you have infinite patience, drilled by hand. The code is coming once it has been cleaned up a bit. Everything else you’d need is already there waiting. This helmet even has its own lil’ music video, which we’ve carefully beat-matched in after the break.

Naturally, this makes us think of all the Daft Punk helms that have blinked by on this blog over the years. This hand-soldered one might be the most meticulously made.

Continue reading “Light Up The Night With A Tetrahedral LED Hat”

A Levitating Lamp Without Magnets

If you think of levitating objects you probably think about magnets but this is not what [Aaron Hung] used to build his levitating LED lamp. To be fair, his lamp is not really levitating but merely generates the illusion through the principles of tensegrity. We have featured a number of tensegrity structures over the last months but this is maybe the first time somebody has used it to build a daily-use item.

In his instructable [Aaron Hung] points out that according to Earnshaw’s theorem magnetic levitation using static magnetic fields like those of permanent magnets is actually impossible. If you are interested, the Wikipedia article also explains why floating superconductors and the Levitron toy do not contradict this theorem. (TL;DR: they’re dynamic.)

Coming back to [Aaron Hung]’s tensegrity lamp, the construction is rather simple and only requires an Arduino Nano, a Neopixel ring, a 9 V battery some wood or cardboard, and fishing line. The tensegrity part of the lamp consists of two similar pieces of laser-cut wood which are held together by fishing line so that the top part seems to float in mid-air. Normally, tensegrity structures are very fragile so [Aaron Hung] added some extra lines for stability which allowed him to hang the lamp from the top section without collapsing the whole structure. After coding some animations for the Neopixel ring and adding a paper lampshade the project was finished.

We would like to see more tensegrity versions of classic DIY projects and it was fun to see that similar objects were already built from Lego.

[Video after the break].

Continue reading “A Levitating Lamp Without Magnets”

Surviving The Pandemic As A Hacker: Making A Mask Of Your Very Own

As the COVID-19 pandemic has continued along its way through the world, our community has responded as it always does, by designing and making things intended to solve the problems thrown up by the situation we find ourselves in. Much of this effort has gone into the production of PPE to plug the gap and many essential staff have been protected by maker-provided equipment, while the remainder of the effort has produced a wide array of clever designs for COVID-related items.

With curves flattened in many areas, Governments around the world are now encouraging the wearing of face masks in everyday social interactions. The purpose of mask for the general public is for droplet catching rather than virus filtering, and home made masks easily accomplish this. So let’s take a look at what you need to know about making a mast of your very own.

Continue reading “Surviving The Pandemic As A Hacker: Making A Mask Of Your Very Own”

Building An ESP32 Smart Power Strip From Scratch

Surely the most straightforward way of creating a smart power strip would be to take an existing model and hack in some relays that you could fire with a WiFi-enabled microcontroller. But where’s the fun in that? Instead of repurposing a commercial power strip for his recent project, [Md Raz] decided to just build the whole thing himself.

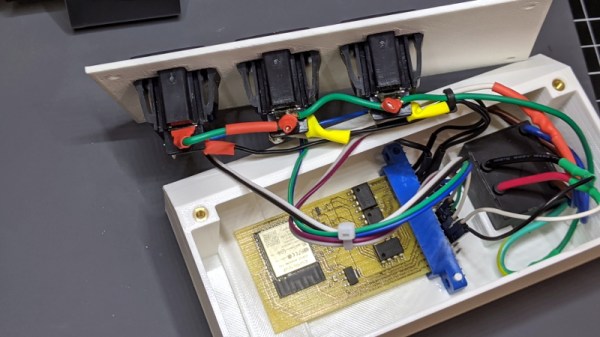
The project started with a 3D printed enclosure that could hold the electronics and three panel mount sockets. The use of heat-set inserts makes it a bit more robust for future upgrade work, but otherwise it’s a fairly simple rectangular design. Nobody ever said a power strip had to be pretty, right? In addition to the panel mount sockets, there’s also a AC-DC converter to step mains voltage down to 5 VDC for the ESP32.

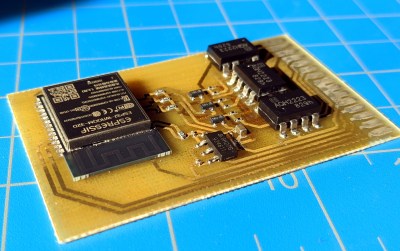
In addition to the microcontroller, the custom PCB in the power strip holds a trio of MOSFETs connected to AQH2223 solid state relay (SSR) chips. Once the ESP32 toggles the line attached to each MOSFET, the indicator LED above the outlet goes on and the appropriate SSR is thrown to turn on the power. With a simple web interface running on the microcontroller, all three outlets can be independently controlled from any device with a web browser.

If you’d like to limit your interaction with mains voltages, then we’ve seen some projects that commandeer the low-voltage side of a commercial smart power strip. But remember, putting a Raspberry Pi inside of a power strip might seem suspicious to some folks.

The Seedy World Of Message Serialization

Look, I’ve been there too. First the project just prints debug information for a human in nice descriptive strings that are easy to understand. Then some tool needs to log a sensor value so the simple debug messages gain structure. Now your debug messages {{look like : this}}. This is great until a second sensor is added that uses floats instead of ints. Now there are sprinklings of even more magic characters between the curly braces. A couple days later and things are starting to look Turing complete. At some point you look up and realize, “I need a messaging serialization strategy”. Well you’ve come to the right place! Continue reading “The Seedy World Of Message Serialization”