Lattice Drops EULA Clause Forbidding FPGA Bitstream Reverse Engineering

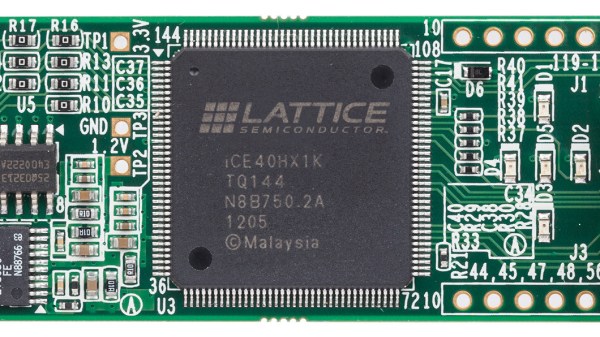
Yesterday we reported that Lattice Semiconductor had inserted a clause that restricted the reverse engineering of bitstreams produced by their FPGA toolchains. Although not explicitly stated, it’s assumed that this was directed toward several projects over the past five years that have created fully open source toolchains by reverse engineering the bitstream protocols of the Lattice ICE40 and ECP5 FPGA architectures. Late yesterday Lattice made an announcement reversing course.

To the open source community, thank-you for pointing out a new bitstream usage restriction in the Lattice Propel license. We are excited about the community’s engagement with Lattice devices and our intent is to not hinder the creation of innovative open source FPGA tools.

It’s refreshing then to see this announcement from Lattice Semiconductor. Even more so is the unexpected turn of speed with which they have done so, within a couple of days of it being discovered by the open-source community. We report depressingly often on boneheaded legal moves from corporations intent on curbing open source uses of their products. This announcement from Lattice removes what was an admonition opposing open source toolchains, can we hope that the company will continue yesterday’s gesture and build a more lasting relationship with the open source community?

The underlying point to this story is that in the world of electronics there has long been an understanding that hardware hackers drive product innovation which will later lead to more sales. Texas Instruments would for years supply samples of exotic semiconductors to impecunious students for one example, and maybe you have a base-model Rigol oscilloscope with a tacitly-approved software hack that gives it an extra 50MHz of bandwidth for another.

We can only congratulate Lattice on their recognition that open source use of their products is beneficial for them, and wish that some of the other companies triggering similar stories would see the world in the same way. Try interacting more with your open source fans; they know and love your hardware more than the average user and embracing that could mean a windfall for you down the road.

Burning Chrome

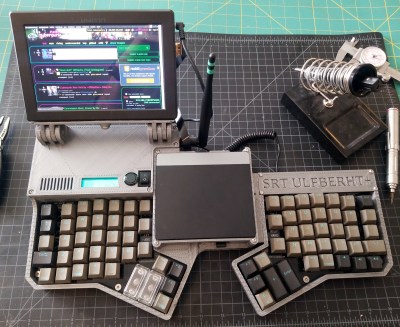
You want a good project that combines multiple disciplines, gives you something useful in the end, and will certainly wow the muggles? Or do you simply need a custom rig with which to “jack in” to “cyberspace”? How about building your own luggable, portable, computer with some style — your own cyberdeck?

Coming to you from the fertile world that William Gibson created in “Neuromancer”, “Count Zero”, and “Mona Lisa Overdrive”, cyberdecks were the portable computers that the heroes and anti-heroes roaming the Sprawl would use to connect to what was essentially the Internet. Since we’re already living in the era where large portions of the world are controlled by vast corporations, we spend our entire lives online, and machine intelligence is poised to become sentient, you might as well get building.

We’ve seen a number of great examples of cyberdeck builds, and they’re all special in their own way, but there are common features uniting them all. First, you’ll need a screen, a portable computer brain, some batteries, and a nice keyboard. The good news is that all of the above have become eminently available, even inexpensive, in the last few years.

Discipline #1 is that of the case modder. You’re designing your ideal portable computer, after all. It’s got to look good, and we don’t mean that black, boxy ThinkPad look. If you’ve got a 3D printer, and maybe a willingness to spray paint, the world is your oyster here.

Discipline #2 is that of the keyboard builder. You’re not going to want to enter the Matrix with anything less than a pleasant typing interface. Again, 3D printing, laser-cutting, or CNC milling your own keyplate and building yourself a keyboard from scratch is a viable option, but there are tons of Bluetooth and USB keyboard options if you want to cut corners, or find one you really like.

Discipline #3 is the software hacker. Putting together exactly the right set of software, setting up the system to do what you want, and getting that sweet background screen just right are the last steps to making yourself at home in Cyberspace.

With so much latitude to introduce your own design ideas into your bespoke luggable, no two will be alike. Mine’s going to have programming ports for every microcontroller I frequently use, a decent speaker, maybe a variable power supply, and probably some reasonable amount of LED bling. What’s going to be on yours?

This article is part of the Hackaday.com newsletter, delivered every seven days for each of the last 200+ weeks. It also includes our favorite articles from the last seven days that you can see on the web version of the newsletter.

Want this type of article to hit your inbox every Friday morning? You should sign up!

Sparklines For Your ESP32 Projects

On a typical microcontroller project we may only have access to a relatively tiny screen. Information display can be a challenge, but it’s one that may be made easier by [0xPIT]’s ESParklines library for Espressif processors using the Arduino framework.

A sparkline is a simple line graph without annotations (like axes or units) intended to fit within the flow of text. They’re largely associated today with the statistician Edward Tufte, and if you’ve not encountered them or Tufte before then we suggest you’ll enjoy educating yourself.

It’s a simple enough library and it comes with example code. Usefully it maintains a data buffer all of its own allowing simple updating, and as well as the examples there is a YouTube video we’ve put below the fold showing graphs evolving as more information is added to them. We’re curious about one thing though, it’s billed as an ESP library, for either the ESP8266 or the ESP32, but we can’t find any ESP-specific code in there and neither could our friendly ESP-guru. Have we missed something? The comments are below if you can shed any light.

Continue reading “Sparklines For Your ESP32 Projects”

Vacuum Dust Collection With Self-Powered Relays

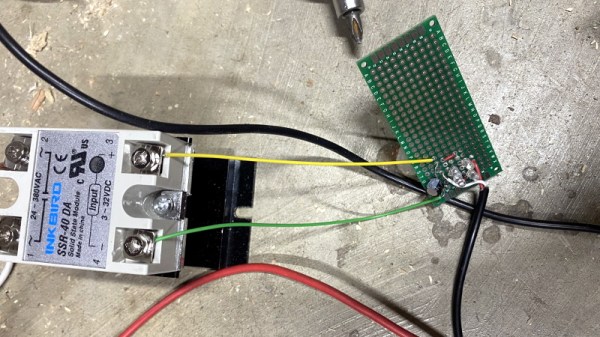
Like many people with multiple woodworking tools, [Will Stone] wanted to create a centralized dust collection system. But he quickly found that the devil was in the details, as he struggled to find an economic way to automatically kick on the vacuum when one of the tools started up. His final solution might be one of the most elegant, and surely the cheapest, we’ve ever come across.

As with other DIY systems we’ve seen over the years, [Will] is using a simple inductive current sensor to detect when AC power is being drawn by one of his tools. But where the similarity stops is that there’s nothing so pedestrian as a microcontroller reading the output of the sensor. He realized that when the coils in the sensor were energized they were putting out about 7 volts AC, which should be more than enough to trigger a relay.

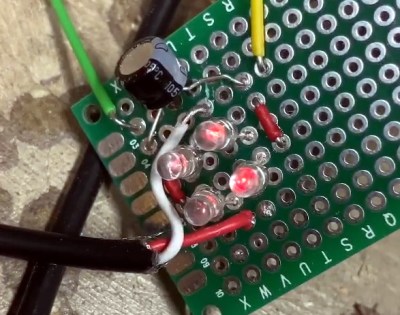
So he threw together a rectifier circuit on a piece of perfboard, using four LEDs in true hacker style. With the addition of a capacitor to smooth out the voltage, this little circuit is able to trip the 40 amp solid state relay controlling power to the vacuum using nothing more than the energy harvested from the sensor’s coil.

Using a current sensor is great when the tools are close enough to all be plugged into the same line, but that doesn’t help the folks with cordless tools or supersized shops. In that case, you might need to look into a sound-activated system.

Automatic Planet Finder Is Out Of This World

When the world is on your shoulders, it can be relaxing to remember that we’re just hairless monkeys hurtling through space on a big rock alongside a lot of other rocks. If you find yourself wondering where exactly the other major rocks are instead of worrying, we think that’s a good sign.

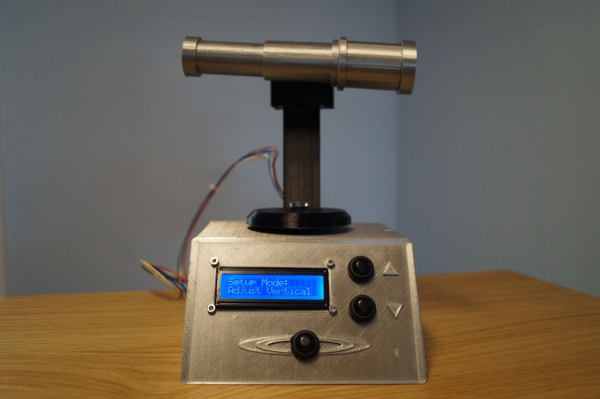
Wherever [snowbiscuit] lives, there’s a large planet finder in a public square somewhere that stopped locating rocks a long time ago. Hungry to watch such a thing in action, [snowbiscuit] built a great-looking tabletop version that uses the Horizontal Coordinate System to locate planets. Inside is a Raspberry Pi 3, which queries NASA for azimuth and altitude data and combines that data with a predetermined north reading to point out whatever planet was selected by spinning the printed telescope on top. The telescope itself is non-working, and returns to north after a few seconds to wait for input.

This project is wide open for remixing if you want to make your own. As lovely as it is now, designing around a slip ring would eliminate all those long wires and make it more sleek. Take a peek after the break.

Don’t stop your desktop space toy collection there — build an ISS-tracking lamp to go with it.

Continue reading “Automatic Planet Finder Is Out Of This World”

New Microscope Directly Images Protein Atoms

There’s an old joke that you can’t trust atoms — they make up everything. But until fairly recently, there was no real way to see individual atoms. You could infer things about them using X-ray crystallography or measure their pull on tiny probes using atomic force microscopes, but not take a direct image. Until now. Two laboratories recently used cryo-electron microscopy to directly image atoms in a protein molecule with a resolution of about 1.2 x 10⁻⁷ millimeters or 1.2 ångströms. The previous record was 1.54 ångströms.

Recent improvements in electron beam technology helped, as did a device that ensures electrons that strike the sample travel at nearly the same speeds. The latter technique resulted in images so clear, researchers could identify individual hydrogen atoms in the apoferritin molecule and the water surrounding it.

Continue reading “New Microscope Directly Images Protein Atoms”

Homebrew Coil Winder Makes Toroids A Snap To Wind

Anyone who has ever wound a toroidal coil by hand can tell you that it’s not exactly a fun job. Even with the kinds of coils used in chokes and transformers for ham radio, which generally have relatively few windings, passing all that wire through the toroid time after time is a pain. And woe unto anyone who guesses wrong on how much wire the job will take.

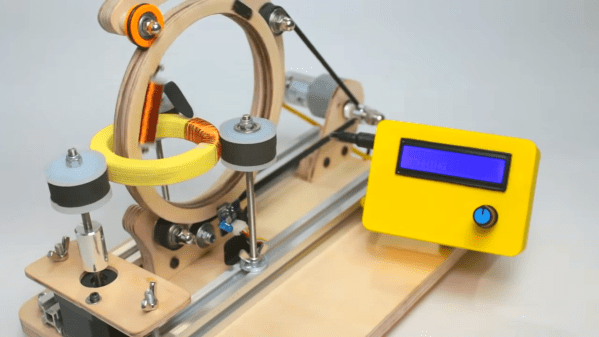
To solve those problems, [Sandeep] came up with this clever and effective toroid winder. The idea is to pass a small spool of magnet wire through the toroid’s core while simultaneously rotating the toroid to spread the windings out as evenly as possible. That obviously requires a winding ring that can be opened up to allow the toroid form to be inserted; [Sandeep] chose to make his winding ring out of plywood with a slit in it. Carrying the wire spool, the winding ring rotates on a C-shaped fixture that brackets the toroid, which itself rotates under stepper motor control on a trio of rollers. An Arduino controls the rotation of both motors, controlling the number of windings and their spread on the form. lacking a ferrite core for testing, [Sandeep] used a plywood ring as a stand-in, but the results are satisfying enough to make any manual coil-winder envious.

We love tools like this that make a boring job a snap. Whether it’s cutting wires for wiring harnesses or winding guitar pickups, tools like these are well worth the time spent to build them. But we suppose when it comes to toroid winding, one could always cheat.

Continue reading “Homebrew Coil Winder Makes Toroids A Snap To Wind”