Hackaday Podcast 099: Our Hundredth Episode! Denture Synth, OLED Keycaps, And SNES Raytracing

Hackaday editors Mike Szczys and Elliot Williams celebrate the 100th episode! It’s been a pleasure to marvel each week at the achievements of awesome people and this is no different. This week there’s a spinning POV display that solves pixel density and clock speed in very interesting ways. A macro keyboard made of OLED screens gives us a “do want” moment. And you can run a Raspberry Pi photo frame by sipping power from ambient light if you use the right power-tending setup. We wrap up the last episode of 2020 with a dive into ballpoint pens and solar racers.

Take a look at the links below if you want to follow along, and as always, tell us what you think about this episode in the comments!

Direct download (~65 MB)

Places to follow Hackaday podcasts:

Continue reading “Hackaday Podcast 099: Our Hundredth Episode! Denture Synth, OLED Keycaps, And SNES Raytracing”

Ringing In The Holidays With Self-Playing Chimes

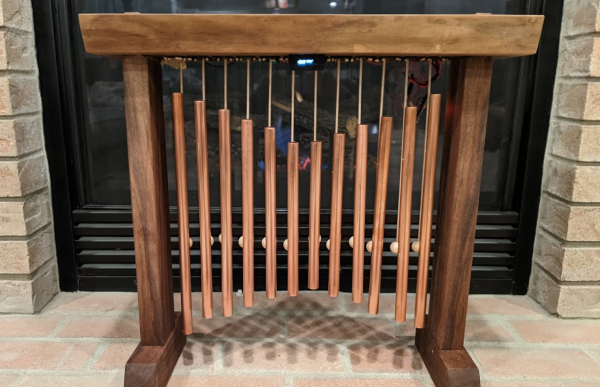
The holiday season is here, and along with it comes Christmas music. Love them or hate them, Yuletide tunes are a simple fact of life each December. This year, [Derek Anderson] put a modern spin on a few classic melodies and listened to them via his set of self-playing chimes.

Inspired by [Derek]’s childhood Ye Merry Minstrel Caroling Christmas Bells (video), these chimes really bring the old-school Christmas decoration into the 21st century. Each chime is struck by a dedicated electromagnetically-actuated mallet, which is in turn controlled by an ESP32 running MicroPython.

Winding the electromagnets

The chimes play MIDI files, so you could, of course, play music unrelated to Christmas if you wanted to. And they even feature an OLED screen that displays what song is being played. For added flair, the entire thing is beautifully framed in black walnut, not to mention the custom-wound solenoids.

This project incorporated mechanical and electrical design, woodworking, 3D printing, programming, and song arrangement. It’s a wonder that [Derek] was able to create the entire product in the 40-80 hour time frame he estimated. (Though it looks like he had a bit of help.)

We always love to see projects like this, ones in which several disciplines get rolled together to create a beautiful finished piece.


Continue reading “Ringing In The Holidays With Self-Playing Chimes”

How The Gates (Almost) Stole Christmas

‘Twas the night before Christmas and all through the house
Blue screens were everywhere; no response from the mouse
Windows, it seems, had decided to die
Because it had updated; we didn’t know why
But Santa had a plan while we were all in bed
He reformatted our server and installed Linux instead
In the morning we rushed in and what did we see?
Programs were running, and most of them free!
There was Chrome and Open Office and emacs for me
Not a penny was going to Mr. Gates’ fee
Now we have no more blue screens, ever, of course
Because Santa turned us on to that sweet open source

We Would Not Want To Be Stormtroopers Right Now

Humanity is another step closer to a fantasy-accurate lightsaber thanks to Hackaday alumnus [James Hobson] at Hacksmith. Their proto-saber cuts through (cosplay) stormtrooper armor, (foam) walls, and a (legit!) 1/4″ (6.35mm) steel plate. For so many reasons, we want to focus on the blade and handle. (Video, embedded below.)

The blade is a plasma stream designed for glassworking and burns a propane/oxygen mix with almost no residue, but the “blade” stays in a tight cylinder shape. With a custom PCB hosting a mixing controller, the blade extends and retracts like in the movies. The handle is not a technical marvel; it is an artistic wonder and if you want to see some machining eye-candy, check out the first video after the break. The second video demonstrates just how much damage you can do with a 4000° Fahrenheit tube of portable plasma.

You won’t be dueling anyone just yet, since there is no magnetic field shaping the blade like the ones [Lucas] envisioned. Unfortunately, you can’t block anything more substantial than a balloon sword since solid material will pass right through it, but it will suffer a mighty burn in the process. Lightsabers are a fantasy weapon, but the collective passion of nerds have made it as real as ever, and the Guinness folks give credibility to this build.

Continue reading “We Would Not Want To Be Stormtroopers Right Now”

Hello, Holograms

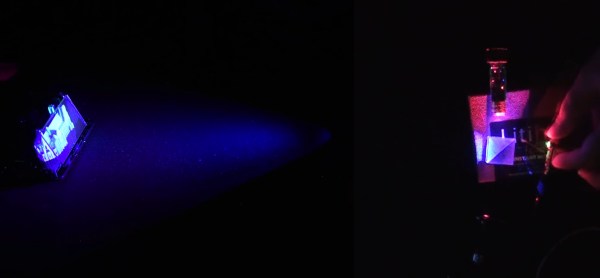
Holograms are tricky to describe because science-fiction gives the name to any three-dimensional image. The science-fact versions are not as flashy, but they are still darn cool. Legitimate holograms are images stored on a photographic medium, and they retain a picture of the subject from certain angles. In other words, when [Justin Atkin] makes a hologram of a model building, (video, embedded below) you can see the east side of the belfry, but when you reorient, you see the west side, or the roof if you point down. Holography is different from stereoscopy, which shows you a 3D image using two cameras. With a stereoscopic image, you cannot tilt it and see a new part of the subject, so there is a niche for each method.

There are a couple of different methods for making a hologram at home. First, you probably want a DIY hologram kit since it will come with the exposure plate and a known-good light source. Far be it for us to tell you you can’t buy plates and a laser pointer to take the path less traveled. Next, you need something that will not move, so we’re afraid you cannot immortalize your rambunctious kitty. The last necessity is a stable platform since you will perform a long-exposure shot, and even breathing on the setup can ruin the image. Different colors come from the coherent light source, so getting the “Rainbow Holograms” advertised in the video is a matter of mixing lights. Since you can buy red, green, and blue laser pointers for a pittance, you can do color remixes to your content.

Another type of hologram appears on things like trading cards as those wildly off-color (chromatic, not distasteful) images of super-heroes or abstract shapes. They’re a different variety, which can be printed en-masse, unlike the one-off [Justin] shows us how to make.

If you’re yearning for volumetric displays, we are happy to point you to this beauty capable of showing a jaw-dropping 3D model or this full-color blocky duck.

Continue reading “Hello, Holograms”

4-bit Retrocomputer Emulator Gets Custom PCB

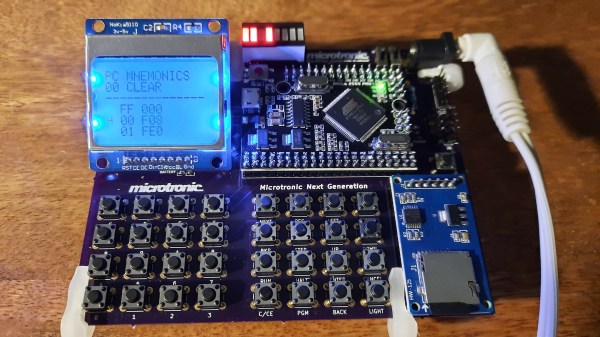
It might be fair to suspect that most people who are considered digital natives have very little to no clue about what is actually going on inside their smartphones, tablets, and computers. To be fair, it is not easy to understand how modern CPUs work but this was different at the beginning of the 80s when personal computers just started to become popular. People who grew up back then might have a much better understanding of computer basics thanks to computer education systems. The Busch 2090 Microtronic Computer System released in 1981 in Germany was one of these devices teaching people the basics of programming and machine language. It was also [Michael Wessel]’s first computer and even though he is still in proud possession of the original he just recently recreated it using an Arduino.

The original Microtronic was sold under the catchy slogan “Hobby of the future which has already begun!” Of course, the specs of the 4-bit, 500 kHz TMS 1600 inside the Microtronic seem laughable compared to modern microcontrollers, but it did run a virtual environment that taught more than the native assembly. He points out though that the instruction manual was exceptionally well written and is still highly effective in teaching students the basics of computer programming.

Already, a couple of years back he wrote an Arduino-based Microtronic emulator. In his new project, he got around to extending the functionality and creating a custom PCB for the device. The whole thing is based on ATMega 2560 Pro Mini including an SD card module for file storage, an LCD display, and a whole bunch of pushbuttons. He also added an RTC module and a speaker to recreate some of the original functions like programming a digital clock or composing melodies. The device can also serve as an emulator of the cassette interface of the original Microtronic that allowed to save programs with a whopping data rate of 14 baud.

He has certainly done a great job of preserving this beautiful piece of retro-tech for the future. Instead of an Arduino, retro computers can also be emulated on an FPGA or just take the original hardware and extend it with a Raspberry Pi.

SpaceAusScope Team Listens To The Galaxy

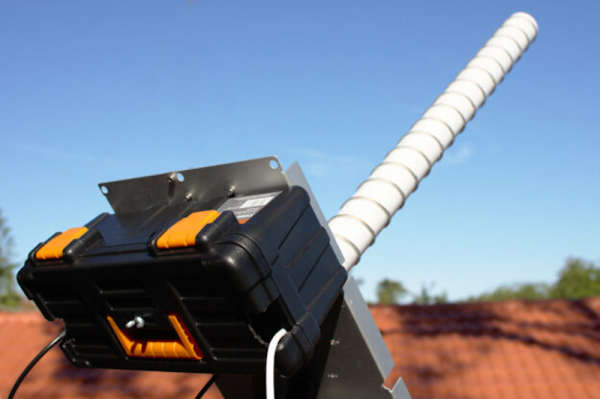
Australia has always had a reputation for astronomy. It is a great site low in the Southern hemisphere and there are lots of sparsely inhabited areas free from light and radio interference. Some of the first video from the Apollo 11 landing, for example, came in from “the dish” — a very large radio telescope down under. Australian hobbyists have formed a group, SpaceAusScope, where teams across Australia are building radio telescopes with the plan — which has been delayed by the pandemic — of collecting data and providing it for public analysis.

A secondary goal of the group is to provide better documentation for amateur radio telescope builders. So even if you don’t live in Australia, you might want to check out their website. It looks as thoughthe documentation will arrive in the future, but there is a very informative blog post from one team member about the helical antenna design most of the teams are using to eavesdrop on the hydrogen line.

Continue reading “SpaceAusScope Team Listens To The Galaxy”