We’re accustomed to seeing giant LED-powered screens in sports venues and outdoor displays. What would it take to bring this same technology into your living room? Very, very tiny LEDs. MicroLEDs.
MicroLED screens have been rumored to be around the corner for almost a decade now, which means that the time is almost right for them to actually become a reality. And certainly display technology has come a long way from the early cathode-ray tube (CRT) technology that powered the television and the home computer revolution. In the late 1990s, liquid-crystal display (LCD) technology became a feasible replacement for CRTs, offering a thin, distortion-free image with pixel-perfect image reproduction. LCDs also allowed for displays to be put in many new places, in addition to finally having that wall-mounted television.
Since that time, LCD’s flaws have become a sticking point compared to CRTs. The nice features of CRTs such as very fast response time, deep blacks and zero color shift, no matter the angle, have led to a wide variety of LCD technologies to recapture some of those features. Plasma displays seemed promising for big screens for a while, but organic light-emitting diodes (OLEDs) have taken over and still-in-development technologies like SED and FED off the table.
While OLED is very good in terms of image quality, its flaws including burn-in and uneven wear of the different organic dyes responsible for the colors. MicroLEDs hope to capitalize on OLED’s weaknesses by bringing brighter screens with no burn-in using inorganic LED technology, just very, very small.
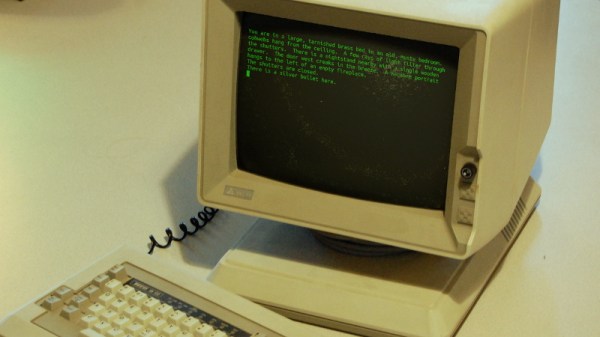
Many readers will be familiar with the final scene of Raiders Of The Lost Ark, in which the Ark of the Covenant, having been retrieved by Indiana Jones, is placed in a crate and wheeled off to be lost in the seemingly infinite depths of a dusty Government warehouse. Who knows what treasures lurk in such fabled taxpayer-funded repositories, and as if to prove their vast potential, [Arthur O’Dwyer] relates a tale of digital archaeology in which the entire source code of a game thought long-lost was regurgitated with the help of a civil servant.
The game in question is Castlequest, which he had played in the 1980s on the now-defunct GEnie online service. One of very few online references to it came via an entry in the copyright catalog of the US Copyright Office, where copyright holders can choose to register their works. Eventually after some detective work and a conversation with one of the game’s authors, he received copies of the entry. But instead of the expected summary, he was pleasantly surprised to find the full Fortran code of the game. The snag was that it came as a PDF scan of printed pages rather than as code itself, so there followed a tedious process of transcription before it could be published in a GitHub repository and eventually made compilable. The code remains copyrighted as an important part of its story, but should you be interested you can transport yourself back four decades and try your luck at text adventuring.
Maybe there’s more to be found in those dusty copyright warehouses, and searching for it has to be more pleasant than digging up landfills.
Technical interviews are generally dreaded, just like every other interview. However, technical interviews include many elements that non-technical folks might find mystifying or even pointless, such as whiteboard problem solving, take-home assignments, design sessions, or even just straight brain teasers. [Erik McClure] went a bit off the beaten path and started using the factory builder game Factorio as a technical interview.
Many point to the intent behind the problems and tricky questions inherent in whiteboard coding exercises and assert that the focus is not to complete the problem, but rather to expose how a candidate thinks and problem solves. Factorio is all problem-solving as you work as a team to slowly scale up a humble production line to a massive factory, which makes it a good candidate for assessing these sorts of skills. We doubt that the fine developers who wrote the game ever imagined it being used as an interview.
In all likelihood, you probably won’t have a Factorio interview anytime soon as [Erik] estimated each interview would take between eight and twenty hours. But we love the idea of reimagining the interview from a tedious set of problems to solve to an evolving cooperative game. Of course, you can also read more about getting the experience necessary for a job and what companies are looking for in an interview.
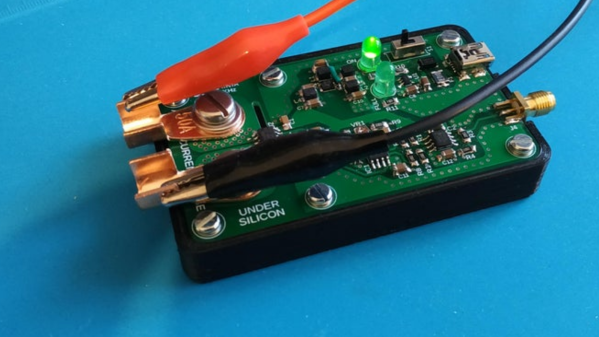
A decent current measurement sensor ought to be an essential part of every hacker’s workbench. One that is capable of measuring DC, as well as low and high frequencies with reasonable accuracy. And bonus credits if it can also withstand high bus voltages – such as those found in mains utility or electric vehicle work. [Undersilicon] couldn’t find one that ticked all the boxes, so he built an ACS730 based AC/DC current probe capable of measuring up to 25 A at frequencies up to 1 MHz.
Allegro Microsystems has a wide offering of current sensor IC’s. The ACS730 features a -3 dB bandwidth of 1 MHz, and -1 dB bandwidth of 500 kHz. Since it is galvanically isolated, it can be used in AC mains applications up to 297 Vrms and for DC up to 420 V. And as he intended to use it as an oscilloscope accessory, the analog output suited the application nicely. A pair of precision op-amps provide the voltage output scaled to 100 mV/A. The board is powered off a 1000 mAh LiPo battery that can run the sensor for about 15 ~ 20 hours. The power supply section consists of a charge circuit for the LiPo, and a split rail dual output power supply converter for the op-amps.
The ACS730 has a 2.5 V output when measured current is zero, and is scaled for 40 mV/A. This gives an output voltage swing from -0.5 V for -50 A to +4.5 V for +50 A. This is where the AD823ARZ dual 16 MHz, Rail-to-Rail FET Input Amplifiers step in. One pair is used to obtain a 2.5 V reference from the 5 V supply, and also to buffer the analog output from the ACS730. The second pair subtracts the 2.5 V offset, and applies a gain of 2.5 to get the 100 mV/A output. Dual power supply for the op-amps comes from a TPS65133 Split-Rail Converter, ±5V, 250mA Dual Output Power Supply. Lastly, LiPo charging is handled by the MCP73831 Single Cell, Li-Ion/Li-Polymer Charge Management Controller.
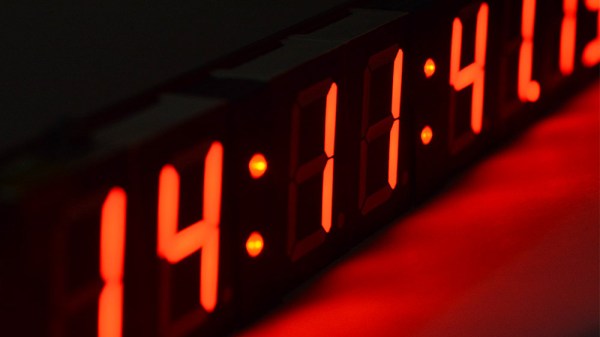
This is a story about a successful system that nevertheless failed to make the cut. An experimental LED brightness adjustment is something [Mitxela] explored in a project for a high-precision clock; one that shows time down to the nearest millisecond, and won’t flicker or otherwise look weird when photographed with a high-speed camera. To pull this off means reinventing many things about a clock display, including how to handle brightness adjustment elegantly. Now, to be clear, the brightness adjustment idea described here is something that did not end up being used, but it’s interesting enough that [Mitxela] wrote it up and we’re very glad he did.
The idea was to have a smooth and seamless automatic brightness adjustment, ideally with no added components. Since LEDs can be used as light sensors, [Mitxela] saw an opportunity to use elements of the clock displays themselves as sensors. This is how it works: a charge in the p-n junction that makes up an LED will decay at a rate proportional to the amount of light hitting the junction. By measuring the speed of this decay, it’s therefore possible to tell how much light is hitting the LED. It’s effective and elegant, but there are a few practical issues to deal with.
The first failed idea was to employ as sensors the unused decimal points in the seven-segment LED modules, but that turned out to have issues. One was the common-cathode wiring of the display modules; this makes them very convenient to drive as displays, but made using the decimal point as a light sensor impractical. The other issue was that the built-in diffuser that makes the displays easier to read absorbs a lot of ambient light. A much better option was to use the LEDs in the colon separators between digits, since they’re independent. Naturally they still have to light up in addition to being used as sensors, but [Mitxela] made a successful prototype by performing the necessary measurements in between the LEDs being driven by PWM.
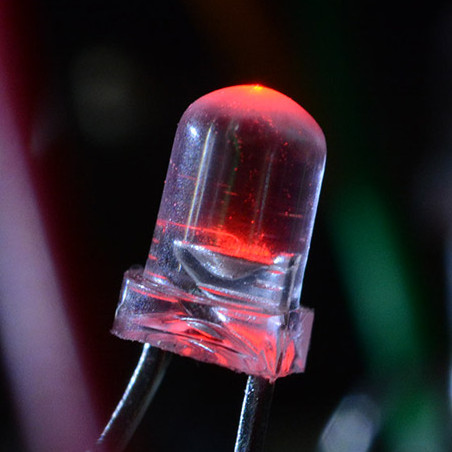
Despite how clever and efficient the solution was, in the end what sank it was the fact that the LEDs just don’t do a very good job of sensing ambient light for this purpose. The LEDs are simply too directional. Even after sanding away the top (lens) part of the LEDs, they still had a very narrow field of view. As [Mitxela] describes it, tilting the clock towards the ceiling could send it to full brightness, and the shadow of one’s head falling across the clock would plummet it into “night mode” dimness. In short, it responded to what was directly in front of it, rather than the ambient light level as a whole.
It’s a reminder that sometimes a solution simply won’t tick all the right boxes, and it can happen for unexpected reasons. Still, LEDs are versatile things. Not only can they sense light, but as the name implies they’re also diodes. As diodes can be used as temperature sensors that means LEDs can as well.
Bad news, Martian helicopter fans: Ingenuity, the autonomous helicopter that Perseverance birthed onto the Martian surface a few days ago, will not be taking the first powered, controlled flight on another planet today as planned. We’re working on a full story so we’ll leave the gory details for that, but the short version is that while the helicopter was undergoing a full-speed rotor test, a watchdog timer monitoring the transition between pre-flight and flight modes in the controller tripped. The Ingenuity operations team is going over the full telemetry and will reschedule the rotor test; as a result, the first flight will occur no earlier than Wednesday, April 14. We’ll be sure to keep you posted.
Anyone who has ever been near a refinery or even a sewage treatment plant will have no doubt spotted flares of waste gas being burned off. It can be pretty spectacular, like an Olympic torch, but it also always struck us as spectacularly wasteful. Aside from the emissions, it always seemed like you could at least try to harness some of the energy in the waste gasses. But apparently the numbers just never work out in favor of tapping this source of energy, or at least that was the case until the proper buzzword concentration in the effluent was reached. With the soaring value of Bitcoin, and the fact that the network now consumes something like 80-TWh a year, building portable mining rigs into shipping containers that can be plugged into gas flaring stacks at refineries is now being looked at seriously. While we like the idea of not wasting a resource, we have our doubts about this; if it’s not profitable to tap into the waste gas stream to produce electricity now, what does tapping it to directly mine Bitcoin really add to the equation?
What would you do if you discovered that your new clothes dryer was responsible for a gigabyte or more of traffic on your internet connection every day? We suppose in this IoT world, such things are to be expected, but a gig a day seems overly chatty for a dryer. The user who reported this over on the r/smarthome subreddit blocked the dryer at the router, which was probably about the only realistic option short of taking a Dremel to the WiFi section of the dryer’s control board. The owner is in contact with manufacturer LG to see if this perhaps represents an error condition; we’d actually love to see a Wireshark dump of the data to see what the garrulous appliance is on about.
As often happens in our wanderings of the interwebz to find the very freshest of hacks for you, we fell down yet another rabbit hole that we thought we’d share. It’s not exactly a secret that there’s a large number of “Star Trek” fans in this community, and that for some of us, the way the various manifestations of the series brought the science and technology of space travel to life kick-started our hardware hacking lives. So when we found this article about a company building replica Tricorders from the original series, we followed along with great interest. What we found fascinating was not so much the potential to buy an exact replica of the TOS Tricorder — although that’s pretty cool — but the deep dive into how they captured data from one of the few remaining screen-used props, as well as how the Tricorder came to be.
And finally, what do you do if you have 3,281 drones lying around? Obviously, you create a light show to advertise the launch of a luxury car brand in China. At least that’s what Genesis, the luxury brand of carmaker Hyundai, did last week. The display, which looks like it consisted mostly of the brand’s logo whizzing about over a cityscape, is pretty impressive, and apparently set the world record for such things, beating out the previous attempt of 3,051 UAVs. Of course, all the coverage we can find on these displays concentrates on the eye-candy and the blaring horns of the soundtrack and gives short shrift to the technical aspects, which would really be interesting to dive into. How are these drones networked? How do they deal with latency? Are they just creating a volumetric display with the drones and turning lights on and off, or are they actually moving drones around to animate the displays? If anyone knows how these things work, we’d love to learn more, and perhaps even do a feature article.
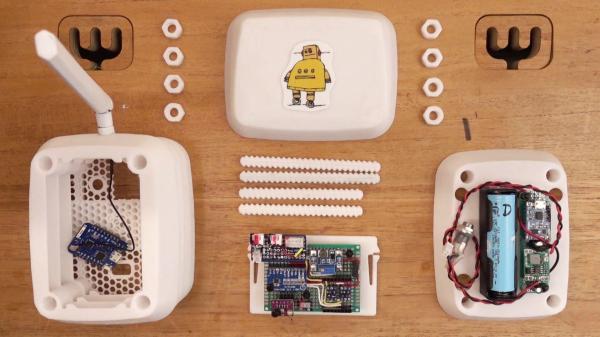
It’s not infrequent that we see the combination of moisture sensors and water pumps to automate plant maintenance. Each one has a unique take on the idea, though, and solves problems in ways that could be useful for other applications as well. [Emiliano Valencia] approached the project with a few notable technologies worth gleaning, and did a nice writeup of his “Autonomous Solar Powered Irrigation Monitoring Station” (named Steve Waters as less of a mouthful).
Of particular interest was [Emiliano]’s solution for 3D printing a threaded rod; lay it flat and shave off the top and bottom. You didn’t need the whole thread anyway, did you? Despite the relatively limited number of GPIO pins on the ESP8266, the station has three analog sensors via an ADS1115 ADC to I2C, a BME280 for temperature, pressure, and humidity (also on the I2C bus), and two MOSFETs for controlling valves. For power, a solar cell on top of the enclosure charges an 18650 cell. Communication over wireless goes to Thingspeak, where a nice dashboard displays everything you could want. The whole idea of the Stevenson Screen is clever as well, and while this one is 3D printed, it seems any kind of stacking container could be modified to serve the same purpose and achieve any size by stacking more units. We’re skeptical about bugs getting in the electronics, though.