NFC Performance: It’s All In The Antenna

NFC tags are a frequent target for experimentation, whether simply by using an app on a mobile phone to interrogate or write to tags, by incorporating them in projects by means of an off-the-shelf module, or by designing a project using them from scratch. Yet they’re not always easy to get right, and can often give disappointing results. This article will attempt to demystify what is probably the most likely avenue for an NFC project to have poor performance, the pickup coil antenna in the reader itself.

A selection of the NFC tags on my desk

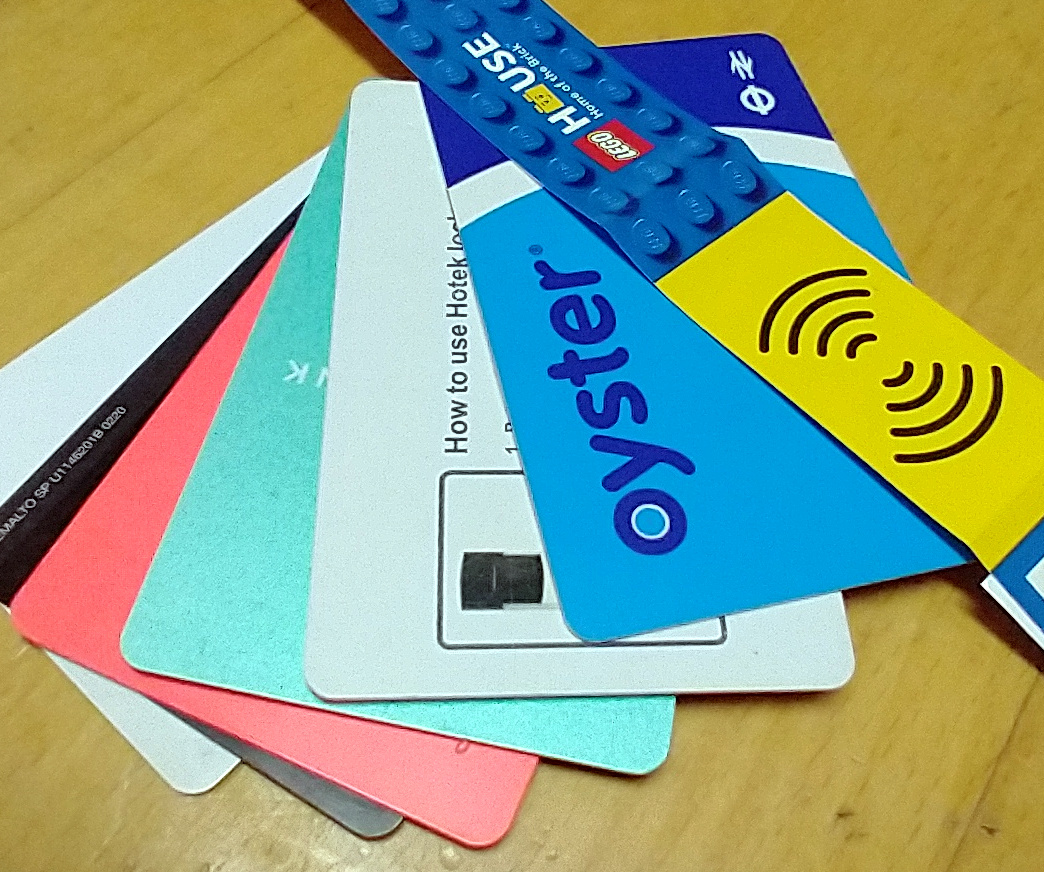
The tags contain chips that are energised through the RF field that provides enough power for them to start up, at which point they can communicate with a host computer for whatever their purpose is.

“NFC” stands for “Near Field Communication”, in which data can be exchanged between physically proximate devices without their being physically connected.  Both reader and tag achieve this through an antenna, which takes the form of a flat coil and a capacitor that together make a resonant tuned circuit. The reader sends out pulses of RF which is maintained once an answer is received from a card, and thus communication can be established until the card is out of the reader’s range. Continue reading “NFC Performance: It’s All In The Antenna”

Hacked Punch-Out Controlled With Actual Punches

In a slightly safer departure away from jetpack roller-skating and flinging around bolts of lightning, [Ian Charnas] has been hacking retro video games. After a lot of hard work [Ian] has managed to add pose estimation to control the character in the NES boxing game “Punch-Out.” Surely he can’t get hurt doing that? No, but since it wasn’t fair to hurt the poor suffering characters, without taking any damage himself, he added electric-shock feedback to give the game a bit more, ahem, punch. See, you can get hurt playing video games!

By starting with Google MoveNet, which is a pre-baked skeletal tracking model which can run in a browser using TensorFlowJS, he defined some simple heuristics for the various boxing moves usually performed with the game controller. Next, he needed to get the game. Being a all-round good guy, [Ian] bought an original copy of the game cartridge to obtain the license, then using the USB CopyNES from RetroUSB, dumped out the game binary for the next step.

Emulation of the NES hardware was chosen, taken care of by FCEUX, in order to run the game and the posture model on the same machine. This simplified the control of the game, since it would be somewhat more work to have it run on the original NES. By using emscripten, FCEUX was cross-compiled to WebAssembly, and so both the game and control side are both in the land of JavaScript. To be honest, after playing the game a little, [Ian] found it far too fast to be playable with posture control, as opposed to much faster button pressing, so some game hacking was required. Emulation made this much easier.

It took [Ian] around two months of disassembling the game binary, and figuring out the game logic around the characters in order to slow them down enough to make it playable, but he did manage it. You can be the judge, since he bought a bunch more cartridges to unlock more license copies, you can play it too. Just don’t add the electric-shock part, nobody needs to be administered electric shock therapy from a two inch high bright orange Mike Tyson!

Continue reading “Hacked Punch-Out Controlled With Actual Punches”

3D Printed Absolute Encoder Is Absolutely Wonderful

When you need to record the angle of something rotating, whether it’s a knob or a joint in a robotic arm, absolute rotary encoders are almost always the way to go. They’re cheap, they’re readily available, and it turns out you can make a pretty fantastic one out of a magnetic sensor, a zip tie, and a skateboard bearing.

When [Scott Bezek] got his hands on a AS5600 magnet sensor breakout board, that’s just what he did. The sensor itself is an IC situated in the middle of the board, which in Scott’s design sits on a 3D-printed carrier. A bearing mount sits atop it, which holds — you guessed it — a bearing. Specifically a standard 608 skateboard bearing, which is snapped into the mount and held securely by a zip tie cinched around the mount’s tabs. The final part is a 3D-printed knob with a tiny magnet embedded within, perpendicular to the axis of rotation. The knob slides into the bearing and the AS5600 reads the orientation of the magnet.

Of course, if you just wanted a rotary knob you could have just purchased an encoder and been done with it, but this method has its advantages. Maybe you can’t fit a commercially-available encoder in your design. Maybe you need the super-smooth rotation provided by the bearing. Or maybe you’re actually building that robotic arm — custom magnetic encoders like this one are extremely common in actuator design, and while the more industrial versions (usually) have fewer zip ties, [Scott]’s design would fit right in.

Continue reading “3D Printed Absolute Encoder Is Absolutely Wonderful”

A PCjr running an SNTP server

IBM PCjr From 1984 Keeps Today’s Clocks Running In Sync

We’ve gotten used to the fact that the clocks on our internet-connected computers and smartphones are always telling the right time. Time servers, provided by a variety of government agencies as well as tech giants, provide them with the exact time and date thanks to accurate atomic clocks and the clever Network Time Protocol (NTP). But it wasn’t always like this: back in the 1990s when many computers didn’t have an internet connection, we had to adjust our computers’ clocks manually. Go back one more decade, and many PCs didn’t even have a battery-backed clock at all; you either set the proper date and time when the computer booted, or just lived with the fact that all new files were timestamped 01-01-1980.

[Michael Brutman] decided to mix today’s world of network time synchronization with the old world of batteryless PCs, and built an SNTP Time Server that runs on a DOS PC. He tried it with two different hardware setups: a 40 MHz 386 PC from 1993, and the (in)famous IBM PCjr from 1984. A standard GPS module serves as an accurate time reference; these units can often be directly connected to old hardware thanks to the eternal RS-232 standard.

Continue reading “IBM PCjr From 1984 Keeps Today’s Clocks Running In Sync”

Faster IPA Recycling For Your Resin Print Workflow

If you’ve printed with photopolymer resins, you know that you need alcohol. Lots of alcohol. It makes sense that people would like to reuse the alcohol both to be environmentally responsible and to save a little money. The problem is that the alcohol eventually becomes so dirty that you have to do something. Given time, the polymer residue will settle to the bottom and you can easily pour off most of the clean liquid. You can also use filters with some success. But [Makers Mashup] had a different idea. Borrowing inspiration from water treatment plants, he found a chemical that will hasten the settling process. You can see a video of his process below.

The experimentation started with fish tank clarifier, which is — apparently — mostly alum. Alum’s been used to treat wastewater for a long time. Even the ancient Romans used it for that purpose in the first century. Alum causes coagulation and flocculation so that particles in the water wind up sinking to the bottom.

Continue reading “Faster IPA Recycling For Your Resin Print Workflow”

Most FDM Printers Are Also Filament Dryers (with A Little Help)

If you’ve printed with an FDM printer, you probably know there are many interrelated factors to getting a good print. One key item is the dryness of the filament. When you first crack your plastic open, it should be dry. Most filament is packed in a sealed bag with desiccant in it. But if you have the filament out for a while, it soaks up moisture from the air and that causes lots of problems. [Design Prototype Test] has built and bought filament dryers before, but now he would like to point out that every FDM printer with a heated bed can act as a filament dryer. You can see the details in the video below.

It turns out that the idea isn’t original, but it doesn’t seem to be one that has caught on. What the video shows though, is to take the idea and run with it. A 3D printed support sits on the bed and accepts a cheap PC fan. The whole affair gets boxed up with cardboard and can dry the filament.

Continue reading “Most FDM Printers Are Also Filament Dryers (with A Little Help)”

Streamline Your SMD Assembly Process With 3D-Printed Jigs

Your brand-new PCBs just showed up, and this time you even remembered to order a stencil. You lay the stencil on one of the boards, hold it down with one hand, and use the other to wipe some solder paste across…. and the stencil shifts, making a mess and smearing paste across the board. Wash, rinse (with some IPA, of course), repeat, and hope it’ll work better on the next try.

openscad window
A PCB jig generated by OpenSCAD

Maybe it’s time to try Stencilframer, a 3D-printable jig generator created by [Igor]. This incredibly useful tool takes either a set of gerbers or a KiCad PCB file and generates 3D models of a jig and a frame to securely hold the board and associated stencil. The tool itself is a Python script that uses OpenSCAD for all 3D geometry generation. From there, it’s a simple matter to throw the jig and frame models on a 3D printer and voilà!– perfectly-aligned stencils, every time.

This is a seriously brilliant script. Anyone whose gone through the frustration of trying to align a stencil by hand should be jumping at the opportunity to try this out on their next build. It could even be paired with an Open Reflow hot plate for a fully open-source PCB assembly workflow.

Continue reading “Streamline Your SMD Assembly Process With 3D-Printed Jigs”