Robotic Tufting Gun Fires Off CNC Textiles

Often used to make rugs, tufting is a process wherein a hollow needle is used to cram thread or yarn into fabric in some kind of pattern. This can be done by hand, with a gun, or with big machines. Some machines are set up to punch the same pattern quickly over and over again, and these are difficult to retool for a new pattern. Others are made to poke arbitrary patterns and change easily, but these machines move more slowly.
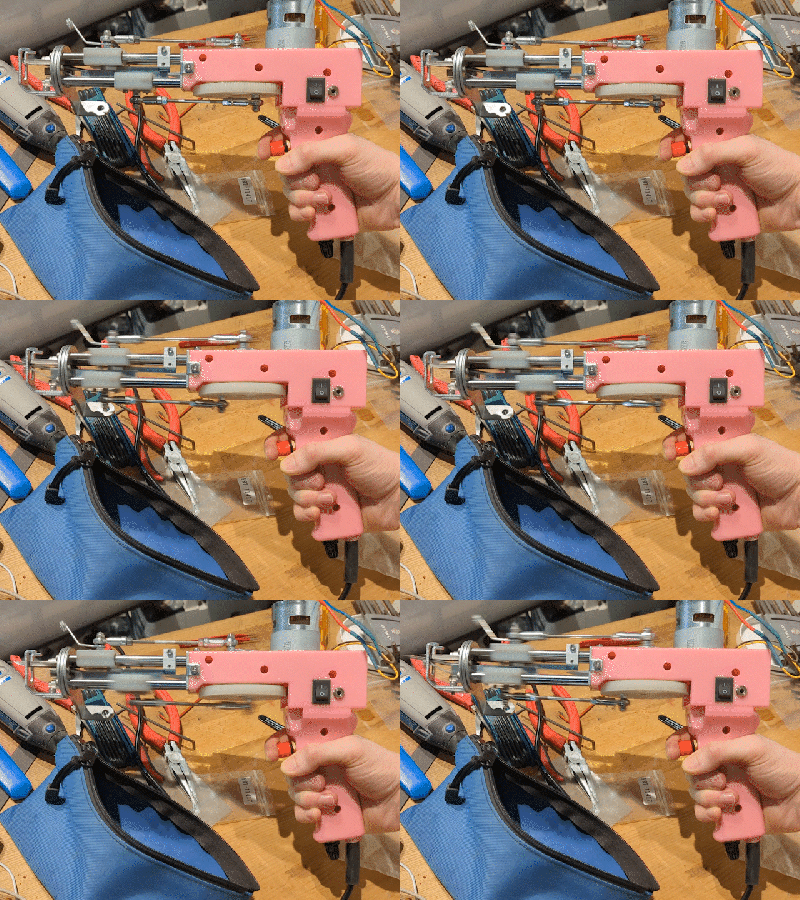
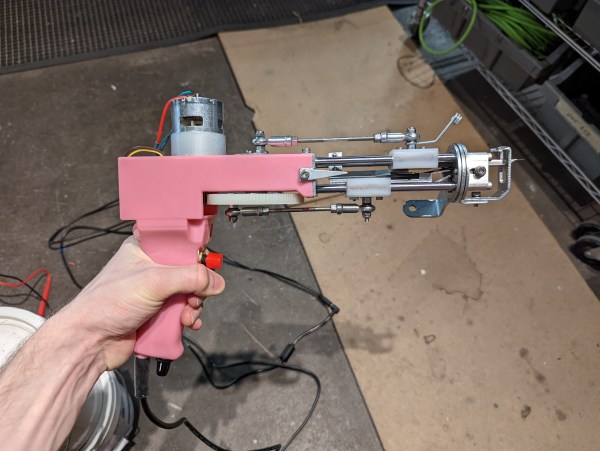
This robotic tufting system by [Owen Trueblood] is of the slow and arbitrary type. It will consist of a modified tufting gun strapped to a robot arm for CNC textile art. Tufting guns are manufactured with simple controls — a power switch, a knob to set the speed, and a trigger button to do the tufting. Once it’s affixed to the robot arm, [Owen] wants to remote control the thing.

The gun’s motor driver is nothing fancy, just a 555 using PWM to control a half H-bridge based on input from the speed control potentiometer. [Owen] replaced the motor controller with an Arduino and added an I/O port. The latter is a 3.5 mm stereo audio jack wired to GND and two of the Arduino’s pins. One is a digital input to power the gun, and the other is used as an analog speed controller based on input voltage. [Owen] is just getting started, and we’re excited to keep tabs on this project as the gun goes robotic.

This isn’t the first time we’ve seen robots do textiles — here’s a 6-axis robot arm that weaves carbon fiber.

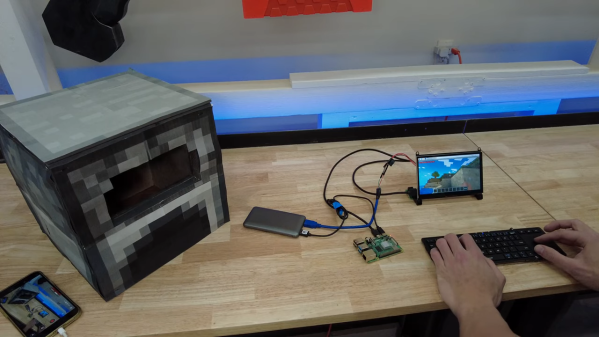
Minecraft furnace IRL

Replica Minecraft Furnace Actually Powers The Game

Let’s face it, we all need a little distraction sometimes, especially lately. And for our money, there’s no better way to put your brain in park than to start up a Minecraft world and get to digging. The simple graphics, the open world, and the lack of agenda other than to find resources and build things are all very soothing.

But play the game long enough and you’re bound to think about what it would be like if the game world crossed over into the real world. The ironically named [Michael Pick] did just that when he managed to craft a real Minecraft furnace that can actually power the game. Of course, there are some liberties taken with the in-game crafting recipe for a furnace, which is understandable for a game that allows you to punch trees with a bare fist to cut them down.

Rather than using eight blocks of cobblestone to build his furnace, [Michael] made a wooden shell for a commercial folding camp stove. Insulated from the shell by a little cement board, the furnace looks pretty true to the in-game item. To generate the electricity needed to run the game, he used a pair of thermoelectric camping generators. With the stove filled with wood — presumably un-punched — the generators put out enough juice to at least partially charge a battery bank, which was then used to power a Raspberry Pi and 7″ monitor. His goal was to get enough power from the furnace to do a speed run in the game and find three diamonds to build a diamond pickaxe. Honestly, we’re jealous — our first diamonds never come that easy.

We’ve seen other Minecraft-IRL crossovers before. Fancy a ride in a minecart? We’ve got that covered. Or maybe you’d rather control a desk lamp from within the game? That’s a thing, too.

Continue reading “Replica Minecraft Furnace Actually Powers The Game”

One Stepper Plus A Whole Bunch Of Magnets Equals A Unique Seven-Segment Display

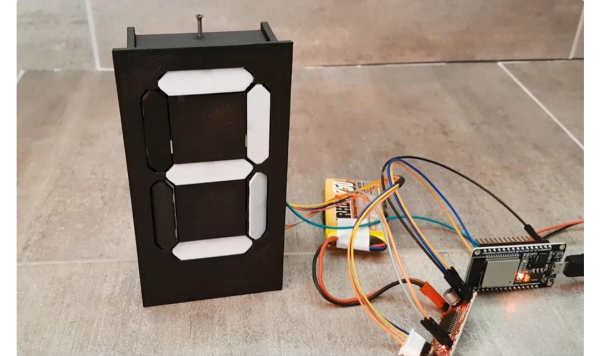
Sometimes the cost of simplicity is extra complexity. It seems counterintuitive, but it seems to be true. And this single-motor mechanical seven-segment display seems to be a perfect example of this paradox.

On second thought, [aeropic]’s mechanism isn’t really all that mechanically complicated, but there sure was a lot of planning and ingenuity that went into it. The front has a 3D-printed bezel with the familiar segment cutouts, each of which is fitted with a pivoting segment, black on one side and white on the other.

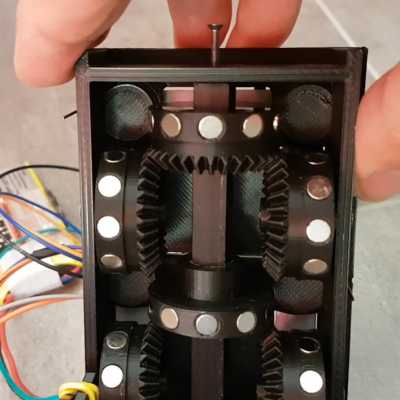
Behind the bezel is a vertical shaft with three wheels, one behind each horizontal segment, and a pair of horizontal shafts, each with two wheels behind each vertical segment. The three shafts are geared to turn together by a single stepper in the base. Each wheel has ten magnets embedded in the outer circumference, with the polarity oriented to flip the segment in front of it to the right orientation for the current digit. It’s probably something that’s most easily understood by watching the video below.

We’ve seen quite a few of these mechanical seven-segment displays lately — this cam-and-servo mechanism comes to mind. We love them all, of course, but the great thing about [aeropic]’s display is how quiet it is — the stepper is mostly silent, and the segments make only a gentle clunk when they flip. It’s very satisfying.

Continue reading “One Stepper Plus A Whole Bunch Of Magnets Equals A Unique Seven-Segment Display”

Miniature Motorized RC Car Is Massively Impressive

Small is often subjective. For example, a school bus is small compared to an Airbus A380. But other things are just small all on their own and need no comparison to make the point. Such is the case with this micro RC car in the video below the break. It’s an RC model of the Smart Car, that when compared to other vehicles on the road, is quite diminutive, both subjectively and absolutely. But the outward appearance of [diorama111]’s project only tells half the story.

Starting out as a static display model, [diorama111] fully disassembled the 1/87 scale Smart Car and got to work. Fully proportional steering is attained with a very, very small stepper motor that drives custom knuckles attached to handmade suspension. They are works of art in their own right.

Do your projects need tweezers for assembly?

Drive is supplied by another small stepper motor. If [diorama111] had stopped there, it would have been every bit as noteworthy to see a 1/87 Smart Car doing figure eights around small bottles of model paint. Instead, [diorama111] kept going! The car has working turn signals, brake lights (including the 3rd taillight in the back window!) and headlights. There is even a function for hazard lights.

The electronics are all hand built using enameled wire and SMD components on perf board, and are a study in miniaturization all their own. An ATtiny processor seems right at home in this design. We admire [diorama111]s steady hands and patience to build such a small RC car, never mind one with such fine attention paid to all the details.

If downsized hacks like this float your thimble-sized boat, you might also appreciate this precious little PDP-11 and terminal.

Continue reading “Miniature Motorized RC Car Is Massively Impressive”

Low-Cost, Two-Channel Scriptable Waveform Generator

Microcontroller addict [Debraj] decided to make his own programmable sine wave generator, and was able to put it together for under $40 USD. Other than low-cost, his list of requirements was as follows:

  • Dual sine wave output, synchronized
  • Frequency, Amplitude, and Phase control
  • Low harmonics under 1 MHz
  • Scriptable via Python

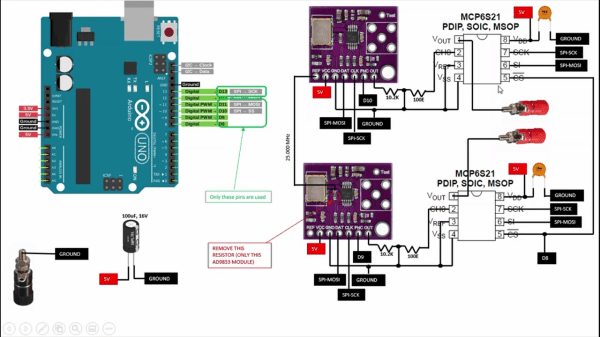
The heart of the project is the Analog Devices AD9833, a complete Direct Digital Synthesis (DDS) waveform generator system on a chip. If you’ve ever rolled your own DDS using discrete ICs or in an FPGA, you can appreciate the benefit of squeezing the phase accumulator, sine lookup table, DAC, and control logic all into a single ten-pin package. [Debraj] uses AD9833 modules from the usual online vendors for a few dollars each. He synchronizes the generators by disconnecting the reference crystal on the second module and driving it from the first one. The remaining specifications are met by the inherent characteristics of the DDS system, and the scriptable interface is accomplished with an Arduino controlling the AD9833 chips and two programmable gain amplifiers (MCP6S31). We like the confidence that [Debraj] displays by sketching the initial circuit diagram with a ball-point pen — check out the sketch and the final pictorial schematic in the video below the break.

This is a good example of combining off-the-shelf modules to quickly build a project. This approach is great for one-off builds or as a proof-of-concept test bed that can later be spun onto a custom PCB. Another reason to use modules these days is that the modules are often in-stock but the chips are unobtainable. Though it appears [Debraj]’s only needs one of these generators, it would be an easy board to layout and build — if you can buy the parts.

Continue reading “Low-Cost, Two-Channel Scriptable Waveform Generator”

How Small Is Too Small?

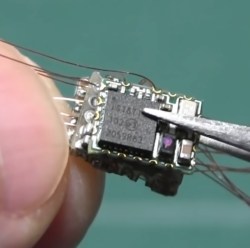
Not a rhetorical question! This week we consider the most micro microcontroller: the HC32L110. It’s the new title holder of the smallest ARM Cortex M0+ part. But could you actually use it?

MCU is the black thing that’s smaller than the capacitor.

I remember way back, when I first learned to solder surface-mount components. It was fiddly at first, but nowadays I don’t use through-hole components unless someone’s twisting my arm. And I still do my soldering myself — down to 0603 really isn’t all that bad with an iron, and below that, there’s always the heat plate. My heat plate has also gotten me through the two times I’ve actually needed to put down a ball-grid-array part. It wasn’t as bad as I had feared, honestly.

So maybe it’s time for me to take the BGA plunge and design a board or two just to get more familiar with the tech. I probably won’t dive straight into the deep end, like the featured chip here with 0.35 mm ball pitch, but rather stick with something that the cheap PCB services can easily handle. My experience tells me that the best way to learn something is just to test it out.

Now, off to go part shopping in the middle of a chip crisis! Wish me luck.

Depraz Mouse Clone Has A USB Tail

In 1980, Logitech started selling a round, three-button input device known the Depraz mouse or Swiss mouse, which was made by — you guessed it — a Swiss company called Depraz. At the time, Logitech was primarily a software development outfit, but the success they saw in selling the Depraz mouse led them to leave logic and looping behind in order to pursue peripherals permanently.

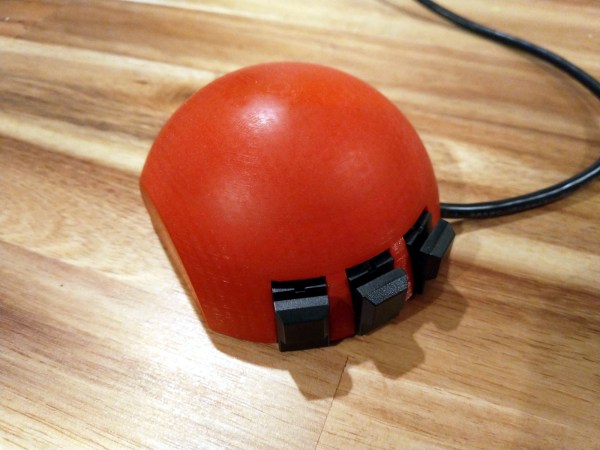
[John Floren] recently decided to make a modern clone called the Bellwether mouse. You may remember that [John] previously restored a vintage Depraz to working condition. The only problem is that ‘working condition’ for a 40-year-old mouse is underwhelming on a modern computer.

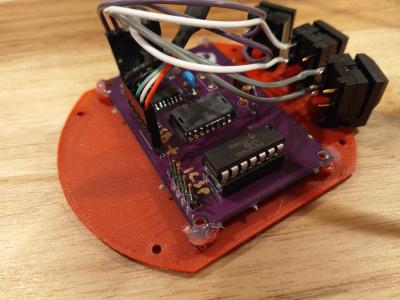
The Bellwether mouse sports a high-end Pixart PMW3389 sensor and uses a PIC16F1454 for the controller. The most complicated part was dealing with voltage levels, because the PIC wants 5 V and the sensor only 2 V. The firmware is a mix of Microchip’s USB HID demo code and [Daniel Kao]’s Arduino code for the PWM3389 sensor.

Unlike the original Depraz’s male DE-9 connector, this updated version connects via USB. We like that [John] learned FreeCAD in order to make the body, and especially that he glued fishing weights to the underside for more heft. Check it out in action after the break. We were most curious about those switches, which at first glance look like they could be keyswitches with DSA keycaps. But no, they’re just some cool switches from the depths of Digi-Key.

Want to print yourself something more ergonomic? Perhaps you’ll click with Ploopy, the open-source trackball.

Continue reading “Depraz Mouse Clone Has A USB Tail”