We’ve seen a lot of flying robots over the years, and for many of them, intimate contact with a stationary object would be a very, very bad thing. [The Laboratory of Intelligent Systems], at EPFL in Switzerland designed GimBall to not only take impacts in stride, but to actually use them as navigational aids. This is similar to an insect bouncing off an obstacle in nature.
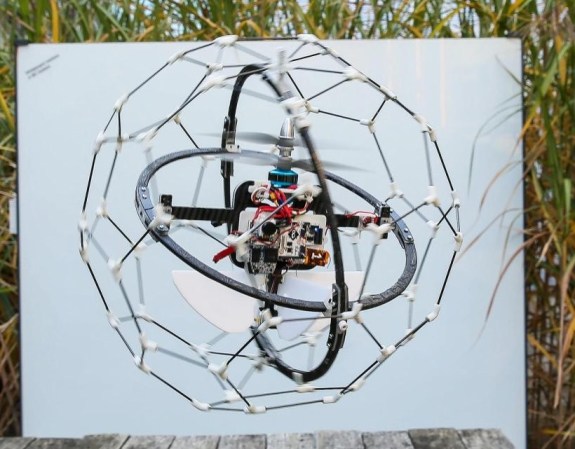
GimBall’s design is a bit of a departure from the norm as well. Contra-rotating airplane propellers provide thrust while countering torque. It appears that the propellers are driven by two separate brushless outrunner motors, which would allow for yaw control via mismatched torque. Directional control is provided by a 4 articulated vanes on the bottom of the craft. Standard RC servos move the vanes. While not as common as quadcopters today, this “tail sitting” design has been around for decades. The Convair XFY “Pogo” is a good example of an early tail sitter design.
What makes GimBall so novel is its exoskeleton. A carbon fiber gimbal encircles the entire craft. Around the gimbal is a geodesic sphere made up of carbon fiber rods and plastic joints. The sphere acts like a shock absorber, allowing GimBall to harmlessly bounce off objects. The gimbal ensures that impacts won’t upset the craft’s attitude. Check out the video after the break to see how these two systems form an impressive shell which completely separates GimBall’s chassis from the outside world. GimBall can actually use its shell to “rotate” around obstacles.
Continue reading “GimBall Bounces Off Trees And Comes Back For More”