Back when commercial quadcopters started appearing in the news on the regular, public safety was a talking point. How, for example, do we keep them away from airports? Well, large drone companies didn’t want the negative PR, so some voluntarily added geofencing and tracking mechanisms to their own drones.
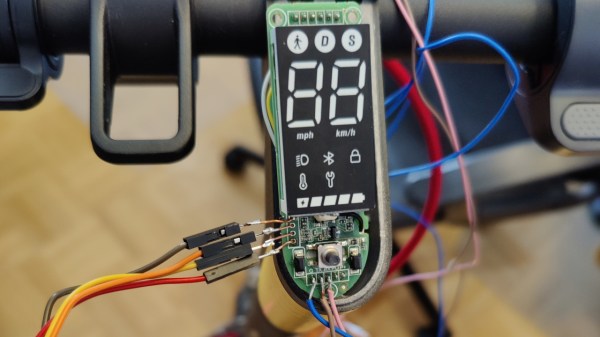
When it comes to DJI, one such mechanism is DroneID: a beacon on the drone itself, sending out a trove of data, including its operator’s GPS location. DJI also, of course, sells the Aeroscope device that receives and decodes DroneID data, declared to be for government use. As it often is with privacy-compromising technology, turns out it’s been a bigger compromise than we expected.
Questions started popping up last year, as off-the-shelf quadcopters (including those made by DJI) started to play a part in the Russo-Ukrainian War. It didn’t take long for Ukrainian forces to notice that launching a DJI drone led to its operators being swiftly attacked, and intel was that Russia got some Aeroscopes from Syria. DJI’s response was that their products were not meant to be used this way, and shortly thereafter cut sales to both Russia and Ukraine.
But security researchers have recently discovered the situation was actually worse than we expected. Back in 2022, DJI claimed that the DroneID data was encrypted, but [Kevin Finisterre]’s research proved that to be a lie — with the company finally admitting to it after Verge pushed them on the question. It wouldn’t even be hard to implement a worse-than-nothing encryption that holds up mathematically. However, it seems, DroneID doesn’t even try: here’s a GitHub repository with a DroneID decoder you can use if you have an SDR dongle.
Sadly, the days of companies like DJI standing up against the anti-copter talking points seem to be over, Now they’re setting an example on how devices can subvert their owners’ privacy without reservation. Looks like it’s up to hackers on the frontlines to learn how to excise DroneID, just like we’ve done with the un-nuanced RF power limitations, or the DJI battery DRM, or transplanting firmware between hardware-identical DJI flight controller models.
Continue reading “Loudmouth DJI Drones Tell Everyone Where You Are” →


 You might have heard the term “bifurcation” if you’ve been around PCIe, especially in mining or PC tinkering communities. This is splitting a PCIe slot into multiple PCIe links, and as you can imagine, it’s quite tasty of a feature for hackers; you don’t need any extra hardware, really, all you need is to add a buffer for REFCLK. See, it’s still needed by every single extra port you get – but you can’t physically just pull the same clock diffpair to all the slots at once, since that will result in stubs and, consequently, signal reflections; a REFCLK buffer chip takes the clock from the host and produces a number of identical copies of the REFCLK signal that you then pull standalone. You might have seen x16 to four NVMe slot cards online – invariably, somewhere in the corner of the card, you can spot the REFCLK buffer chip. In a perfect scenario, this is all you need to get more PCIe out of your PCIe.


