Class D Amp With An H-Bridge

Class D amps are simple – just take an input, and use that to modulate a square wave with PWM. Send this PWM signal to a MOSFET or something, and you have the simplest class D amp in existence. They’re so simple, you can buy a class D amp chip for $3, but [George] thought that would be too easy. Instead, he built his own with an ATTiny and an H-bridge motor driver. No surprise, it works, but what’s interesting is what effect the code on the ATtiny can have on the quality of the audio coming out of the speaker.

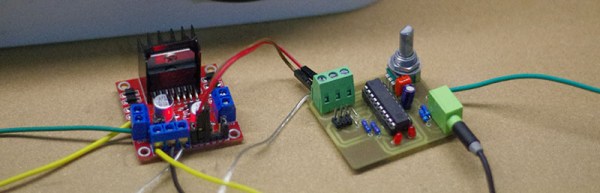
The microcontroller chosen for this project was the ATtiny 461, a part we don’t see much, but still exactly what you’d expect from an ATtiny. The heavy lifting part of this build is an L298 chip found on eBay for a few dollars. This dual H-bridge is usually used for driving motors, but [George] found a home for it in the power section of an amplifier.

The ATtiny is clocked at 16 MHz, making the ADC clock run at 1 MHz. A 10-bit precision conversion takes place, and this value sets the PWM duty cycle. Timer1 in the chip is set up to run at 32 MHz, and by counting this timer up to 1023 gives this amp its PWM cycle speed of 31.25 kHz. That’s right in the neighborhood of what a class D amp should run at, and the code is only about 30 lines. It can’t get simpler than that.

[George] put up a video of this amp in operation, and despite not following the standard design of a Class D amp, it sounds pretty good. You can see that video below.
Continue reading “Class D Amp With An H-Bridge”

NeXT Cubes And LCD Monitors

The NeXT slabs and cubes were interesting computers for their time, with new interesting applications that are commonplace today seen first in this block of black plastic. Web browsers, for example, were first seen on the NeXT.

Running one of these machines today isn’t exactly easy; there are odd video connectors but you can modify some of the parts and stick them in an LCD monitor. It’s a tradeoff between a big, classic, heavy but contemporary CRT and a modern, light, and efficient LCD, but it’s still a great way to get a cube or slab up and running if you don’t have the huge monitor handy.

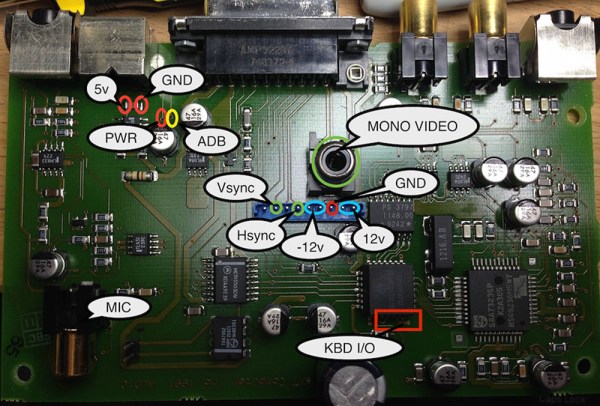
The NeXT cube doesn’t have a single wire going between the computer and the monitor; that would be far too simple. Instead, a NeXT Sound Box sits between the two, providing the user a place to plug the monitor, keyboard, mouse, and audio connectors into. [Brian] took the board from this Sound Box and put it inside an old NEC LCD monitor he had sitting around. 12V and 5V rails were wired in, the video lines were wired in, and [Brian] created a new NeXT monitor.

There are two versions of the NeXT Sound Box – one for ADB peripherals (Apple IIgs and beige Macs), and another for non-ADB peripherals. [Brian] also put together a tutorial for using non-ADB peripherals with the much more common ADB Sound Board.

Hanging Monitors Keeps Your Desk Slightly Less Messy

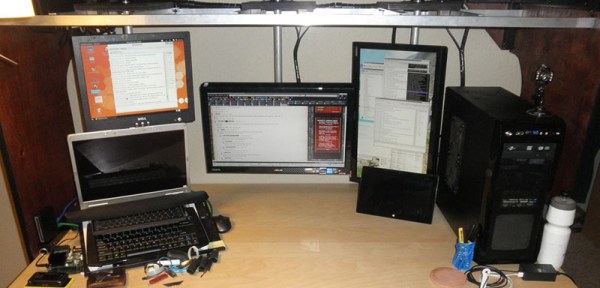
[Gertlex] – like just about everyone reading this, I’m sure – has a messy desk with monitors, keyboards, mice, several other input devices, tablets, and a laptop. He wanted a system that would reduce the wire clutter on his desk and after thinking a bit came up with a really cool solution for arranging his monitors. He’s hanging the monitors from a shelf above his desk using nothing but some aluminum and a few 3D printed brackets.

The main structure is a shelf of ‘bridge’ above his desk, made from 3/4″ ply. The inventive bit of this build is the two 1″ square aluminum tubes spanning the width of this shelf. From these, a few bits of aluminum angle pieces slide along the 1″ rails. a mount holds a 1″ round pipe to these supports, and a VESA mount is clamped to the pipe. There’s an imgur album that goes through the entire design. It’s certainly an improvement over the earlier battlestation, and the wiring loom cleans everything up nice and tidy.

[Gertlex]’s new system of hanging monitors is great, but this simple puts some even cooler builds on the table. The sliding system is great, but by putting one monitor on its own carriage, you could have an infinitely reconfigurable monitor setup. Some proper bearings, 3D printed VESA mounts, and maybe even a few stepper motors would make a build like this the coolest battlestation rig since the great ‘capacitor plague and I have a soldering iron so free monitors’ spectacular of 2005.


Weird Clocks And A Two Chip Apple I

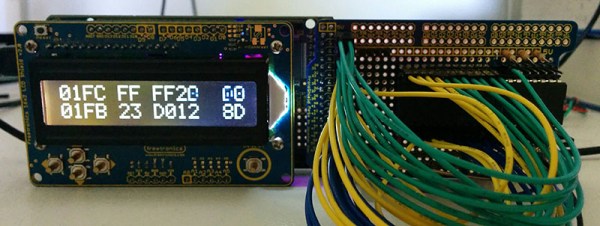
The Apple I, [Woz]’s original, had about sixty chips on a single board. Most of these chips were logic glue or hilariously ancient DRAMs. The real work was done by the 6502, the 6821 PIA, and the Signetics video chip. It’s a simple computer, really, and following the now popular tradition of two-chip computers, [Dave] built a replica of the Apple I using a 6502 and an ATMega.

The ATMega in this project takes care of everything – the 4k of RAM, the few bytes of ROM, the IO, and even the clock. With the 6502 you can have a little bit of fun with the clock; because the 6502 reads data off the bus a few nanoseconds off the falling edge of the clock and writes on the rising edge, [Dave] played around with the duty cycle of the clock to give the ATMega a bit more time to do its thing. With a 50% duty cycle, the 16Mhz ‘Mega has about eight cycles to decode an address and read or write some data. By making the low part of a clock cycle longer, he has about 45 cycles on the ‘Mega to do all the work. All of this was inspired by a fantastic tutorial on the 6502 clock.

Right now [Dave] has some hex values displaying on a small LCD, while the real I/O is handled by a serial connection to a computer. It’s retro enough, and a future update will include a faux cassette interface, possibly using an SD card for storage.

The Four Thousand Dollar MP3 Player

[Pat]’s friend got a Pono for Christmas, a digital audio player that prides itself on having the highest fidelity of any music player. It’s a digital audio device designed in hand with [Neil Young], a device that had a six million dollar Kickstarter, and is probably the highest-spec audio device that will be released for the foreseeable future.

The Pono is an interesting device. Where CDs have 16-bit, 44.1 kHz audio, the Pono can play modern lossless formats – up to 24-bit, 192 kHz audio. There will undoubtedly be audiophiles arguing over the merits of higher sampling rates and more bits, but there is one way to make all those arguments moot: building an MP3 player out of an oscilloscope.

Digital audio players are limited by the consumer market; there’s no economical way to put gigasamples per second into a device that will ultimately sell for a few thousand dollars. Oscilloscopes are not built for the consumer market, though, and the ADCs and DACs in a medium-range scope will always be above what a simple audio player can manage.

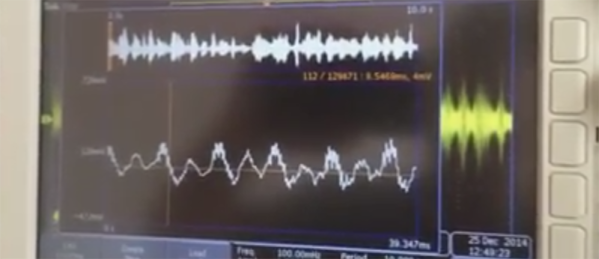
[Pat] figured the Tektronicx MDO3000 series scope sitting on his bench would be a great way to capture and play music and extremely high bit rates. He recorded a song to memory at a ‘lazy’ 1 Megasample per second through analog channel one. From there, a press of the button made this sample ready for playback (into a cheap, battery-powered speaker, of course).

Of course this entire experiment means nothing. the FLAC format can only handle a sampling rate of up to 655 kilosamples per second. While digital audio formats could theoretically record up to 2.5 Gigasamples per second, the question of ‘why’ would inevitably enter into the minds of audio engineers and anyone with an ounce of sense. Short of recording music from the master tapes or another analog source directly into an oscilloscope, there’s no way to obtain music at this high of a bit rate. It’s just a dumb demonstration, but it is the most expensive MP3 player you can buy.

Dual Porting A C64 Flash Cart

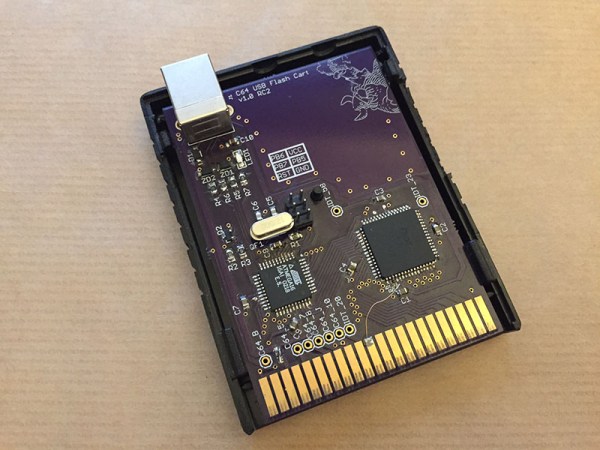
The old cartridges for the Commodore 64 use EEPROMs to store their data, and the newer Flash carts use either a Flash chip or an SD card to put a whole bunch of games in a small plastic brick. [Stian] and [Runar] thought that wasn’t good enough – they wanted to program cartridges in real time, the ability to reboot the C64 without ever touching it, and a device for coding and testing. What they came up with is the latest advance in Commodore cartridge technology.

The device presents 8k of memory to the C64, but it doesn’t do this with Flash or an EEPROM. Instead, [Stian] and [Runar] are using a dual-port static RAM, specifically one from the IDT7005 series. This chip has two data busses, two address busses, and /CE, /OE, and R/W lines for either side of the chip, allowing other digital circuits to be connected to one small section of the C64’s memory.

Also in the cart is an ATmega16 running V-USB to handle the PC communications. It takes about 1 to 1.5 seconds to transfer an entire 8k over to the cartridge, but this chip can read and write the RAM along with the C64 simultaneously.

If you want a box that will give you the ability to put ever game in existence on a single cartridge, this isn’t the one. However, if you want to write some C64 games and do some live debugging, this is the one for you. The Eagle files are available, and there’s a video demo below.

Continue reading “Dual Porting A C64 Flash Cart”

Making A Player Piano Talk MIDI

[Ramon] was always fascinated with pianos, and when he came across a few player piano rolls in an antique shop, a small kernel of a project idea was formed. He wondered if anyone had ever tried to convert a player piano into a full MIDI instrument, with a computer tickling the ivories with a few commands. This led to one of the best builds we’ve ever seen: a player piano connected to a computer.

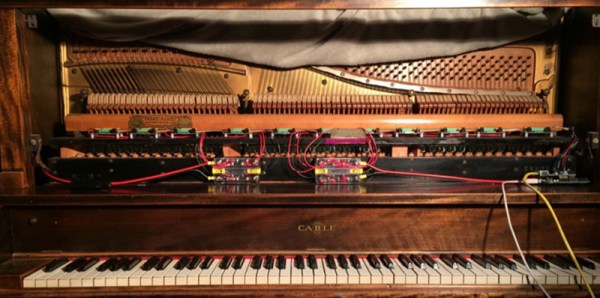
[Ramon] found an old piano in Craigslist for a few hundred dollars, and once it made its way into the workshop the teardown began. Player pianos work via a vacuum, where air is sucked through a few pin points in a piano roll with a bellows. A series of pipes leading to each key translate these small holes into notes. Replicating this system for a MIDI device would be impossible, but there are a few companies that make electronic adapters for player pianos. All [Ramon] would have to do is replicate that.

The lead pipes were torn out and replaced with 88 separate solenoid valves. These valves are controlled via a shift register, and the shift registers controlled by an ATMega. There’s an astonishing amount of electronic and mechanical work invested in this build, and the finished product shows that.

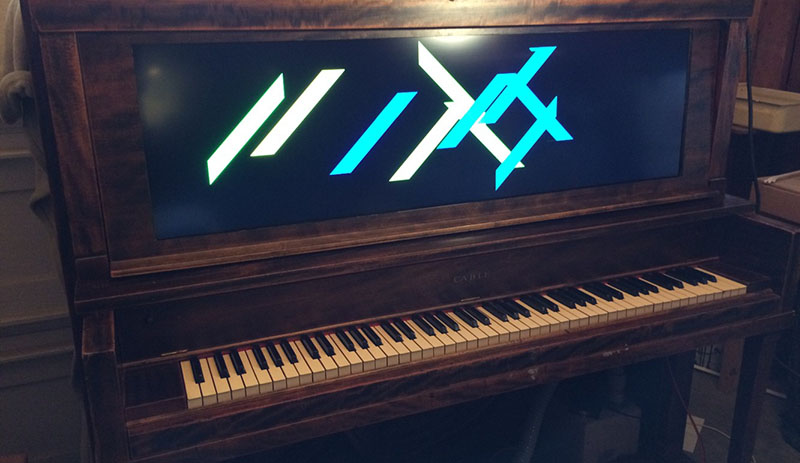
As if turning an ancient player piano into something that can understand and play MIDI music wasn’t enough, [Ramon] decided to add a few visuals to the mix. He found a display with a ratio of 16:4.5 – yes, half as tall as 16:9 – and turned the front of the piano into a giant display. The ten different styles of visualization were whipped up in Processing.

display

The piano has so far been shown at an interactive art exhibit in Oakland, and hopefully it’ll make it to one of the Maker Faires next year. There are also plans to have this piano output MIDI with a key scanner underneath all the keys. Very impressive work.

Video below.

Continue reading “Making A Player Piano Talk MIDI”