Get More Freedom With This Guitar Pedal

When the electric guitar was first produced in the 1930s, there was some skepticism among musicians as to whether or not this instrument would have lasting impact or be a flash-in-the-pan novelty. Since this was more than a decade before the invention of the transistor, it would have been hard then to imagine the possibilities that a musician nowadays would have with modern technology to shape the sound of an instrument like this. People are still innovating in this space as well as new technology appears, like [Gary Rigg] who has added a few extra degrees of freedom to a guitar effects pedal.

A traditional expression pedal, like a wah-wah pedal, uses a single motion to change an aspect of the sound of the guitar, and is generally controlled with the musician’s foot. [Gary]’s pedal, on the other hand, can be manipulated in three different ways to control separate elements of the instrument’s sound. It can be pitched forward and back like a normal effects pedal, but also rolled side-to-side and twisted around its yaw axis. The pedal has a built-in IMU to measure the various position changes of the pedal, which is then translated by an RP2040 microcontroller to a MIDI signal which controls the three different aspects of the sound digitally.

While the yaw motion might be difficult for a guitarist to create with their foot while playing, the idea for this pedal is still excellent. Adding in a few more degrees of freedom gives the musician more immediate control over the sound of their instrument and opens up ways of playing that might not be possible or easy with multiple pedals, with the MIDI allowing for versatility that might not be available in many analog effects pedals. Not every pedal needs MIDI though; with the help of a Teensy this digital guitar pedal has all its effects built into a self-contained package.
Continue reading “Get More Freedom With This Guitar Pedal”

Rebuilding The First Digital Personal Computer

When thinking of the first PCs, most of us might imagine something like the Apple I or the TRS-80. But even before that, there were a set of computers that often had no keyboard, or recognizable display beyond a few blinking lights. [Artem Kalinchuk] is attempting to recreate one of these very early digital computers, the Kenbak-1, using as many period-correct parts as possible.

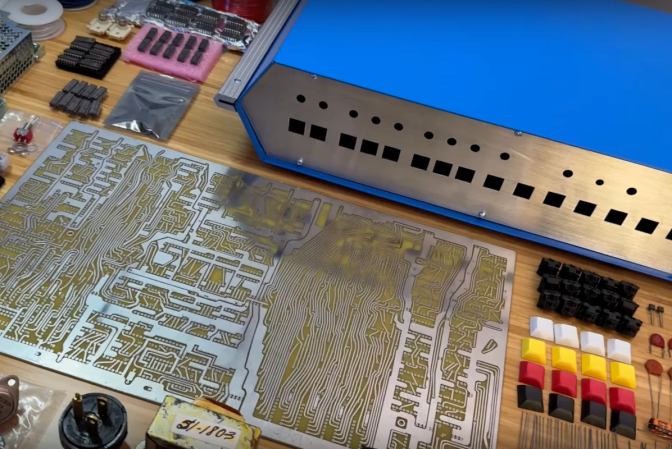
Considered by many to be the world’s first personal computer, the Kenbak-1 was an 8-bit machine with 256 bytes of memory, using TTL integrated circuits for the logic as there was no commercially available microprocessor available at the time it was designed. For [Artem]’s build, most of these parts can still be sourced including the 7400-series chips and carbon resistors although the shift registers were a bit of a challenge to find. A custom PCB was built to replicate the original, and with all the parts in order it’s ready to be assembled and put into a case which was built using the drawings for the original unit.

Although [Artem] plans to build a period-correct linear power supply for this computer, right now he’s using a modern switching power supply for testing. The only other major components that are different are the status lamps, in this case switched to LEDs because he wasn’t able to source incandescent bulbs that drew low enough current, and the switches which he’s replaced with MX-style keys. We’ll stay tuned as he builds and tests this over the course of several videos, but in the meantime if you’re curious how this early computer actually worked we featured an emulator for it a while back.

Continue reading “Rebuilding The First Digital Personal Computer”

The Sunchronizer Keeps Your Solar Panel Aligned

In the past few years, the price-per-watt for solar panels has dropped dramatically. This has led to a number of downstream effects beyond simple cost savings. For example, many commercial solar farms have found that it’s now cheaper to install a larger number of panels in fixed positions, rather than accepting the extra cost, maintenance, and complexity of a smaller number panels that use solar tracking to make up the difference. But although this practice is fading for large-scale power production, there are still some niche uses for solar tracking. Like [Fabian], if you need to maximize power production with a certain area or a small number of panels you’ll wan to to build a solar tracker.

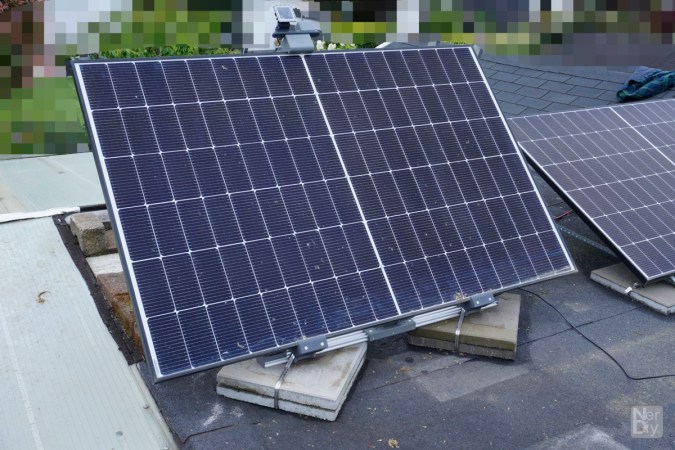
[Fabian]’s system is based on a linear actuator which can tilt one to four panels (depending on size) in one axis only. This system is an elevation tracker, which is the orientation generally with respect to latitude, with a larger elevation angle needed in the winter and a lower angle in the summer. [Fabian] also designs these to be used in places like balconies where this axis can be more easily adjusted. The actuator is controlled with an ESP32 which, when paired with a GPS receiver, can automatically determine the sun’s position for a given time of day and adjust the orientation of the panel to provide an ideal elevation angle on a second-by-second basis. The ESP32 also allows seamless integration with home automation systems like SmartHome as well.

Although this system only tracks the sun in one axis right now, [Fabian] is working on support for a second axis which mounts the entire array on a rotating table similar to an automatic Lazy Susan. This version also includes a solar tracking sensor which measures solar irradiance in the direction the panel faces to verify that the orientation of the panel is maximizing power output for a given amount of sunlight. Tracking the sun in two axes can be a complicated problem to solve, but some solutions we’ve seen don’t involve any GPS, programming, or even control electronics at all.

Continue reading “The Sunchronizer Keeps Your Solar Panel Aligned”

Autonomous Boat Plots Lake Beds

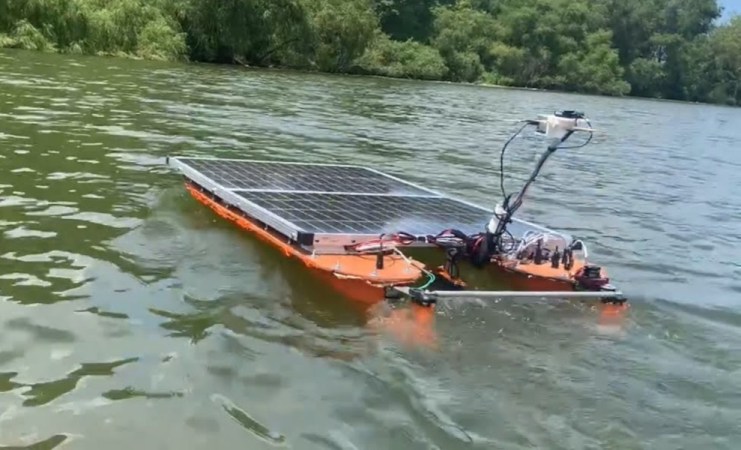
Although the types of drones currently dominating headlines tend to be airborne, whether it’s hobbyist quadcopters, autonomous delivery vehicles, or military craft, autonomous vehicles can take nearly any transportation method we can think of. [Clay Builds] has been hard at work on his drone which is actually an autonomous boat, which he uses to map the underwater topography of various lakes. In this video he takes us through the design and build process of this particular vehicle and then demonstrates it in action.

The boat itself takes inspiration from sailing catamarans, which have two hulls of equal size connected above the waterline, allowing for more stability and less drag than a standard single-hulled boat. This is [Clay]’s second autonomous boat, essentially a larger, more powerful version of one we featured before. Like the previous version, the hulls are connected with a solar panel and its support structure, which also provides the boat with electrical power and charges lithium-iron phosphate batteries in the hull. Steering is handled by two rudders with one on each hull, but it also employs differential steering for situations where more precise turning is required. The boat carries a sonar-type device for measuring the water depth, which is housed in a more hydrodynamic 3d-printed enclosure to reduce its drag in the water, and it can follow a waypoint mission using a combination of GPS and compass readings.

Like any project of this sort, there was a lot of testing and design iteration that had to go into this build before it was truly seaworthy. The original steering mechanism was the weak point, with the initial design based on a belt connecting the two rudders that would occasionally skip. But after a bit of testing and ironing out these kinks, the solar boat is on its way to measure the water’s depths. The project’s code as well as some of the data can be found on the project’s GitHub page, and if you’re looking for something more human-sized take a look at this solar-powered kayak instead.

Continue reading “Autonomous Boat Plots Lake Beds”

Original Game Boy Gets Display “Upgrade”

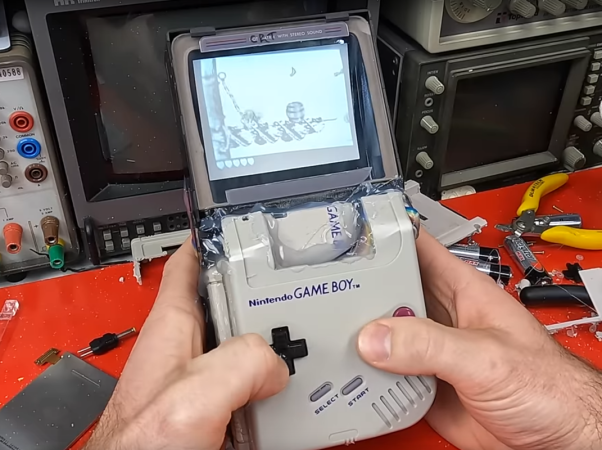
Before LCD and LED screens were ubiquitous, there was a time when the cathode ray tube (CRT) was essentially the only game in town. Even into the early 2000s, CRTs were everywhere and continuously getting upgrades, with the last consumer displays even having a semi-flat option. Their size and weight was still a major problem, though, but for a long time they were cutting edge. Wanting to go back to this time with their original Game Boy, [James Channel] went about replacing their Game Boy screen with a CRT.

The CRT itself is salvaged from an old video conferencing system and while it’s never been used before, it wasn’t recently made. To get the proper video inputs for this old display, the Game Boy needed to be converted to LCD first, as some of these modules have video output that can be fed to other displays. Providing the display with power was another challenge, requiring a separate boost converter to get 12V from the Game Boy’s 6V supply. After getting everything wired up a few adjustments needed to be made, and with that the CRT is up and running.

Unfortunately, there was a major speed bump in this process when [James Channel]’s method of automatically switching the display to the CRT let the magic smoke out of the Game Boy’s processor. But he was able to grab a replacement CPU from a Super Game Boy, hack together a case, and fix the problem with the automatic video switcher. Everything now is in working order for a near-perfect retro display upgrade. If you’d like to do this without harming any original hardware, we’ve seen a similar build based on the ESP32 instead.

Continue reading “Original Game Boy Gets Display “Upgrade””

Building AI Models To Diagnose HVAC Issues

HVAC – heating, ventilation, and air conditioning – can account for a huge amount of energy usage of a building, whether it’s residential or industrial. Often it’s the majority energy consumer, especially in places with extreme climates or for things like data centers where cooling is a large design consideration. When problems arise with these complex systems, they can go undiagnosed for a time and additionally be difficult to fix, leading to even more energy losses until repairs are complete. With the growing availability of platforms that can run capable artificial intelligences, [kutluhan_aktar] is working towards a system that can automatically diagnose potential issues and help humans get a handle on repairs faster.

The prototype system is designed for hydronic (water-based) systems and uses two separate artificial intelligences, one to analyze thermal imagery of the system and look for problems like leaks, hot spots, or blockages, and the other to listen for anomalous sounds especially relating to the behavior of cooling fans. For the first, a CNC-like machine was built to move a thermal camera around a custom-built model HVAC system and report its images back to a central system where they can be analyzed for anomalies. The second system which analyses audio runs its artificial intelligence on a XIAO ESP32C6 and listens to the cooling fans running in the model.

One problem that had to be tackled before any of this could be completed was actually building an open-source dataset to train the AI on. That’s part of the reason for the HVAC model in this project; being able to create problems to train the computer to detect before rolling it out to a larger system. The project’s code and training models can be found on its GitHub page. It seems to be a fairly robust solution to this problem, though, and we’ll be looking forward to future versions running on larger systems. Not everyone has a hydronic HVAC system, though. As heat pumps become more and more popular and capable, you’ll need systems to control those as well.

Tiny Trackpad Fits On Ergonomic Keyboard

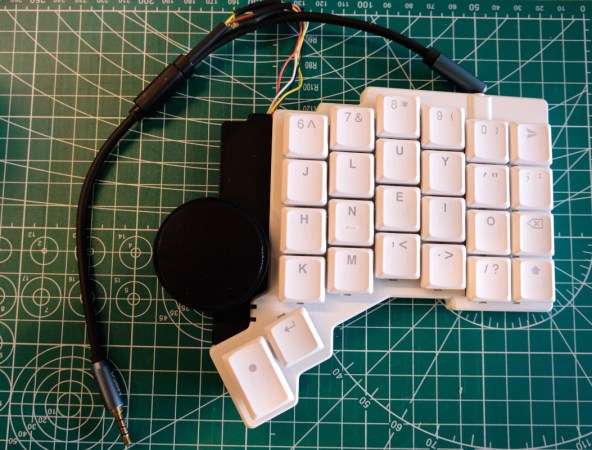
Cats are notorious for interrupting workflow. Whether it’s in the kitchen, the garden, or the computer, any feline companion around has a way of getting into mischief in an oftentimes disruptive way. [Robin] has two cats, and while they like to sit on his desk, they have a tendency to interrupt his mouse movements while he’s using his Apple trackpad. Rather than solve the impossible problem of preventing cats from accessing areas they shouldn’t, he set about building a customized tiny trackpad that integrates with his keyboard and minimizes the chance of cat interaction.

The keyboard [Robin] uses is a split ergonomic keyboard. While some keyboards like this might use a standard USB connection to join the two halves, the ZSA Voyager uses I2C instead and even breaks the I2C bus out with a pogo pin-compatible connector. [Robin] originally designed a 3D-printed integrated prototype based on a Cirque trackpad that would clip onto the right side of the keyboard and connect at this point using pogo pins, but after realizing that the pogo pin design would be too difficult for other DIYers to recreate eventually settled on tapping into the I2C bus on the keyboard’s connecting cable. This particular keyboard uses a TRRS connector to join the two halves, so getting access to I2C at this point was as simple as adding a splitter and plugging in the trackpad.

With this prototype finished, [Robin] has a small trackpad that seamlessly attaches to his ergonomic keyboard, communicates over a standard protocol, and avoids any unwanted cat-mouse action. There’s also a build guide if you have the same keyboard and want to try out this build. He does note that using a trackpad this small involves a bit of a learning curve and a larger-than-average amount of configuration, but after he got over those two speed bumps he hasn’t had any problems. If trackpads aren’t your style, though, with some effort you can put a TrackPoint style mouse in your custom mechanical keyboard instead.