A one-string bass violin made from two washtubs, some plywood, a Louisville Slugger, and some weed whacker line.

Louisville Slugger Puts This Bass On Base

One of the most recognizable instruments in both jug band and American folk music has got to be the washtub bass. Also known as gutbuckets, these instruments tend to use an old broom for a neck and usually have a single string.

A nifty DIY wooden tool for turning a wingnut with ease.We would argue that the design of [goaly]’s single-string double gutbucket owes something to the double bass of the violin family as well, with its figure eight shape. On top of those tubs is a plywood soundboard, which is screwed into a series of wood blocks around the lip of the tubs.

For the combination neck and fretboard, [goaly] called up a vintage Louisville Slugger, which is way more interesting than some old broom handle. [goaly] extended the backbone through the body with scrap lengths of 2″x2″, and this spine runs through both tubs and acts as a peg on the bottom. In lieu of a tailpiece, the string is tied to a board that the player secures with their foot.

Although [goaly] experimented with steel cable, clothesline rope, nylon rope, and paracord first, the string is made from weed whacker trimmer line. At the top, the string is attached through the neck — it’s held down with a couple of bent fender washers and pulled taut with a wingnut. We love that [goaly] even fashioned a wooden tool to make it easy to turn the wingnut. And we also love the DIY bridge, which looks like a little person.

There are a couple of ways to make sounds with this thing. Fretting and plucking work, of course, but so does bending the whole thing backward to change the pitch. For a good time, do both. We think it sounds nice and thump-y, and it even makes great percussive sounds on the front and back. Check it out in action after the break.

Don’t have a washtub? A wheelbarrow works too, and it comes with its own stand.

Continue reading “Louisville Slugger Puts This Bass On Base”

Unique Pomodoro Timer Displays Quotes While You Work

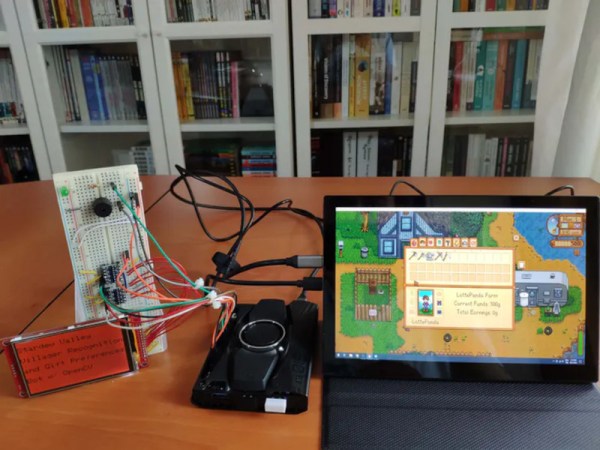
[zorbash] came up with a great side project while designing a way to read notes and highlighted sections from e-books without having to use Good Reads or the Amazon tool: build a gadget to display a parade of quotes from favorite authors and their books. The project is called Brain because it’s built on an IoT platform called Nerves.

As a bonus, the gadget functions as a Pomodoro timer of sorts — that’s the time management method where you work for 25-minute periods and take 5-minute breaks in between, with a longer break every four Pomodoros. Brain displays a quote for 25 minutes and then flashes the screen to draw [zorbash]’s attention to the fact that time is up. We think this is a nice, unobtrusive way to do things. There are no breaks built in, but that’s just how [zorbash] rolls.

The quotes are fetched using Bookworm, a script [zorbash] wrote that’s available on GitHub. It uses a Raspberry Pi 2 B, an SD card to store the JSON’d quotes, and a Wi-Fi dongle to allow the fetching. If you’re wondering about the enclosure, it’s made of clay.

If you like your Pomodoro timers a little more physical, here’s one that starts as soon as you plug it in to a USB port.

Pulp-Molding: A Use For Cardboard Confetti

We’re pretty sure that we don’t have to tell you how great cardboard is. You probably sing the praises yourself and use it for everything from a work surface protective layer to a prototype of your next amazing build. But if you still find yourself flush with cardboard even after all that, here’s one thing you can do with all those pieces that are too small to use for anything else– chuck them in an old blender, whip up some cardboard pulp, and press that gunk into some 3D-printed molds.

In addition to a step-by-step of the process, [flowalistik] offers a mold set of STL files for various useful items like a pencil holder, a box with a lid, a tray, and a coaster, as well as the Fusion 360 files in case you want to change them around. You might want to seal the coaster with something protective so that it doesn’t mold/disintegrate/bloom from condensation.

Each part consists of the walls, the wall clip that keeps them closed, but allows for de-molding and reuse, the bottom lid, and the top lid. All these prints need to be pretty high-res so that they can withstand the pressure of the clamp holding it all together. [flowalistik] recommends a layer height no larger than .03mm and a 20% infill.

The process of making the pulp itself is fairly simple, and the recipe only calls for water and some kind of binder. To start, remove all tape, coatings, staples, and anything else non-soluble from the cardboard. Cut it into bite-sized pieces your blender will enjoy, and add water and PVA glue or rice paste. Mix it up, remove the excess water by squeezing your pulp inside of a piece of cloth, and then use it to fill up your mold. You’ll want to press out the water as you go and fill it further, then finally apply the clamp. You can start de-molding parts on a schedule, starting with the clamp after about six hours. Once it’s fully dried in about two days, you can treat it like MDF and sand, cut, or even drill it. We think some of these would look pretty good with a coat of paint.

Need your objects to be more sturdy? Keep that printer warmed up — you can use prints to cast concrete, too.

The Metabolizer Is Turning Trash Into Treasure Even Faster Now

Do you remember [Sam Smith]’s Metabolizer from a few years back? In case you’ve forgotten, this baby takes trash and turns it into printed plastic objects, and it’s solar-powered to boot. Although the Metabolizer didn’t win the 2018 Hackaday Prize, [Sam] and his machine won many achievements that year, including the Open Hardware Challenge. It’s fantastic to see the project still improving.

To recap, the sun hits the solar panels and charge up the battery bank. Once there’s enough power to start the reaction, it gets dumped into a heating element that turns biomass into biochar. This smoke is cooled, collected, refined, and fed into a small gas generator, which produces DC power to run a 3/4-horsepower shredder and the trash printer.

[Sam] likens this beast to a Rube Goldberg machine in that it performs an overly-complicated chain reaction to do a simple task. We certainly see his point, but we think that this machine is worth so much more than those classic machines, which tend to do nothing useful at all and tend to consume many resources in the process.  On the contrary, the Metabolizer’s chain reaction starts with sunshine and ends with useful objects that keep plastic out of landfills. Honestly, it’s more akin to a compost heap with a PhD in Biology and a handful of steroids and a 3D printer attached.

Unfortunately, [Sam] couldn’t get a prototype working in time for the Prize, and he turned to Patreon to gain support after the $1,000 ran out. Three years and a ton of improvements later, [Sam] has a working prototype that’s cheaper, more efficient, and easier to build. But can it be built relatively easily by someone other than [Sam]? Consider the gauntlet thrown down.

Not happy with your standard-style compost pile? You need a DIY trommel to sift out the bad stuff.

A monoblock split keyboard with the all-important num pad.

Back-to-the-Office Ergo Brings A Bit Of Home Sweet Home

We sure do love a good one-piece split keyboard, and it’s not just because you never have to worry about the halves drifting too far apart throughout the day, though that’s a big plus. For one thing, the angles are always just right without having to mess with anything, so muscle memory gets you back to the home row every time. Usually, the only thing missing from these mono-block splits is the num pad. Well, not on the SuperLyra.

This is [Malevolti]’s back-to-the-office build, and it’s sure to start a few conversations. While we don’t have a lot of details, there will be plenty forthcoming on the Black Cat Plasticworks website. As soon as next year, [Malevolti] plans to sell fully-assembled SuperLyras, kits, and bare-bones PCBs. We really appreciate that it allows for either MX-type switches or Chocs, depending on the hot swap sockets installed.

As much as we love the Maltron-esque num pad in the middle, we imagine that it would be more comfortable to use if it were canted at 45° angle relative to the user’s dominant hand. Fortunately, some enterprising redditor had the same idea. They’ve already mocked this up in Photoshop and are inviting comments on another thread.

Want to go split, but don’t know which is right for you? Check out this Split Keyboard Finder.

A 3D-printed maypole braider can produce woven tubes of rope, yarn, or whatever you've got. Al dente spaghetti strands, maybe.

3D-Printed Braiding Machine Will Show You The Ropes

A maypole braider, aka a circular braider, is a type of horn gear braider that makes braided tubes, like one of those woven finger traps or that lovely bit of gutted paracord that’s jazzing up your otherwise boring DIY USB cable. They are called so because the action mimics the motion of a group of maypole dancers bobbing and weaving around each other in an intricate choreography that results in an equally intricate pole decoration job.

A 3D-printed model showing the motion of a maypole braider. Maypole braiders like [kmatch98]’s are responsible for all kinds of ropes, cords, and other braided goods like fly-fishing lines. They use three or more bobbins, each loaded up with a single strand of yarn.

One of the most important parts of braiding anything, including hair, is maintaining tension on the braid as you go. Here, each bobbin rides inside a bobbin carrier, which performs a number of tasks — it holds the bobbin in place, releases yarn when it’s supposed to, and maintains tension on the yarn while skating a figure eight around the track.

This mesmerizing machine consists of spur gears, a frame with a figure 8 track, a pair of horn gears, and a foot — a guide on the bottom of the bobbin that rides along in the track. Early on, [kmatch98] made a fidget spinner version to visualize the basic function. He studied pictures of commercial bobbin carriers and managed to not only reverse engineer them, but improve the design by eliminating one of the two springs and replacing it with gravity. The remaining spring is used for the bobbin release.

Surprisingly, this isn’t the first plastic braiding machine we’ve featured. Here’s one made of freakin’ LEGO.

Three More Remoticon Speakers Complete The Lineup

You know, it’s hard to believe, but Hackaday Remoticon 2021 is just two weeks away. Every year, we work hard to make the ‘con a little better and brighter than the one before it, and this year is no exception. We’ve already got a star-studded list of keynote speakers, and our list of inspiring talks seems to get longer and more exciting every week. With todays announcement of three more speakers, that list is complete and available along with their scheduled times on the official Remoticon website.

Come and see what we’ve got in store for you on Friday, November 19th and Saturday, November 20th. Remoticon admission is absolutely free this year, unless you want a t-shirt to commemorate the event for a paltry $25. Tickets are still available — in fact, they’ll be available right up until Remoticon Day One on the 19th, but if you want a shirt you’ll need to grab one of those tickets by a week from today. Go get yours now!

Okay, let’s get on to today’s announcement of the speakers!

Continue reading “Three More Remoticon Speakers Complete The Lineup”