The Ham Radio All-in-one cable (AIOC) is a small PCB attachment for a popular series of radio transceivers which adds a USB-attached audio interface and virtual TTY port for programming and the push-to-talk function. The STM32F373 microcontroller (which, sadly is still hard to find in the usual channels) is a perfect fit for this application, with all the needed hardware resources.
With USB-C connectivity, the AIOC enumerates as a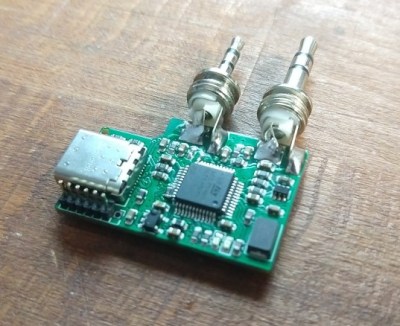 sound card as well as a virtual serial device, so interfacing to practically any host computer should be plug-and-play. Connection to the radio uses 12mm separation 3.5mm and 2.5mm TRS connectors, so is compatible with at least the Baofeng UV-5R but likely many other cheap transceivers that have the same physical setup.
Instructions are provided to use the AIOC with Dire Wolf for easy access to APRS applications, which makes a nice out-of-the-box demo to get you going. APRS is not all about tracking things though since other applications can sit atop the APRS/AX.25 network, for example, HROT: the ham radio of things.
We’ve seen quite a few Baofeng (and related products) hacks, like this sketchy pile of wires allowing one to experiment with the guts of the radio for APRS. Of course, such cheap radio transceivers cut so many engineering corners that there are movements to ban their sale, so maybe a new batch of better radios from our friends in the East is on the horizon?
Thanks to [Hspil] for the tip!