Web scraping is usually only a first step towards extracting meaningful data. Once you’ve got everything pulled down, you’ve still got to process it into something useful. Here to assist with that is Scrapegraph-ai, a Python tool that promises to automate the process using a selection of large language models (LLMs).
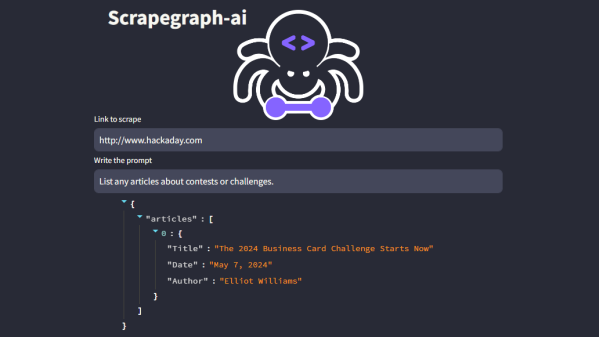
Scrapegraph-ai is able to accept a URL as well as a prompt, which is a plain-English instruction on what to do with the data. Examples include summarizing, describing images, and more. In other words, gathering the data and analyzing or formatting it can now be done as one.
The project is actually pretty flexible in terms of the AI back-end. It’s able to work with locally-installed AI tools (via ollama) or with API keys for services like OpenAI and more. If you have an OpenAI API key, there’s an online demo that will show you the capabilities pretty effectively. Otherwise, local installation is only a few operations away.
This isn’t the first time we have seen the flexibility of AI tools like large language models leveraged to ease the notoriously-fiddly task of web scraping, and it’s great to see the results have only gotten better.