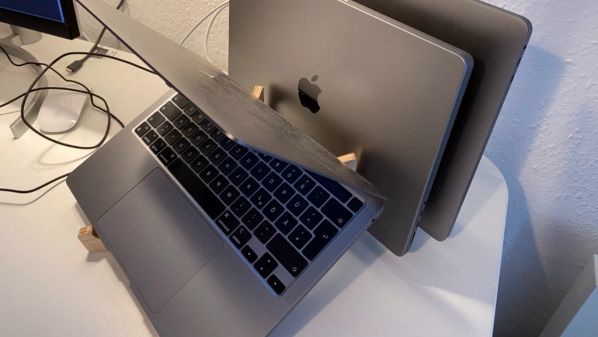
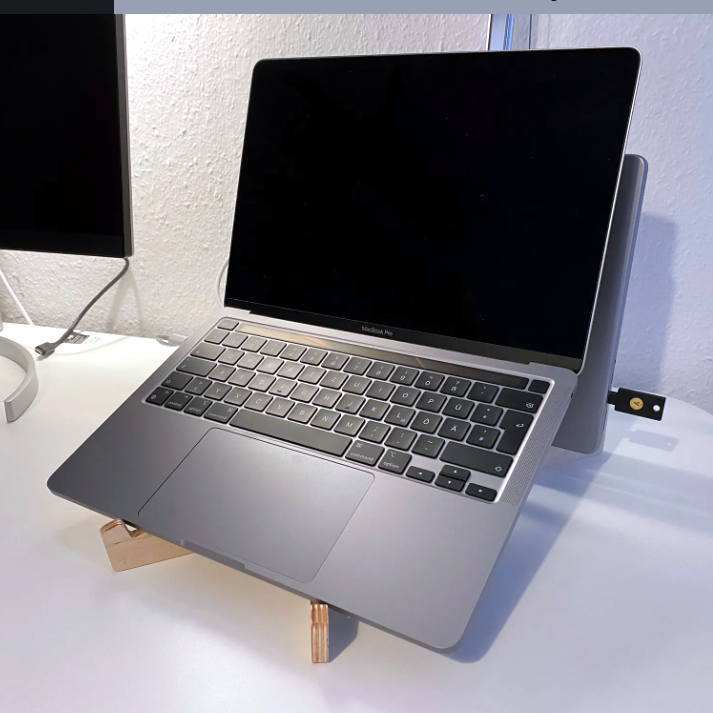
For all their portability, multiple laptops can be a bit clunky to manage on a desk, so [Marco]’s solution definitely saves space while keeping things accessible. The laptop in the front can be open for use and easy access, while the two in the back are held vertically and can be attached to external monitors or other peripherals.
Not only does it save space, but the stand provides ample spots to anchor cable ties for securing the inevitable mess of wires and cables that dealing with three laptops brings. It makes for a tidier desk, that’s for sure.
The stand was designed in Fusion 360 and was cut from plywood with a CNC router. Does this design give you any ideas, or would you like to make one for yourself? The design files are here.
One may think that when it comes to 3D printing, slicing software is pretty much a solved problem. Take a 3D model, slice it into flat layers equal to layer height, and make a toolpath so the nozzle can create those layers one at a time. However, as 3D printing becomes more complex and capable, this “flat planar slicing” approach will eventually become a limitation because a series of flat slices won’t necessarily the best way to treat all objects (nor all materials or toolheads, for that matter.)
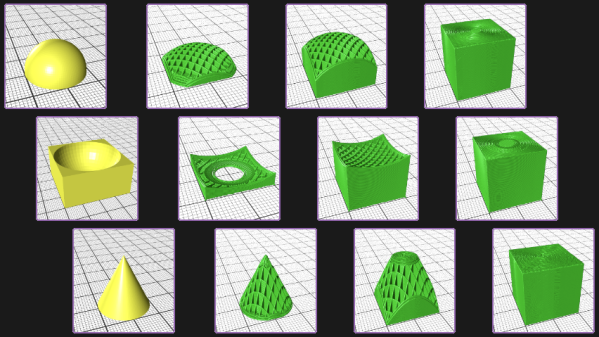
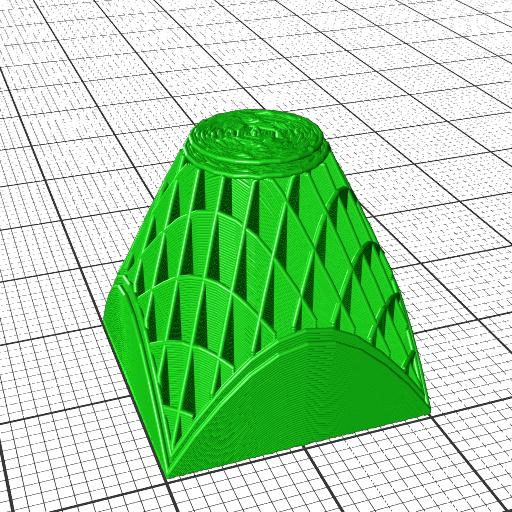
How a 20 mm cube looks when sliced in a cone-shaped plane.
[René K. Müller] works to re-imagine slicing itself, and shows off the results of slicing 3D models using non-planar geometries. There are loads of pictures of a 20 mm cube being sliced with a variety of different geometries, so be sure to give it a look. There’s a video embedded below the page break that covers the main points.
It’s all forward-thinking stuff, and [René] certainly makes some compelling points in favor of a need for universal slicing; a system capable of handling any geometry, with the freedom to process along any path or direction. This is a concept that raises other interesting questions, too. For example, when slicing a 20 mm cube with non-planar geometries, the resulting slices often look strange. What’s the best way to create a toolpath for such a slice? After all, some slicing geometries are clearly better for the object, but can’t be accommodated by normal hot ends (that’s where a rotating, tilted nozzle comes in.)
Such worries may not be an issue for most users at the moment, but it’s worth trying to get ahead of the curve on something like this. And lest anyone think that non-planar slicing has no practical purpose, we previously covered [René]’s demonstration of how non-planar slicing can reliably create 90° overhangs with no supports.
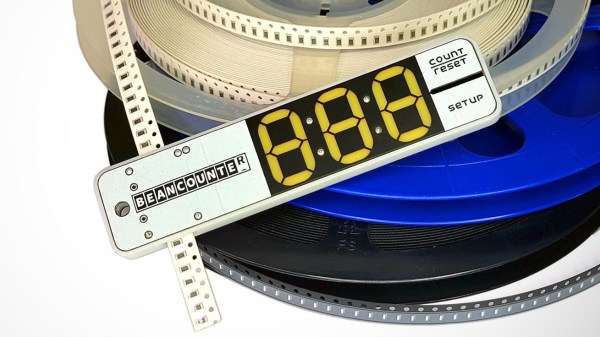
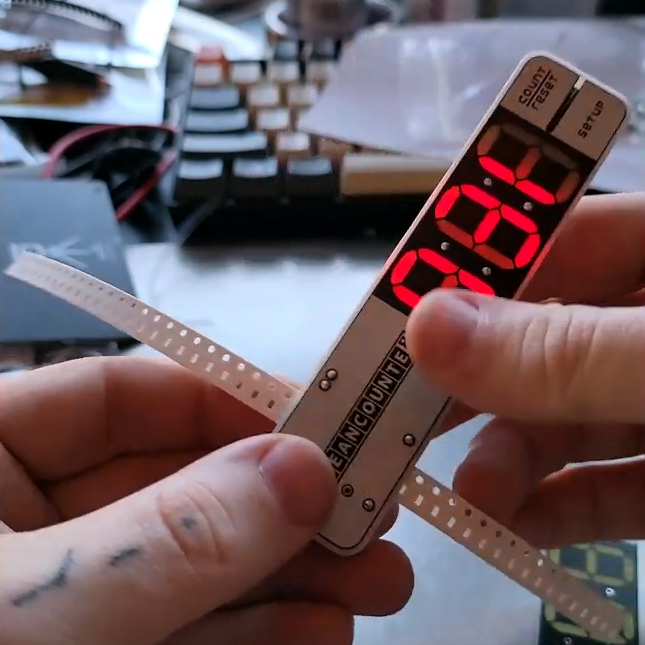
[Nick Poole] has an interesting idea for a new tool, one that has the simple goal of making accurate part counts of SMT reels as easy as pulling tape through a device. That device is the BeanCounter, an upcoming small handheld unit of his own design that counts parts as quickly as one can pull tape through a slot. The device is powered by a CR2032 cell and and works with 8 mm wide tapes up to 2 mm in height, which [Nick] says covers most 0805 or smaller sized parts, as well as things like SOT-23 transistors.
Why would one want to make such a task easier? Two compelling reasons for such a tool include: taking inventory of parts on partial reels or cut tape, and creating segments that contain a known number of parts.
The first is handy for obvious reasons, and the second is useful for things like creating kits. In fact, the usefulness of this tool for creating tape segments of fixed length is perhaps not obvious to anyone who hasn’t done it by hand. Sure, one can measure SMT tape with a ruler or a reference mark to yield a segment containing a fixed number of parts, but that involves a lot of handling and doesn’t scale up very well. In fact, the hassle of cutting tape segments accurately and repeatedly is a common pain point, so making the job easier has value.
If you looked at the photos and suspected that the big, 7-segment numeric display is done with clever PCB fabrication options (making segments by shining LEDs through PCB layers, a trick we always like to see) you’re not alone. After all, [Nick] has a lot of experience in getting clever with board fabrication, and eagle-eyed readers may even suspect that the reset and setup buttons on the edge of the tool are created by using flex PCB segments as switches. Want the nitty-gritty details? Visit the GitHub repository for the project and see it all for yourself at the CAD level.
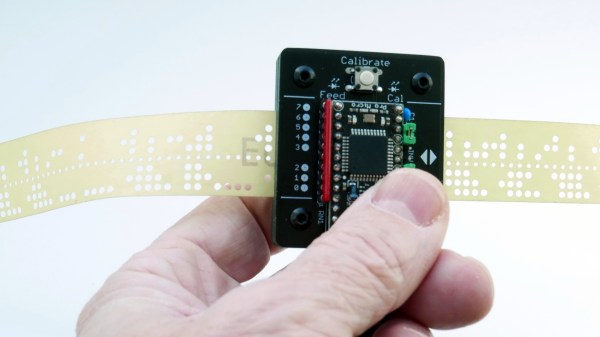
Input devices consisting of optical readers for punched paper tape have been around since the earliest days of computing, so why stop now? [Jürgen]’s Paper Tape Reader project connects to any modern computer over USB, acting like a serial communications device. Thanks to the device’s automatic calibration, it works with a variety of paper materials. As for reading speed, it’s pretty much only limited to how fast one can pull tape through without damaging it.
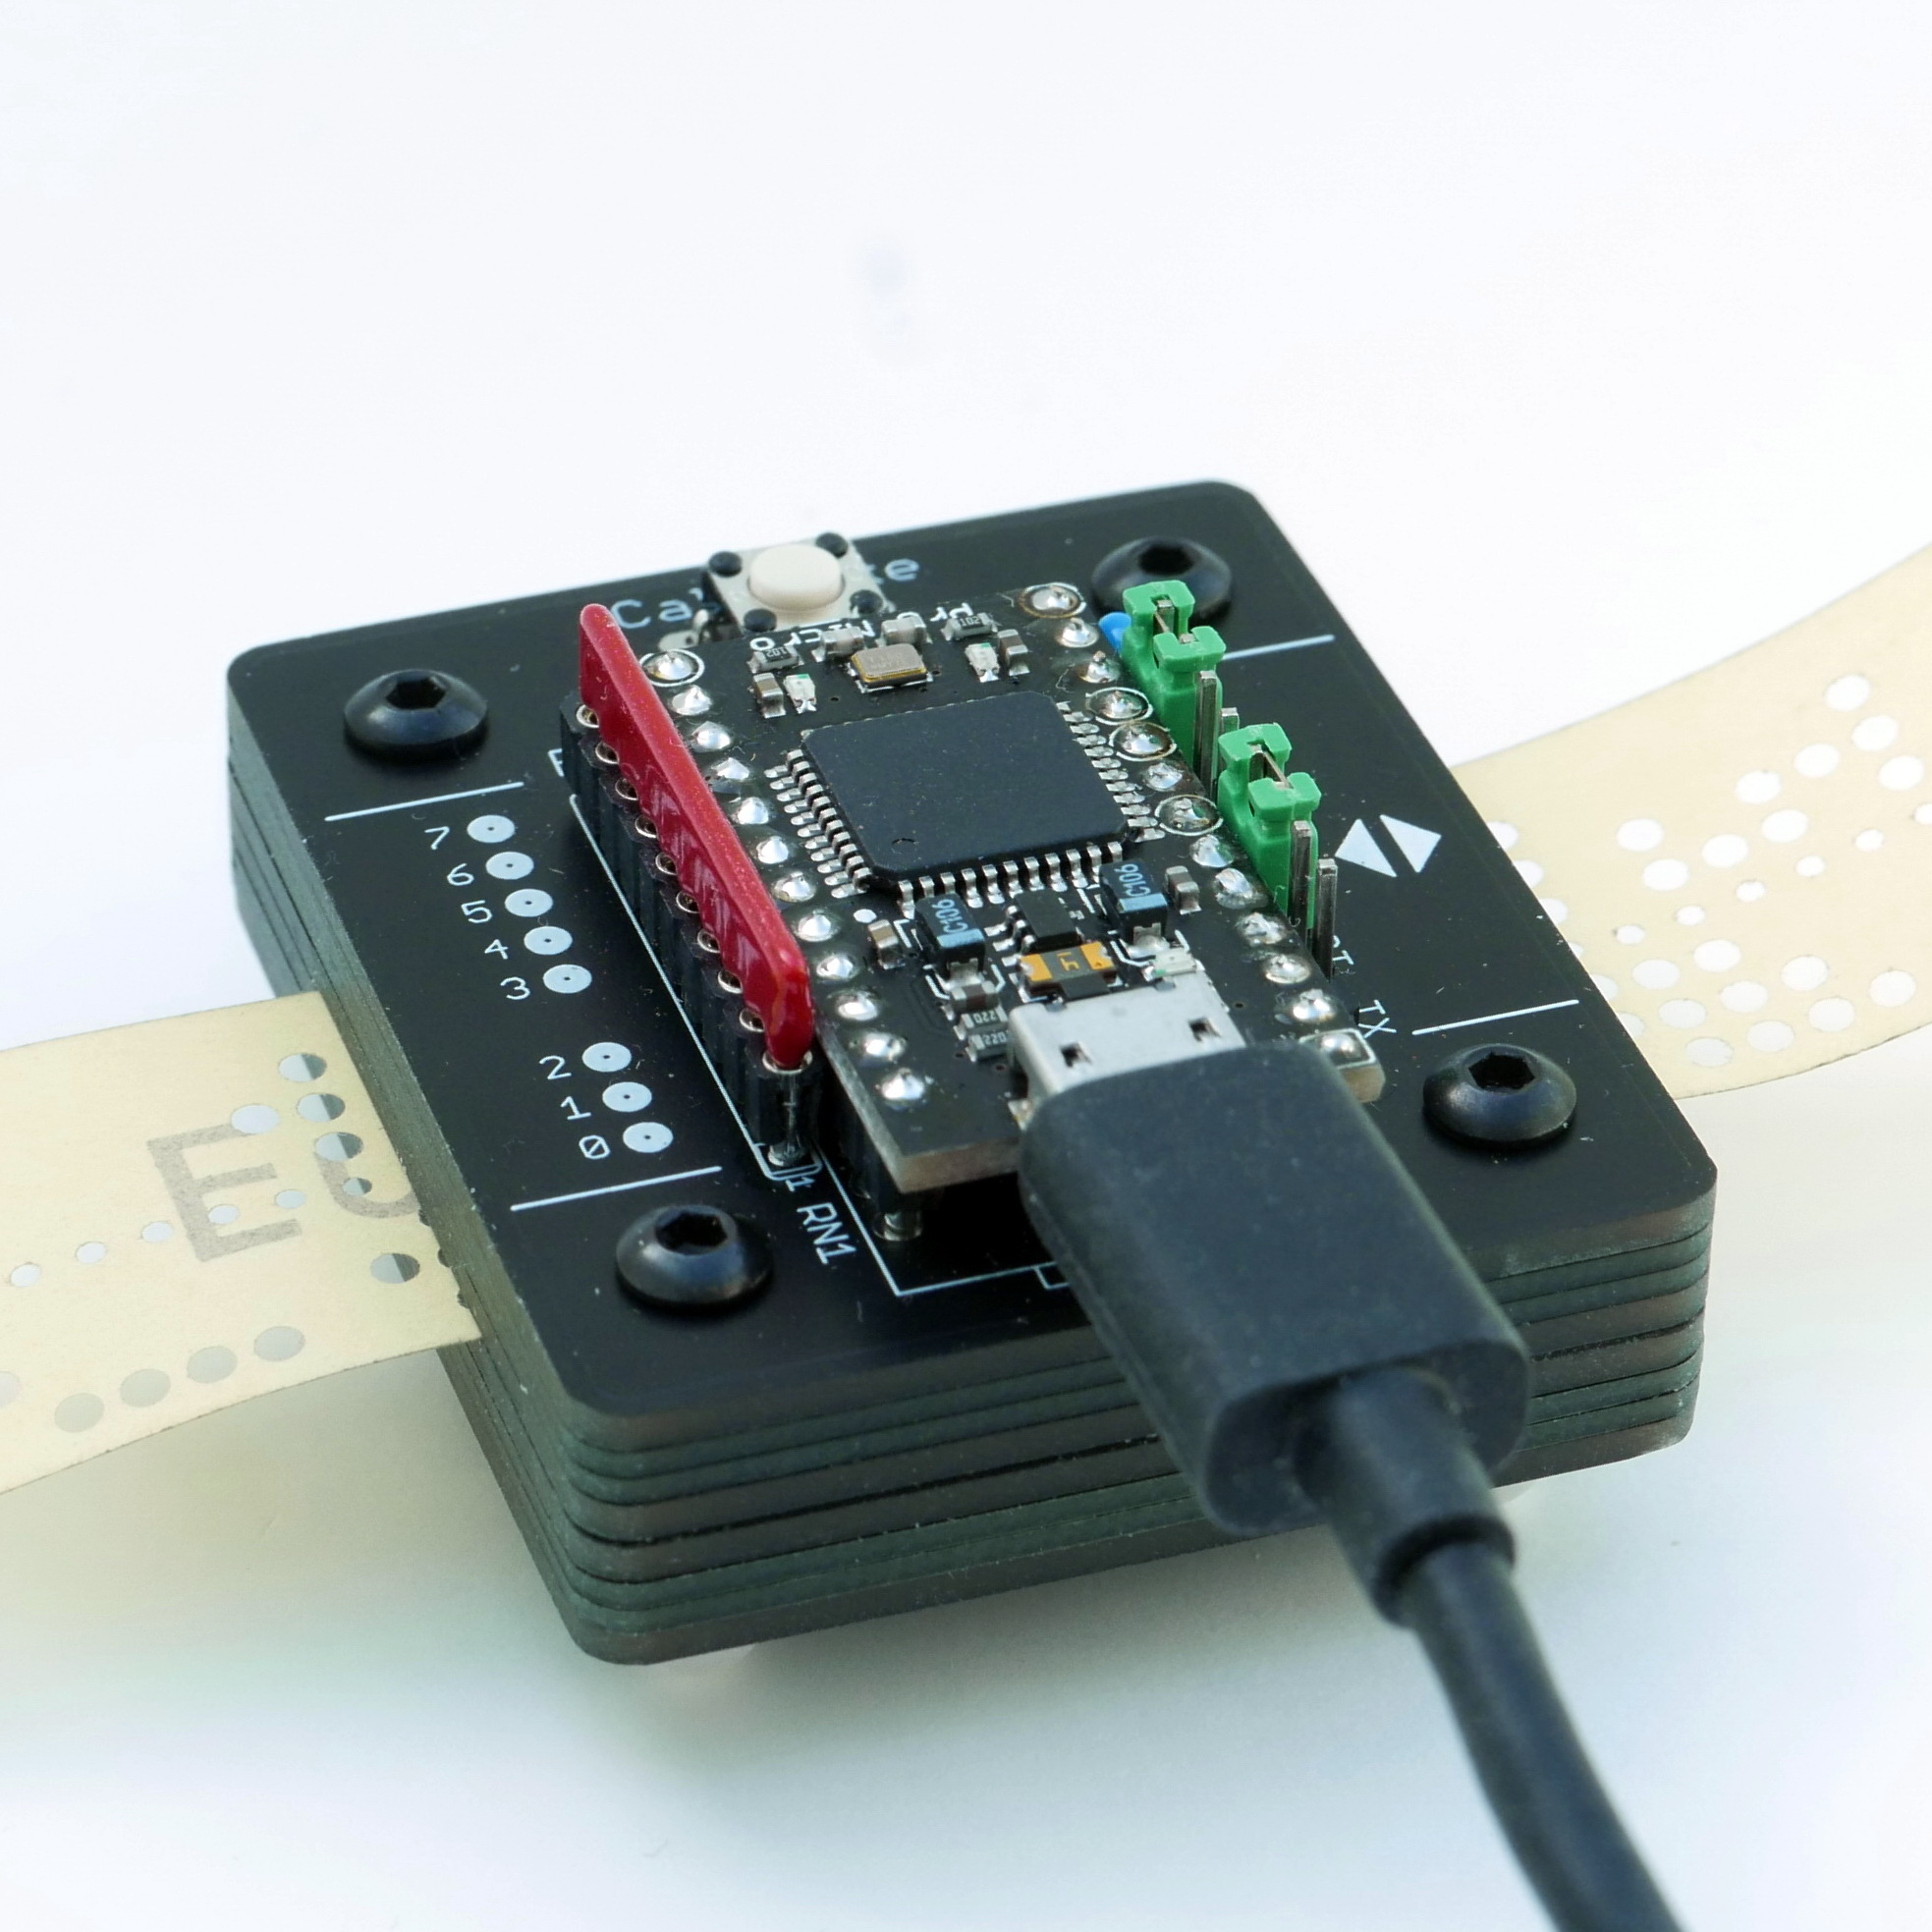
Stacked 1.6 mm PCBs act as an enclosure, of sorts.
While [Jürgen]’s device uses LEDs and phototransistors to detect the presence or absence of punched holes, it doesn’t rely on hardware calibration. Instead, the device takes analog readings of each phototransistor, and uses software-adjusted thresholds to differentiate ones from zeros. This allows it to easily deal with a wide variety of tape types and colors, even working with translucent materials. Reading 500 characters per second isn’t a problem if the device has had a chance to calibrate.
Interested in making your own? The build section of the project has all the design files; it uses only through-hole components, and since the device is constructed from a stack of 1.6 mm thick PCBs, there’s no separate enclosure needed.
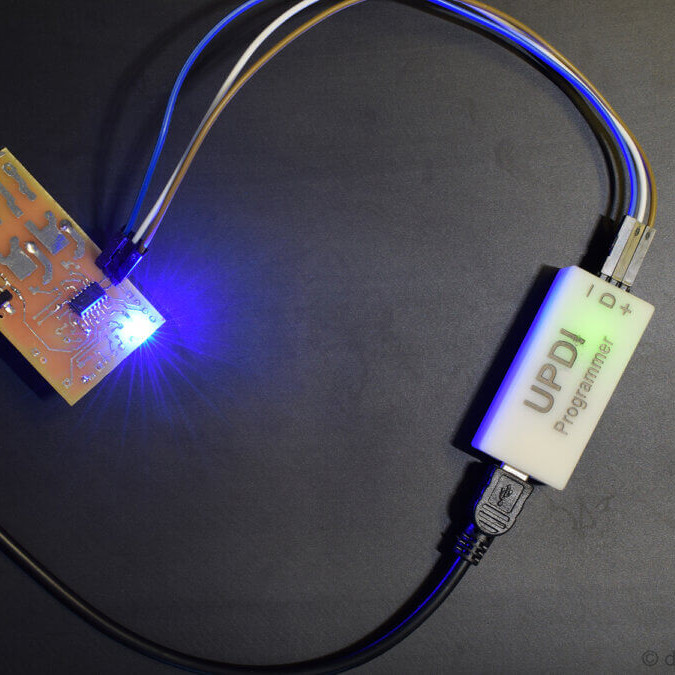
[Daumemo] likes experimenting with DIY electronics, and like many people, eventually ran across an AVR microcontroller with a Unified Program and Debug Interface (UPDI). One option is of course to purchase an UPDI programmer, but an even better solution was to make a DIY USB version from nice, cheap parts.
Programming an Attiny404 over the UPDI interface.
UPDI is an interface for external programming and on-chip debugging of microcontrollers, and [Daumemo]’s solution is based on the jtag2updi project. It combines an Arduino Nano (in this case, a clone) with a single resistor, a single capacitor, and a six pin angled header (with a cleverly bent pin) to enable programming UPDI devices over a USB connection. [Daumemo] is happy to report that the device works just fine in both Microchip Studio with AVRDUDE, or PlatformIO.
Is an Arduino Nano a bit overpowered in this role? Maybe, but the price is certainly right. There’s no need for a custom PCB either, since everything can be soldered direct to the Nano board. A matching 3D printed enclosure is about all that’s needed to make a robust and reliable DIY USB UPDI programmer out of a handful of parts, and that sounds good to us.
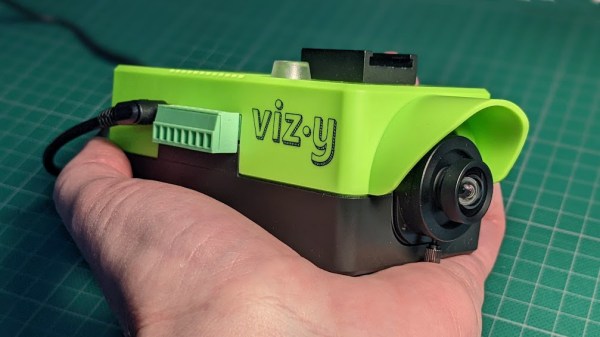
Vizy is a Linux-based “AI camera” based on the Raspberry Pi 4 that uses machine learning and machine vision to pull off some neat tricks, and has a design centered around hackability. I found it ridiculously simple to get up and running, and it was just as easy to make changes of my own, and start getting ideas.
Out of the box, Vizy is only a couple lines of Python away from being a functional Cat Detector project.
I was running pre-installed examples written in Python within minutes, and editing that very same code in about 30 seconds more. Even better, I did it all without installing a development environment, or even leaving my web browser, for that matter. I have to say, it made for a very hacker-friendly experience.
Vizy comes from the folks at Charmed Labs; this isn’t their first stab at smart cameras, and it shows. They also created the Pixy and Pixy 2 cameras, of which I happen to own several. I have always devoured anything that makes machine vision more accessible and easier to integrate into projects, so when Charmed Labs kindly offered to send me one of their newest devices, I was eager to see what was new.
I found Vizy to be a highly-polished platform with a number of truly useful hardware and software features, and a focus on accessibility and ease of use that I really hope to see more of in future embedded products. Let’s take a closer look.
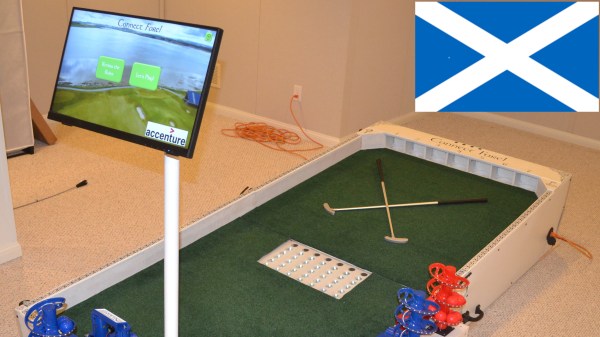
We’ve just come across [Bithead]’s amazing, robotically-automated mashup of miniature golf and Connect Four, which also includes an AI opponent who pulls no punches in its drive to win. Connect Fore! celebrates Scotland — the birthplace of golf, after all — and looks absolutely fantastic.
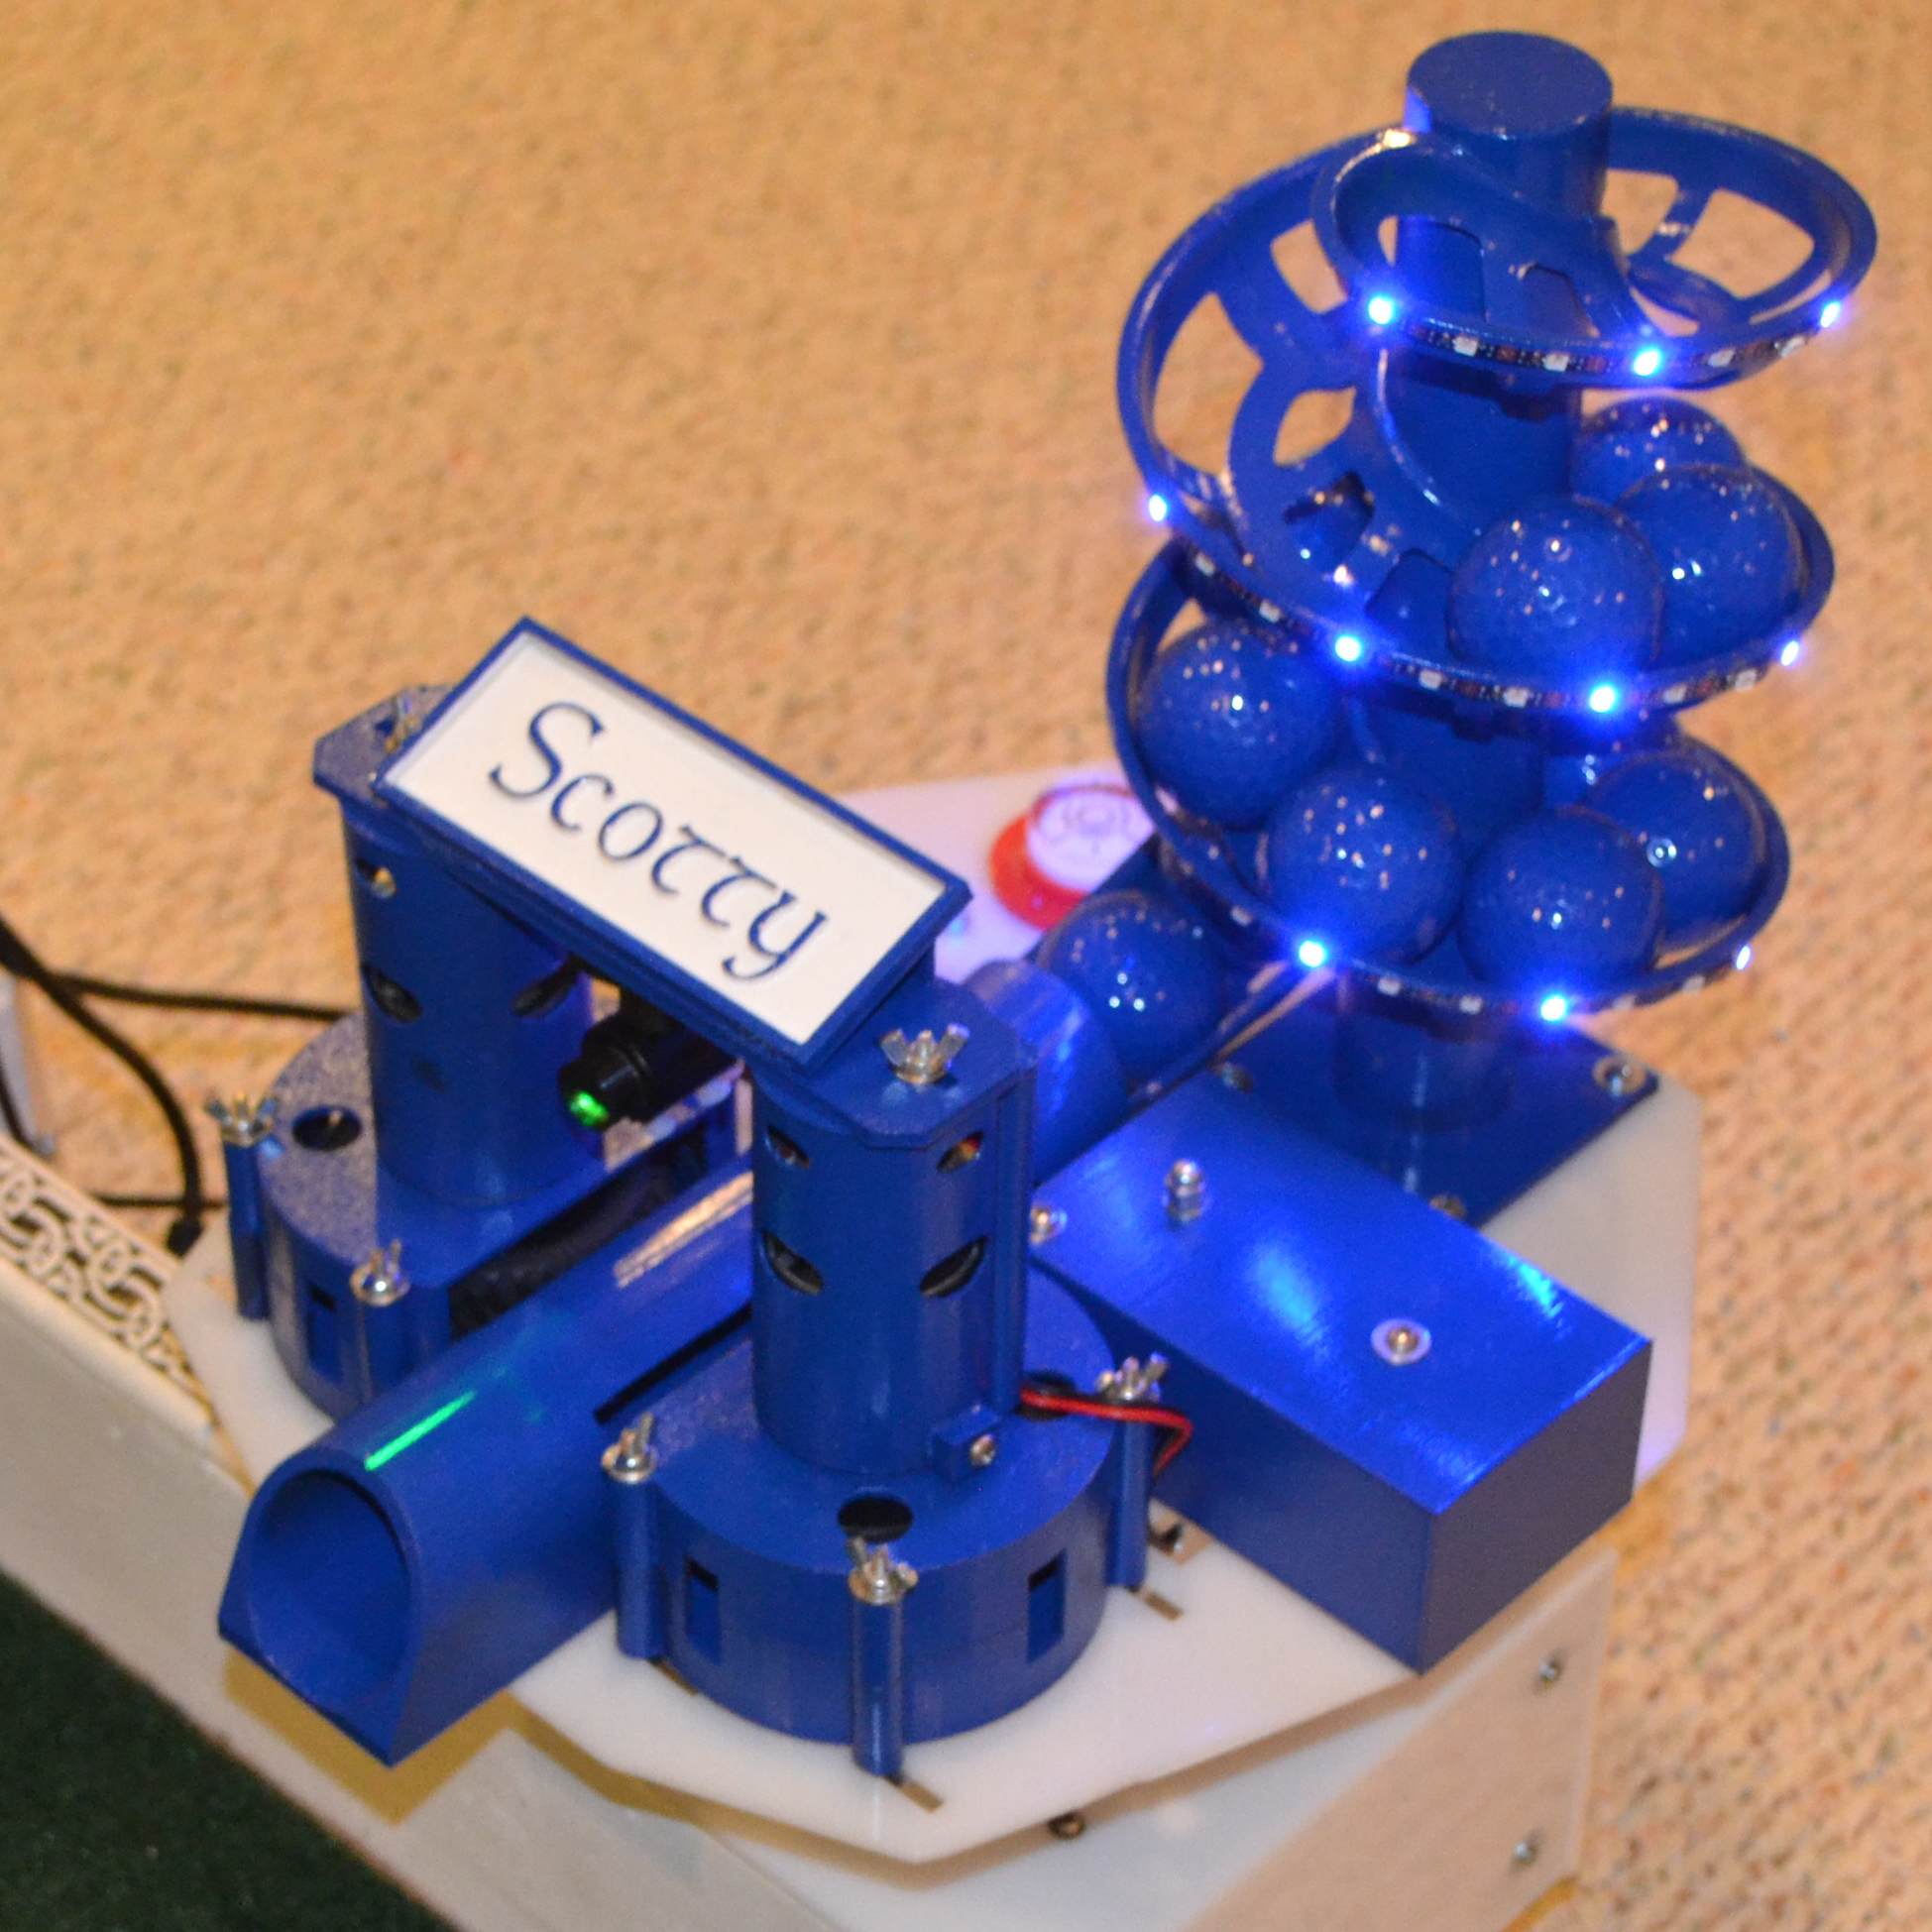
Scotty the AI opponent uses this robotic turret to make their moves in a game of Connect Fore!
The way it works is this: players take turns putting colored balls into one of seven different holes at the far end of the table. Each hole feeds to a clear tube — visible in the middle of the table — which represent each of the columns in a game of Connect Four.
Each player attempts to stack balls in such a way that they create an unbroken line of four in their color, either horizontally, vertically, or diagonally. In a one-player game, a human player faces off against “Scotty”, the computer program that chooses its moves with intelligence and fires balls from a robotic turret.
[Bithead] started this project as a learning experience, and being such a complex project, the write-up is extensive. We really recommend reading through the whole thing if you are at all interested in what goes into making such a project work.
What’s particularly interesting is all of the ways in which things nearly worked, or needed nudging or fine adjustment. One might think that reliably getting a ball to enter a hole and roll down a PVC tube wouldn’t be a particularly finicky task, but it turns out that all kinds of things can go wrong.
Even finding the right play surface was a challenge. [Bithead]’s first purchase from Amazon was a total waste: it looked bad, smelled bad, and balls didn’t roll well on it. There are high-quality artificial turfs out there, but the good stuff gets shockingly expensive, and such a small project pretty much pigeonholes one as a nuisance customer when it comes to vendors. The challenges [Bithead] overcame serve as a reminder to keep the 80/20 rule (or Pareto principle) in mind when estimating what will get a project to the finish line.
Right under the page break below is a brief video tour of the completed table, and after that, you can watch a game in action as [Bithead] faces off against Scotty the AI. Curious about the inner workings? The last video has some build details that fill in a few blanks from the write-up.
 For all their portability, multiple laptops can be a bit clunky to manage on a desk, so [Marco]’s solution definitely saves space while keeping things accessible. The laptop in the front can be open for use and easy access, while the two in the back are held vertically and can be attached to external monitors or other peripherals.