[D. Scott Williamson] paid $5 for a Roland JV-30 synthesizer at a garage sale. Score! There was only one catch: it didn’t work and didn’t include the power supply. Luckily, restoring it was made easier by breaking out a thermal camera.
As mentioned, the keyboard was missing a 9 VDC power supply (rated 800 mA) with a center-negative barrel connector. Slightly oddball, but nothing an enterprising hacker can’t deal with. After supplying power with a bench supply, not only did the keyboard not come to life, but the power supply clamped the current draw at 1.5 A! Something was definitely not right.
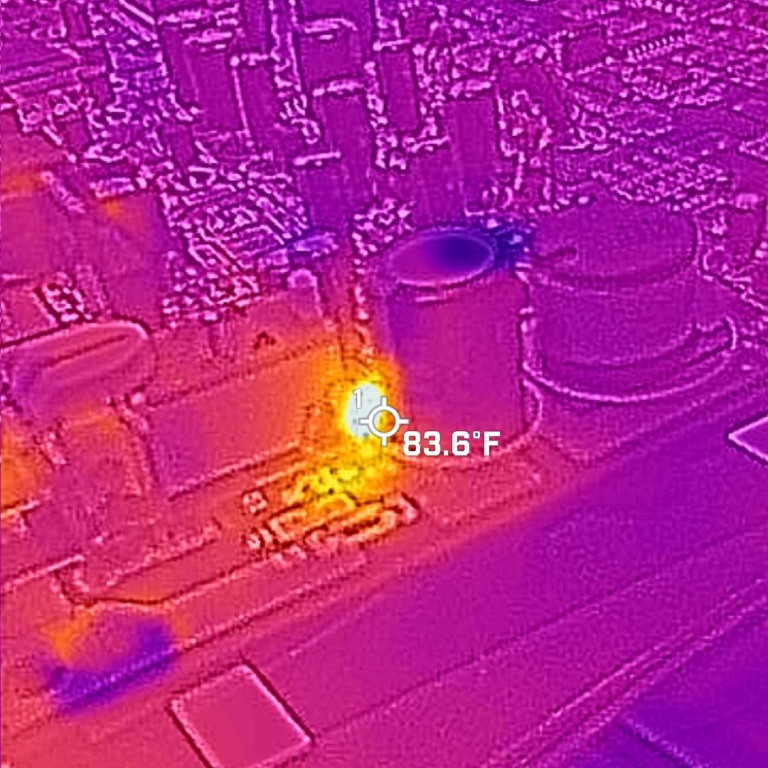
Inside, there was no visible (or olfactory) sign of damage, but looking closer revealed that a little SMT capacitor by the power connector was cracked in two. Fixing that didn’t bring the keyboard to life, so it was time to break out the thermal imager. Something was soaking up all that current, and it’s a fair bet that something is getting hot in the process.
The culprit? The reverse polarity protection diode was shorted, probably as a result of damage by an inappropriate power supply or a surge of some kind. Replacing it resulted in a working keyboard! Not bad at all for $5, a diode, an SMT cap, and a little workbench time. The finishing touch was replacing a missing slider knob, which took some work in OpenSCAD and a 3D printer. Overall, not bad!
Thermal imaging used to be the stuff of staggering price tags, but it’s downright accessible these days, and makes it easy to spot things that are hot when they shouldn’t be. And if a thermal camera’s lens isn’t what you think it should be? It’s even possible for a sufficiently motivated and knowledgeable hacker to modify those.