Color E-Ink Display Photo Frame Pranks [Mom]

As a general rule, it’s not nice to prank your mother. Moms have a way of exacting subtle revenge, generally in the form of guilt. That’s not to say it might not be worth the effort, especially when the prank is actually wrapped in a nice gesture, like this ever-changing e-paper family photo frame.

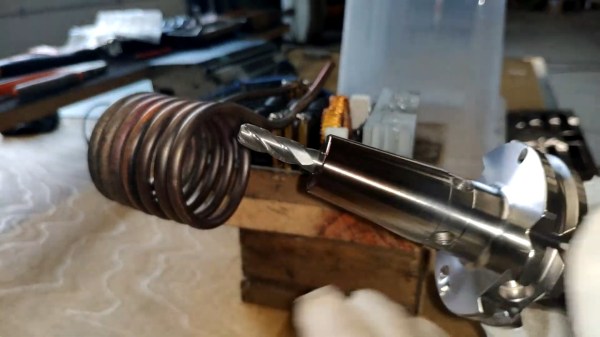
The idea the [CNLohr] had was made possible by a new generation of multicolor e-paper displays by Waveshare. The display [Charles] chose was a generous 5.65″ unit with a total of seven colors. A little hacking revealed an eighth color was possible, adding a little more depth to the images. The pictures need a little pre-processing first, of course — dithering to accommodate the limited palette — but look surprisingly good on the display. They have a sort of stylized look, as if they were printed on a textured paper with muted inks.

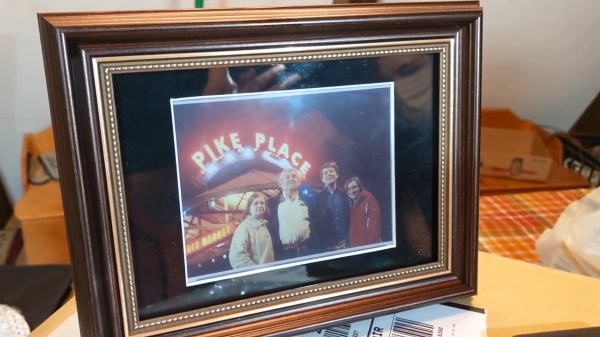
The prank idea was simple — present [Mrs. Lohr] with a cherished family photo to display, only to find out that it had changed to another photo overnight. The gaslighting attempt required a bit more hacking, including some neat tricks to keep the power consumption very low. It was also a bit of a squeeze to get it into a frame that was slim enough not to arouse suspicion. The video below details some of the challenges involved in this build.

In the end, [Mom] wasn’t tricked, but she still seemed pleased with the final product. These displays seem like they could be a lot of fun — perhaps a version of the very-slow-motion player but for color movies would be doable.

Continue reading “Color E-Ink Display Photo Frame Pranks [Mom]”

A Look Behind The “Big Boards” At Mission Control In The Golden Age Of NASA

Certified space-nerd and all-around retro-tech guru [Fran Blanche] has just outdone herself with a comprehensive look at how NASA ran the Mission Control “Big Boards” that provided flight data for controllers for Apollo and for the next 20 years of manned spaceflight.

We’ve got to admit, [Fran] surprised us with this one. We had always assumed that the graphs and plots displayed in front of the rows of mint-green consoles and their skinny-tie wearing engineers were video projections using eidophor projectors. And to be sure, an eidophor, the tech of which [Jenny] profiled a while back, was used on one of the screens to feed video into Mission Control, either live from the Moon or from coverage of the launch and recovery operations. But even a cursory glance at the other screens in front of “The Pit” shows projections of a crispness and clarity that was far beyond what 1960s video could achieve.

Instead, plots and diagrams were projected into the rear of the massive screens using a completely electromechanical system. Glass and metal stencils were used to project the icons, maps, and grids, building up images layer by layer. Colors for each layer were obtained by the use of dichroic filters, and icons were physically moved to achieve animations. Graphs and plots were created Etch-a-Sketch style, with a servo-controlled stylus cutting through slides made opaque with a thin layer of metal. The whole thing is wonderfully complex, completely hacky, and a great example of engineering around the limits of technology.

Hats off to [Fran] for digging into this forgotten bit of Space Race tech. Seeing something like this makes the Mission Control centers of today look downright boring by comparison.

Continue reading “A Look Behind The “Big Boards” At Mission Control In The Golden Age Of NASA”

Massive Battle Bot Needs Equally Chunky Custom-Molded Wheels

We’ve all run into situations where the right part for the job isn’t something that you can just buy off the shelf. In a lot of cases, 3D-printing is the cure for that problem, but sometimes you need to go big with tough parts for a tough job. These custom molded urethane battlebot wheels are a great example of that. (Video, embedded below.)

The robotic warrior in question is “Copperhead”, a heavyweight death-dealer that has competed on the “BattleBots” show on TV. It’s an incredibly stout machine with a ridiculous 50 pound (23 kg) drum of spinning tool-steel on the front to disassemble competitors. Add to that the sheer mass of the bot’s armor plating and running gear, throw in the need to withstand the punishment meted out by equally diabolical weapons, and standard wheels are not going to fly.

As [Robert Cowan] details in the video below, nothing but the sturdiest wheels will do, so the bot builders mold custom wheels with integrated hubs. The four-piece mold was machined out of aluminum to hold the plastic hubs, which were also machined but could easily have been 3D-printed. Polyurethane resin is poured in and adheres to the plastic hub better than we’d have thought it would: enough so to avoid coming apart despite some pretty severe blows. The whole casting process is a good watch, as is the overview of Copperhead’s design. And watching it tear apart “War Hawk” was a treat too.

You may not be building battle bots, but a scaled-down version of this process could be a handy trick to have stored away for someday. Continue reading “Massive Battle Bot Needs Equally Chunky Custom-Molded Wheels”

Take This 3D-Print Post-Processing Method With A Grain Of Salt

There’s a lot of folklore around post-processing of prints from FDM printers. Proponents swear by their methods, which are generally intended to either strengthen the part or to improve its appearance, or both. But do they actually work?

Knowing that a collection of anecdotes is no substitute for actual data, [Stefan] from CNC Kitchen has again performed some valuable experiments, this time testing the strength of parts that have been annealed in salt. This was a follow-up to his recent experiments with baking prints after entombing them in plaster, which yielded mixed results in terms of strength gains. Viewers commented that common salt makes a good medium for annealing prints, so he set about finding the right kind of salt. It turns out that the finer the grain, the better — powdery salt packs tighter and leaves little space for the softened plastic to flow — but that powdery salt is not easier to find. He ended up making his own by pulverizing table salt in a blender. He also had to play around with temperatures and times until coming up with a good process.

The results are impressive. PETG, ABS, and two varieties of PLA prints tested with force applied perpendicular to the print layers all showed marked increase in strength after breaking, to the point of nearly matching the strength of parts printed with the layers parallel to the stress. As with the plaster, parts were printed at 100% infill; a Benchy printed at 20% was notably unseaworthy after annealing. Surface finish on the annealed parts is an interesting combination of pitting with white residue — not unattractive but still a bit weird.

Salt annealing might be a bit cumbersome, but it’s a neat method to add to all the other post-processing tricks that people have come up with for their 3D prints. Continue reading “Take This 3D-Print Post-Processing Method With A Grain Of Salt”

World’s Smallest Benchy Shows Off What 3D-Printing Can Do For “Microswimmers”

We’ve said it before, but we cast a wary eye at any superlative claims that come our way. “World’s fastest” or “world’s first” claims always seem to be quickly debunked, but when the claim of “World’s Smallest Benchy” is backed up by a tugboat that two dozen E. coli would have a hard time finding space on, we’re pretty comfortable with it.

Of course the diminutive benchmark was not printed just for the sake of it, but rather as part of a demonstration of what’s possible with “microswimmers”, synthetic particles which are designed to move about freely in microscopic regimes. As described in a paper by [Rachel P. Doherty] et al from the Soft Matter Physics lab at Leiden University, microswimmers with sizes on the order of 10 to 20 μm can be constructed repeatably, and can include a small area of platinum catalyst. The catalyst is the engine of the microswimmer; hydrogen peroxide in the environment decomposes on the catalyst surface and provides a propulsive force.

Artificial microswimmers have been around for a while, but most are made with chemical or evaporative methods which result in simple shapes like rods and spheres. The current work describes much more complex shapes — the Benchy was a bit of a flex, since the more useful microswimmers were simple helices, which essentially screw themselves into the surrounding fluid. The printing method was based on two-photon polymerization (2PP), a non-linear optical process that polymerizes a resin when two photons are simultaneously absorbed.

The idea that a powered machine so small could be designed and manufactured is pretty cool. We’d love to see how control mechanisms could be added to the prints — microfluidics, perhaps?

Simple Induction Heater Helps With Homebrew Shrink-Fitting

Machinists have a lot of neat shop tricks, but one especially interesting one is shrink-fitting tools. Shrink-fitting achieves an interference fit between tool and holder by creating a temperature difference between the two before assembly. Once everything returns to temperature, the two parts may as well be welded together.

The easiest way to shrink-fit machine tooling is with induction heating, and commercial rigs exist for doing the job. But [Roetz 4.0] decided to build his own shrink-fitting heater, and the results are pretty impressive. The induction heater itself is very simple — a 48 volt, 20 amp power supply, an off-the-shelf zero-voltage switching (ZVS) driver, and a heavy copper coil. When the coil is powered up, any metal within is quickly and evenly heated by virtue of the strong magnetic flux in the coil.

To use the shrinker, [Roetz 4.0] starts with a scrupulously clean tool holder, bored slightly undersized for the desired tool. Inside the coil, the steel tool holder quickly heats to a lovely deep brown color, meaning it has gotten up to the requisite 250-300°C. The tool is quickly dropped into the now-expanded bore, which quickly shrinks back around it. The advantage of this method over a collet or a chuck is clear in the video below: practically zero runout, and the tool is easily released after another run through the heater.

You say you’ve got no need for shrink-fitting tools? How about stuck bolts? Induction heaters work great there too.

Continue reading “Simple Induction Heater Helps With Homebrew Shrink-Fitting”

Plastic Strips Protect Ball Screws On This Homebrew CNC Router

It’s a fact of life for CNC router owners — swarf. Whether it’s the fine dust from a sheet of MDF or nice fat chips from a piece of aluminum, the debris your tool creates gets everywhere. You can try to control it at its source, but swarf always finds a way to escape and cause problems.

Unwilling to deal with the accumulation of chips in the expensive ball screws of his homemade CNC router, [Nikodem Bartnik] took matters into his own hands and created these DIY telescopic ball screw covers. Yes, commercial ball screw covers are available, but they are targeted at professional machines, and so are not only too large for a homebrew machine like his but also priced for pro budgets. So [Nikodem] recreated their basic design: strips of thin material wound into a tight spring that forms a tube that can extend and retract. The first prototypes were from paper, which worked but proved to have too much friction. Version 2 was made from sheets of polyester film, slippery enough to get the job done and as a bonus, transparent. They look pretty sharp, and as you can see in the video below, seem to perform well.

It’s nice to see a build progress to the point where details like this can be addressed. We’ve been following [Nikodem]’s CNC build for years now, and it really has come a long way.

Continue reading “Plastic Strips Protect Ball Screws On This Homebrew CNC Router”