Reading (or writing!) Hackaday, we find that people are often solving problems for us that we didn’t even know that we had. Take [Jack Qiao]’s SVGnest for instance. If you’ve ever used a laser cutter, for instance, you’ve probably thought for a second or two about how to best pack the objects into a sheet, given it your best shot, and then moved on. But if you had a lot of parts, and their shapes were irregular, and you wanted to minimize materials cost, you’d think up something better.
SVGnest, which runs in a browser, takes a bunch of SVG shapes and a bounding box as an input, and then tries to pack them all as well as possible. Actually optimizing the placement is a computationally expensive proposition, and that’s considering the placement order to be fixed and allowing only 90 degree rotations of each piece.
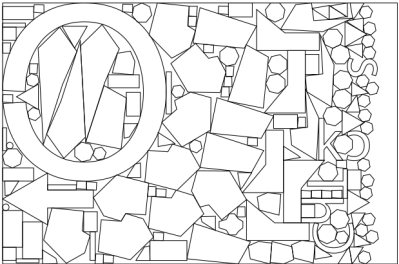 Once you consider all the possible orders in which you place the pieces, it becomes ridiculously computationally expensive, so SVGnest cheats and uses a genetic algorithm, which essentially swaps a few pieces and tests for an improvement many, many times over. Doing this randomly would be silly, so the routine packs the biggest pieces first, and then back-fills the small ones wherever they fit, possibly moving the big ones around to accommodate.
That’s a lot of computational work, but the end result is amazing. SVGnest packs shapes better than we could ever hope to, and as well as some commercial nesting software. Kudos. And now that the software is written, as soon as you stumble upon this problem yourself, you have a means to get to the solution. Thanks [Jack]!