Hunting The Wild Vibrotruck

A few weeks ago, my wife was out walking the dog, and she sent me four or five photos of small orange boxes planted all around our neighborhood. (OK, I’ll bite!) They had little cards on them explaining that they were geophones, and a QR code on them that lead to a website with all the details. Munich was getting a large-scale seismic survey to map out our underground water, with the aim of using it for geothermal heat and power in the near future.

How do you map up to five kilometers under the earth? You pound the ground, sending shockwaves downward, and then listen for their reflections. At the boundaries between different layers, the change in the speed of sound in the different media cause reflections. Calculating the time it took for a given reflection to reach you lets you figure out how deep the layer boundary is.

The seismic survey procedure goes like this: geophones are set out at roughly 20 m intervals in lines spaced around 300 m apart that run roughly north-south, while “vibrotrucks” drive a roughly east-west course, creating mini-earthquakes every 20 meters along the way. Covering a surface of 1,000 km^2 with over 120,000 sample locations and exciting them 86,000 times is going to take a while. Lucky for me, they started in my part of town.

Continue reading “Hunting The Wild Vibrotruck” →

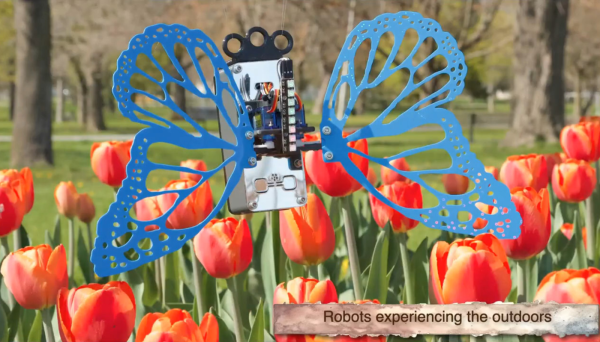
Hackaday Europe 2026: Outdoors With Robots

Erin Kennedy has been building robots for over a decade now, with a focus on smaller bots that interact with, or maybe even clean up, the outdoor environment. Still other bots are made to interact with people, and when the people are outside in the park, that’s where your robot needs to go.

Whatever the reason, Erin’s talk at Hackaday Europe 2026 is an invitation to take your projects out into the outdoors. But the great wide world outside of your lab is not necessarily the most friendly place for a little bot, and the other half of this talk is about practical design tips and lessons learned to help it survive. Continue reading “Hackaday Europe 2026: Outdoors With Robots” →

If At First You Don’t Succeed…

… at least document what failed and give the failure analysis a good effort. And then later on, you can “try, try again” or let someone else carry on with the work; they’ll have a good basis to start from.

We were talking about a project to use 10 W blue lasers to post-smooth 3D prints when I came up with this not-very-catchy catchphrase. The project itself is very much “in progress”, which is a nice way of saying that it hasn’t yet fully met its goals. But nonetheless I was entirely happy to watch not one, but two, videos where [I changed a thing] discussed the intricacies of laser-smoothing 3D prints, precisely because it sounds easy but absolutely isn’t, and because the problems were laid out so well.

I definitely take for granted how easy the slice-it-into-layers nature of FDM 3D printers makes path planning. After all, you can print interlocking knots, hinges, and even entire sections of chain mail as long as you only have to go one layer at a time. When you print this way, you never have to worry about the print head crashing into something that you’ve printed before, or being unable to reach into a small valley. To smooth two or more layers of a 3D print into each other, you are suddenly out of the comfy flatland. You have to worry about collisions, obstructions, and all the rest of actual 3D.

But those issues and more were carefully documented as [I changed a thing] went through his attempts at writing the software to drive the laser-augmented machine, and honestly that attention to the problems that were confounding him was worth a dozen “success” videos. In that sense, it worked on me a little like nerd sniping.

Those were my takeaways from the video series, then. One, it’s hard to do laser smoothing uniformly. But two, documenting the difficulties, considerations, and failures for your future self, or for others, is not just good practice, but can also encourage other people to help you with your project, or to take it on themselves. The more thought you put into how and why your project failed, the more bait you’re laying out for the next nerd. And that’s at least one part of what makes the open-source ethos work.

Same As It Ever Was

Whether you like it or not, the use of LLMs to write code is kind of a big deal at the moment. We’ve been asking ourselves what, if anything, this means for us here at Hackaday. Should we try to figure out what percentage of a project was done by an actual human and how much was done by a machine? Does it really matter? What is our AI policy anyway?

Clearly, Hackaday is pro-human. We’re in it for the hackers as much as for the hacks. Our community is, like Soylent Green, made of people. It’s your inspirations and innovations that keep us reading and writing every day. And we produce 100% of our content the old-fashioned way, with projects selected through the taste and judgement of our writers, and their own words telling the story.

What about the hacks? We’ve seen a lot of projects recently that were coded with the help of an LLM. Does that diminish the work? In the end, what rings truest to us is what has always been Hackaday’s editorial guiding star: Is there something special in the hack that makes it worth talking about? Then we write about it. Was it written using vim or emacs? Did the author consult friends or a chatbot while working on the project? That’s not really relevant.

But in the past few years, the BS-generation machines have found our hobby, and we’re finding a lot more projects that don’t have any spark to them. We’re seeing circuits that make no sense, and claims that defy physics. Of course, we always have. The LLM-nonsense project is today’s version of the perpetual motion machines of old. Just like we never trust a hardware project that is all renders, seeing only AI-generated images is a huge red flag. It’s our job to separate out the wheat from the chaff for you all, but it’s something that you must be doing everyday as well.

We’ve seen amazing hacks over Hackaday’s 22-year history. Hackaday is older than YouTube and older than Stack Overflow. We’ve seen technology come and go. We’ve seen C-beams glitter in the dark near the Tannhäuser gate. (OK, maybe not.) And in the end, our AI policy is our same-old policy: we write up hacks that inspire us in the hope that they inspire you.

So if you’re using Claude to help you with the UI bits, or if you’re hand-writing it all in assembly, or wiring up the logic in diodes, we just want to see your cool hacks. And we hope that our collective signal will be so loud that we drown out the noise, at least in our own little corner of the hacker universe.

You Gotta Want It

On Hackaday last week, and on the podcast, we were talking about one of the educational toys of yesteryear that launched a thousand careers, at least if the comment section is to be believed: the Radio Shack 200-in-1 electronics kit. The “toy” itself was basically a bunch of components with spring terminals, but the secret sauce was in in the instruction book, and maybe the marketing.

Tom had one of these when he was a kid, and told a great story about wanting it desperately based on the ads he had seen with kids Morse coding to each other. When he got the kit, and found out that “it was just a bunch of wires” he was fully pissed off. But he worked through the examples, learned some basic electronics, and the rest is history.

What I really love about this story is the siren’s call of a good project. Tom was pulled in, and maybe even fooled, by the advertising, but it probably changed his life. It’s funny how many of our folks can remember the first project that got them hooked as well. With me it was some simple audio effects pedals and then maybe later some simple BEAM robots, and for younger hackers maybe it was a 3D printer or Arduino project.

Digital or analog, the common ground here is that we all thought that some project was cool enough to warrant the sweat of learning enough to do it. Good instructions are helpful of course, and having the parts on hand never hurts. But it’s the promise of making something that you really want that I think underlies all good first projects. (And heck, every subsequent project as well.)

So while Tom, and a bunch of our readers, were looking back with nostalgia at the 200-in-1, I’m thinking about how many more than 200 projects I’ve seen made by our community, and even featured here on Hackaday, that are out there to provide the motivation to get someone started. Keep on hacking!

Announcing The 2026 Hackaday Retrocomputing Challenge

What is it about retrocomputing? For some people, it’s nostalgia. For others, it’s the appeal of simplicity. For still others, it’s the chance to save old machines from the graveyard. Whatever your motivation, there’s no denying that we’ve seen a metric ton of retrocomputer projects here at Hackaday. And we’d like to see more!

We’re happy to announce the 2026 Hackaday Retrocomputing Challenge!

Now’s the chance to put your retrocomputer project up for all to see. Open up a Hackaday.io project that features your retrocomputer project, and we’ll pick our three favorites for a $150 gift certificate courtesy of this contest’s sponsor, DigiKey. You have until Tuesday, October 27th. So get hacking!

Continue reading “Announcing The 2026 Hackaday Retrocomputing Challenge” →

Fully Characterized Systems

A friend from my old hackerspace was in grad school for electrical engineering. He had a professor who would ask, when something went wrong with a student project, “Have you fully characterized the system?” It’s a good, if lofty, goal, but it also became an inside joke around the hackerspace because YOLO was our MO about 95% of the time. Head crashes on the 3D printer – “not fully characterized”. Forgot to take out the trash last weekend? Was the system fully characterized?

It’s maybe also the difference between theory and practice: In theory, there’s no difference between theory and practice, and all systems can be fully characterized. But in practice, it’s hard to fully characterize a system that you don’t yet fully understand.

Case in point: we have nine small saplings growing in our front yard, and I have to water them. It’s boring moving the hose from tree to tree, so I thought I’d take a length of hose, stopper it at one end, and drill enough holes in it so that it could irrigate all of the trees at once. I kinda characterized the system: I figured out how much water flows per minute through our hose, and divided that up into a reasonable outflow in my mind, and drilled holes that ended up being way too large.

Why? Because a length of hose has a resistance to flow, and the water came pouring out of the first few holes, while the last few were dry. It wasn’t a constant pressure system like I thought it would be. I hadn’t even thought that the drag in the hose would matter, so there was no way I would have tried to measure it. But how would I characterize this resistance anyway? You could make a hose with too-large holes and measure the falloff. (Oops, that’s exactly what I did.)

In retrospect, professional drip irrigation systems always have holes that are tiny relative to the pipe diameter, which avoids this pressure-drop phenomenon, which means that they don’t have to worry about characterizing the hose resistance. So that’s what I ended up doing. I cut the hole size in half, and later widened up some of the downstream holes until it looked about right. Not even close to fully characterized, but it works.

So now, in addition to the engineer’s “have you fully characterized the system?”, I have the hacker’s “can you avoid characterizing parts of the system?” in my mind. And a holey chunk of hose in the trashcan.

Supercon News

Just briefly, in case you missed it: Tickets are on sale now for Supercon Ten, and we’ve extended the call for participation by another two weeks. If you’re a Hackaday fan, you owe it to yourself to join us at our annual gathering.