C#, The Language For All Platforms – Now Including Windows 3.11 And DOS

The Microsoft .NET framework has been with us in one form or another since the millennium, and though it has remained largely the preserve of the Microsoft universe, it has found its way since then through a variety of implementations to other platforms including MacOS and GNU/Linux. In Microsoft terms though its history goes back only as far as Windows 98, earlier MS operating systems remain off-limits.

Just a glimmer of .NET in DOS and Windows 3.11 comes courtesy of [Michal Strehovský], who has successfully compiled .net C# code for both Windows 3.11 and DOS. An in-depth explanation comes courtesy of [Scott Hanselman], and it involves some tricks spanning the decades since the early 1990s. The .NET Core compiler’s object files can be fed into the linker that shipped with an ancient version of Microsoft’s C++ compiler, which when used with Microsoft’s Win32s compatibility layer that brought some of Windos NT’s APIs to the 16-bit OS, allows C# from 2020 to run as though it were 1992 again. Meanwhile the DOS version uses .NET Core’s ability to produce self-contained executables along with some very significant tricks to pare down the size of the finished program from many megabytes to an eventual DOS-suitable 27k. Remember the apocryphal Bill Gates quote, that “640k should be enough for anyone“, that refers to the maximum memory available to DOS without extra memory-extending tricks.

Neither piece of software is especially useful, and we can’t see a rush of C# coders to these new platforms. But we applaud him for his ingenuity, and getting old hardware to do new tricks is right up our alley. It’s certainly dredged up a few memories from back in the day for us. Meanwhile we’ve featured .NET in a few projects over the years, most recently on an FPGA.

Rental Home Thermostat Gets Smart Upgrade Without Modifying The Dumb Controller

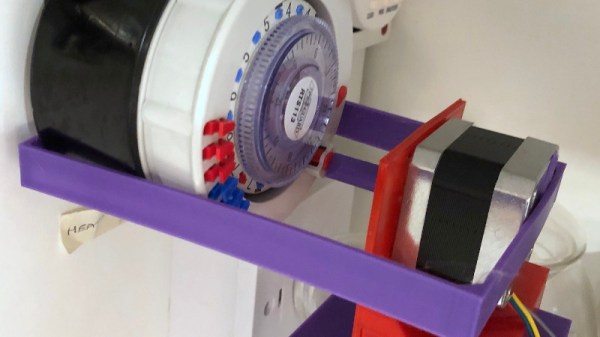
A problem facing those who live in rental properties comes with two prongs: that such properties rarely have up-to-date facilities such as heating controllers, and that landlords tend to take a dim view of tenants installing their own alternatives. [Andy] wanted to upgrade the heating controller in his home and was in this situation, so he came up with a smart controller add-on for the existing mechanical timer that does not irreversibly modify anything and is easily removable when he moves on.

This sounds like an impossible task, but it’s one he’s done very well by mounting a stepper motor on a 3D-printed frame over the timer switch. It’s the type with a motorised ring onto which plastic fingers can be placed to flip a switch on or off; he’s simply removed the plastic fingers and designed a shaft extension for the motor that simulates their passing the switch. He can now turn his heating on and off at will from an ESP8266, in this case on an Adafruit Feather Huzzah.

Behind it all lies Adafruit IO with a custom dashboard — Hackaday’s [Sean Boyce] took this service for a trial run if you’d like his take on it’s features. For this project, Adafruit IO delivered exactly what [Andy] was after but still left a few teething troubles. The stepper needed to be told not to try to hold its position, and moving a stepper very slowly generated wait periods long enough to trigger the ESP’s watchdog timers. Adding in IFTTT gave him the ability to schedule, as well as Alexa control. All in all he’s replicated some commercial offerings with a lot less cost and all without annoying his landlord. You can see it in action in the video below the break.

Continue reading “Rental Home Thermostat Gets Smart Upgrade Without Modifying The Dumb Controller” →

See In The Dark, The Simple Way

Night vision googles used to be the exclusive preserve of the military, and then of the well-heeled. Image intensifier tubes were very expensive, and needed high-voltage power supplies to keep them going. Now that we have solid-state infra-red cameras the task of seeing in the dark had become much simpler, and [Alex Zidros] is here to show us just how easy that can be. His night vision goggles take a selection of off-the-shelf parts and a little bit of 3D printing to produce a complete set-up for a fraction of the cost of those night-vision goggles of old.

At its heart is a little NTSC/PAL LCD display in a 3D printed bracket. These used to be a small display of choice, but we see them rarely now because standalone displays and the microcontrollers to drive them have become so much more useful. Driving the display is a video camera with its IR filter removed, and providing illumination is an IR flashlight. In effect it’s a classic analogue CCTV system in miniature, but the most important thing is that it works.

We might have expected a Raspberry Pi Zero and NoIR camera, but it’s difficult to argue with a functioning night vision system. If you want to look at a project with an image intensifier tube though, we’ve covered one of those in the past.

A Barn Find 6502 Is Restored

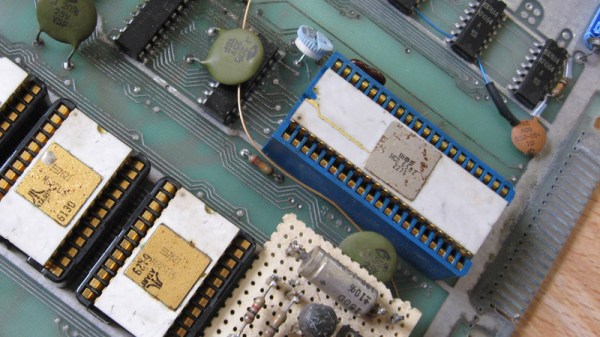
The phrase “Barn find” is normally associated with the world of older cars, where enthusiasts live in the hope that they may one day stumble upon a dusty supercar lurking unloved for decades on a remote farm. It’s not so often found in the context of electronics, but that’s the phrase that [John Culver] uses for a mid-1970s Atari arcade board that had been through a very hard time indeed and was in part coated with cow dung. It’s interesting because it sports a very early example of a MOS 6502 in a ceramic package, whose date code tells us was manufactured in week 22 of 1976.

Finding a microprocessor, even a slightly rare one, is not that great an event in itself. What makes this one interesting is the state it was in when he got it, and the steps he used to retrieve it from the board without it sustaining damage, and then to clean it up and remove accumulated rust on its pins. We are fast approaching a point at which older microprocessors become artifacts rather than mere components, and it’s likely that more than one of us with an interest in such things may one day have to acquire those skills.

We’re rewarded at the end with a picture of the classic chip passing tests with flying colours, and the interesting quirk that this is a chip with the famous rotate right bug that affected early 6502s. If you are interested in the 6502 then you should definitely read our colleague [Bil Herd]’s tribute to its recently-departed designer, [Chuck Peddle].

3D Printing For Wire Paths Yields An Arduboy Minus The PCB

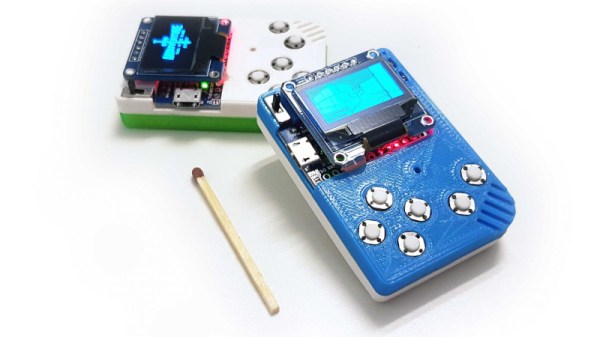
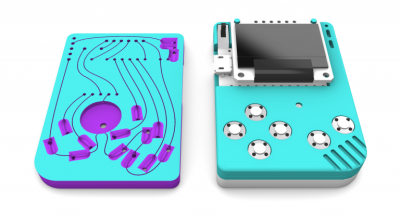
What is part way between a printed circuit board and a rats-nest of point-to-point wiring? We’re not sure, but this is it. [Johan von Konow] has come up with an inspired solution, 3D printing an Arduboy case with channels ready-made for all the wires. The effect with his 3DPCBoy is of a PCB without the PCB, and allows the console to be made very quickly and cheaply.

The Arduboy — which we originally looked at back in 2014 — is a handheld gaming console in a somewhat Gameboy-like form factor. Normally a credit-card sized PCB hosts all the components, including a microcontroller, display, and buttons. Each has a predictable footprint and placement so they can simply be wired together with hookup wire, if you don’t mind a messy result.

Here the print itself has all the holes ready-created for the components, and the path of the wires has a resemblance to the sweeping traces of older hand-laid PCBs. The result is very effective way to take common components — and Arduino pro micro board for the uC, an OLED breakout board, and some buttons — and combine them into a robust package. This technique of using 3D prints as a combination of enclosure and substrate for components and wiring has an application far beyond handheld gaming. We look forward to seeing more like it.

[Via the Arduboy community forum, thanks Kevin Bates for the tip.]

A 3.3 V Tube Preamp Without An Inverter

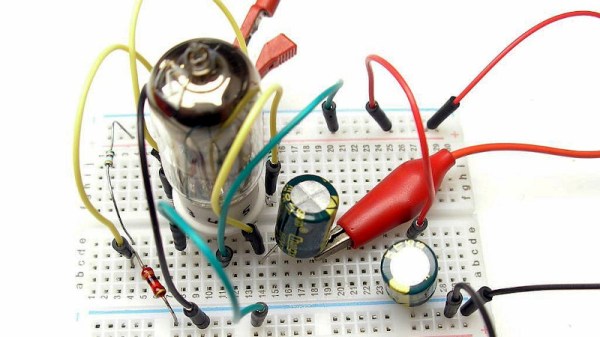
If you’ve ever worked with vacuum tubes, you’ll probably have a healthy appreciation for high voltage power supplies. These components require higher potentials to get those electrons moving, or so we’re told. It’s not the whole truth though, as [Albert van Dalen] demonstrates with his tube preamplifier running from only 3.3 V. If your first thought is that he must have made a flyback converter to step that voltage up to something more useful then you’re in for a surprise, because the single 6J6 pentode really does run from just 3.3 volts. Even its heater, normally supplied with 6.3 V, takes the lower voltage.

The circuit appears at first sight to be a conventional single-ended design, but closer examination reveals a grid bias circuit more reminiscent of a bipolar transistor. This results in a positive grid voltage rather than the more usual negative, and an unusually high 0.3 mA grid current. The cathode current is only  0.15 mA, but the preamplifier delivers a 3.5x gain. There is more detail on his website.

It would be interesting to subject this circuit to a full audio analysis and comparison with a more conventional design. As with so much in the world of audio there’s some smoke and mirrors around what constitutes the so-called “valve sound”, and it’s a question whether the satisfaction comes through the sound itself or the bragging rights of having a unit with a vacuum tube on show.  Still, this is a simple enough design which takes few resources to build, so we look forward to seeing further experimentation. Careful though – down the vacuum audio route can lie folly.

This PIC Is A Squarewave Generator

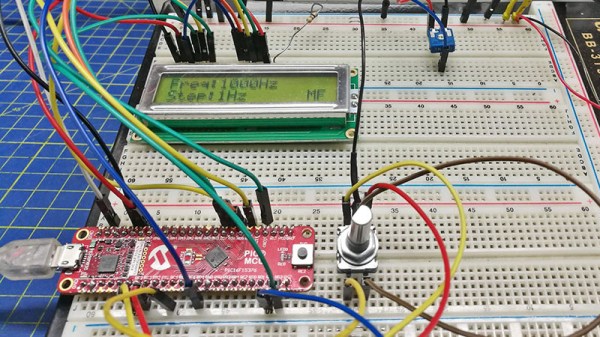
When we use a microcontroller to flip a few GPIOs or talk SPI to a peripheral chip, we are often overlooking that it will usually contain an array of built-in peripherals that were once the preserve of extra hardware. Analogue ports, timers, UARTs, and clock generators, to name just a few. [Giovanni Bernardo] has been experimenting with one of these, the internal frequency synthesiser on many PIC microcontrollers, and he’s  produced a handy square wave generator for which he’s placed code on GitHub and produced a write-up (Italian language, Google translate link).

The board used is a PIC16F375 Curiosity Nano, and code takes input from a rotary encoder to set the frequency, with a button to select different step sizes and an alphanumeric LCD display to show the current settings. Frequencies from 1 Hz to 15 MHz are possible, with a clever switch between two of the PICs internal clocks to be used as the reference frequency. Stability depends upon whatever source the PIC uses for its own clock, and while we suspect that will be enough for most users it’s not inconceivable that the PIC could be clocked from a GPS-disciplined source or similar were there a requirement for it.

There are plenty of ways to generate square waves from a microcontroller. Most projects use waveform generator ICs.